Continuous Air Barrier Systems − Flashing the Installation
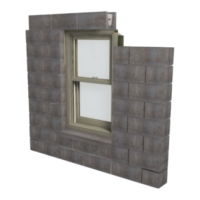
1. Flash the installation in a weather board
fashion. For step by step instructions,
refer to www.marvin.com/Roprep
for
instructions titled “Window Rough
Opening Prep and Flashing Method
A1−Membrane Drainage System”.
Figure 15: Sealing the installation in air barrier applications.
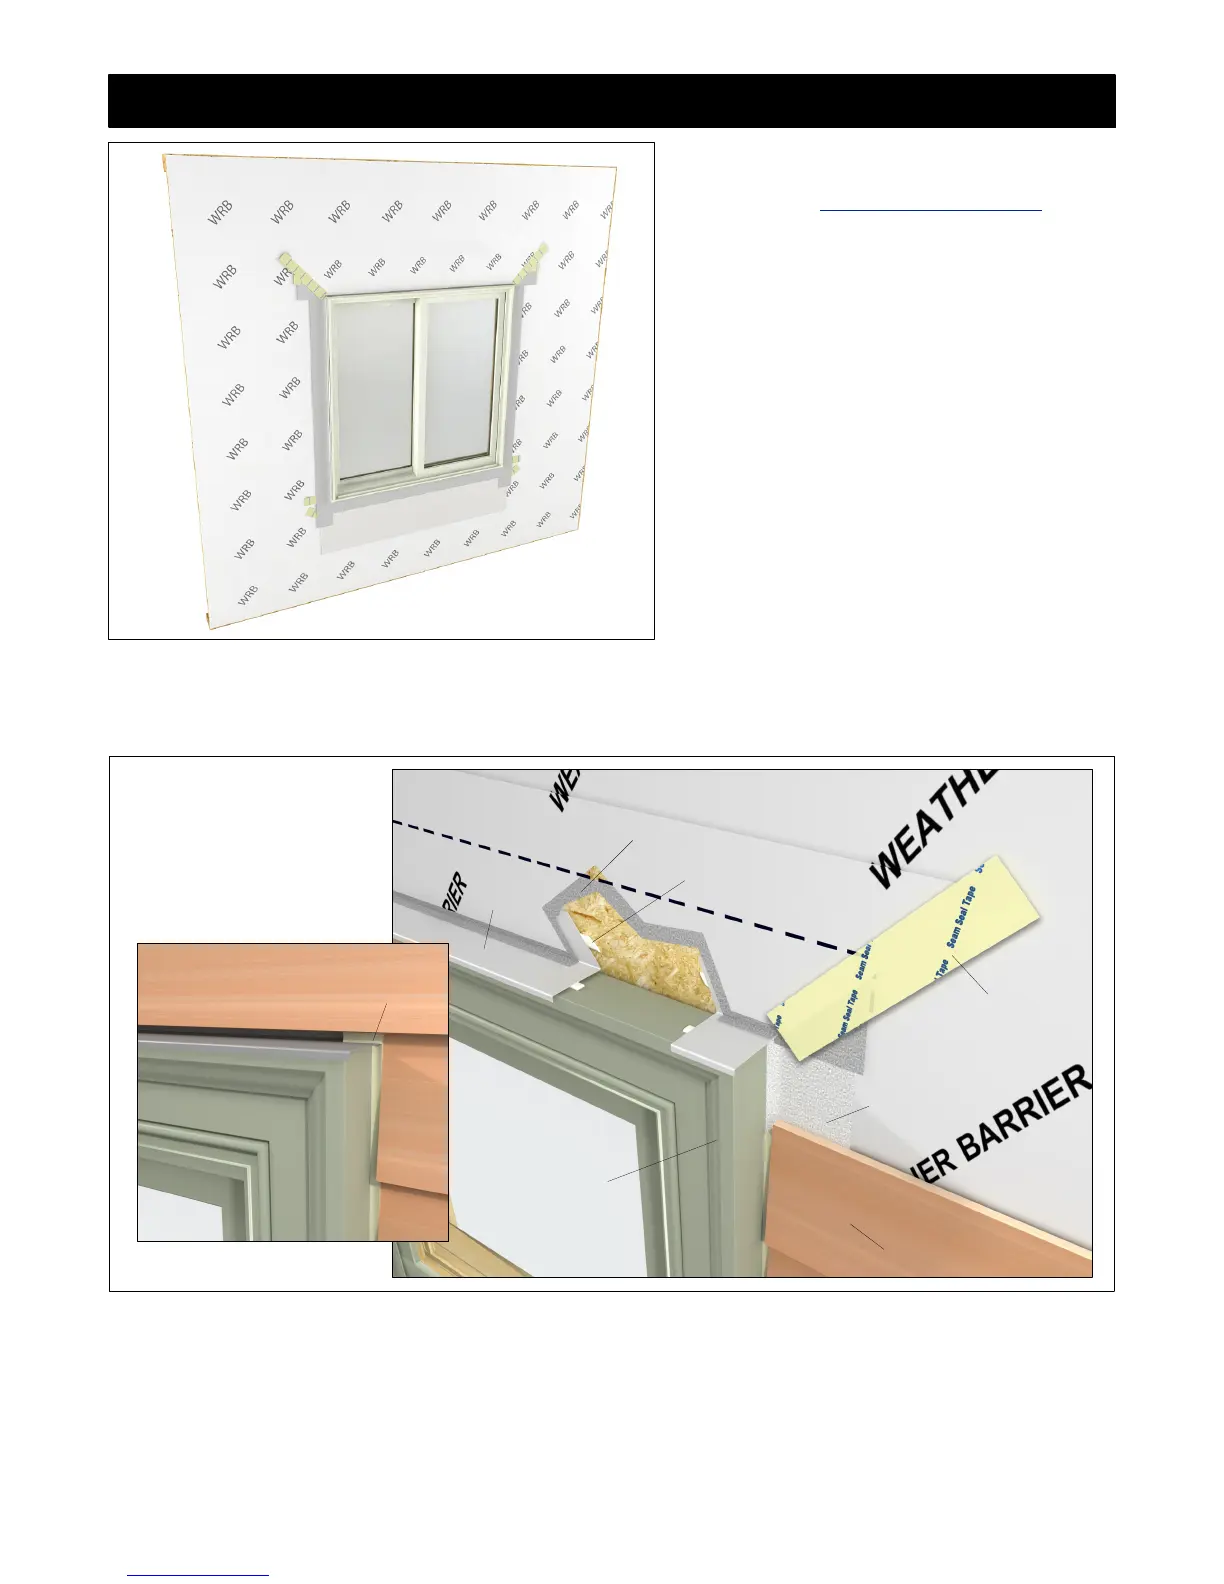
Drip cap
Window
casing/cladding
Siding/
exterior finish
Jamb
flashing
Seam
seal tape
Sealant
Head jamb
flashing
Figure 16: Flashing windows with casing in typical wood frame construction (non recessed masonry).
Sealant
NOTE: Figure 16 shows a window with casing but the flashing detail also applies to any clad window product.
For installation in typical wood frame construction or brick veneer (non−recessed masonry openings), figure 16
shows the proper flashing detail in shingle style fashion. Once the exterior finish such as siding or brick veneer is
installed, a bead of sealant should be applied between the finish and the window/window casing along the sides and
approximately 1−2″
(25−51) in from the ends at the head jamb (see insert). Use a backer rod when necessary.
Window Flashing Detail (non−recessed masonry)
13
Window Installation
StormPlus and Structural Installations
19970019
2012−04−10