Do you have a question about the Marzocchi Drop-Off SL 2006 and is the answer not in the manual?
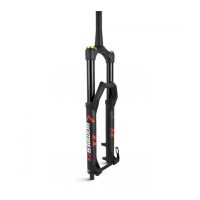
Details fork construction, travel options, and key components like stanchions and crown.
Lists materials used, including magnesium alloy, anodised aluminium, and special seal types.
Specifies steer tube type, brake compatibility, wheel size limits, and fender options.
Provides guidance on fork usage, break-in period, recommended oil changes, and cleaning.
Outlines crucial safety rules for fork maintenance, including tool usage and cleaning agent restrictions.
Warns about dangers of incorrect frame fitting and highlights critical installation steps.
Emphasizes safety during disk brake installation and potential risks of improper mounting.
Details how to correctly assemble the fender using specific screws and torque.
Guides on installing the wheel and performing checks for correct fork-wheel alignment.
Step-by-step guide for removing top caps, releasing air, and draining fork oil.
Instructions for draining fork oil, emphasizing proper disposal.
Instructions for disassembling the steering crown unit and arch-slider assembly.
Details on removing bottom nuts and separating the crown-stanchion unit.
Steps to remove the bottom pad, pumping element, preload tube, and rebound spring from the right leg.
Steps to remove the pumping element from the left leg.
Instructions for carefully removing dust seals, stop rings, and sealing rings without damaging components.
Detailed steps using a special extractor to remove guide bushes from the fork sliders.
Guide on installing guide bushes using specific introducers and ensuring correct seating.
Steps for inserting the spring cup and preparing for seal installation.
Instructions for lubricating and installing sealing rings and stop rings, emphasizing careful handling.
Guide for reassembling the right pumping element, including piston segment, preload tube, and rebound spring.
Steps for assembling the left pumping element, including spring, preload tube, and bottom pad.
Instructions for fitting dust seals and reassembling the crown-stanchion unit with the arch-slider assembly.
Details on how to correctly fill the fork legs with oil and prepare for assembly.
Steps for mounting the top caps, checking O-rings, and tightening to the specified torque.
Provides essential rules and considerations for calibrating the damping system for optimal performance.
Explains how to measure SAG and calculate the desired percentage for different riding styles.
Details on how to adjust air pressure in the fork legs using the specified pump.
Guidance on adjusting air pressure for optimal spring preload and desired SAG.
Instructions for adjusting the rebound damping to control the fork's return speed after compression.
Specifies the correct tightening torque for fender fixing screws.
Specifies the correct tightening torque for fork leg top caps.
Specifies the correct tightening torque for bottom nuts.
Specifies the correct tightening torque for wheel axle Allen screws.
Specifies the correct tightening torque for wheel axle screws.
Details the oil type and quantity for the right fork leg of the 130mm model.
Details the oil type and quantity for the left fork leg of the 130mm model.
Details the oil type and quantity for the right fork leg of the 150mm model.
Details the oil type and quantity for the left fork leg of the 150mm model.
Identifies potential causes like high oil level and suggests checking oil levels.
Suggests increasing rebound damping or replacing oil for forks extending too quickly.
Indicates fluid oil as a cause for too much sag and suggests checking oil levels.
Attributes sticky fork performance to dirty seals and recommends servicing or renewing seals.
Suggests increasing compression damping or checking oil levels if the fork is too soft.
Points to high rebound damping as the cause for the fork packing up during impacts.
Suggests reducing rebound damping for issues where the front wheel tucks under.
Identifies damaged sealing rings as the cause for oil leaks and recommends renewal.
Attributes knocking sounds to high rebound damping and suggests decreasing it.
Suggests changing the oil or renewing sliding bushes for a loss of sensitivity.
| Model Year | 2006 |
|---|---|
| Category | Fork |
| Travel | 130mm |
| Steerer Diameter | 1 1/8 inch |
| Spring Type | Coil |
| Wheel Size | 26 inch |
| Damping System | Open Bath |
| Damper Type | Oil |
| Axle Type | 9mm QR |
| Adjustments | Rebound |
| Brake Mount | Disc |