Master Audio
PRO Series.Version 1.5 Nov10
46
5
1 2
6
7
3 4
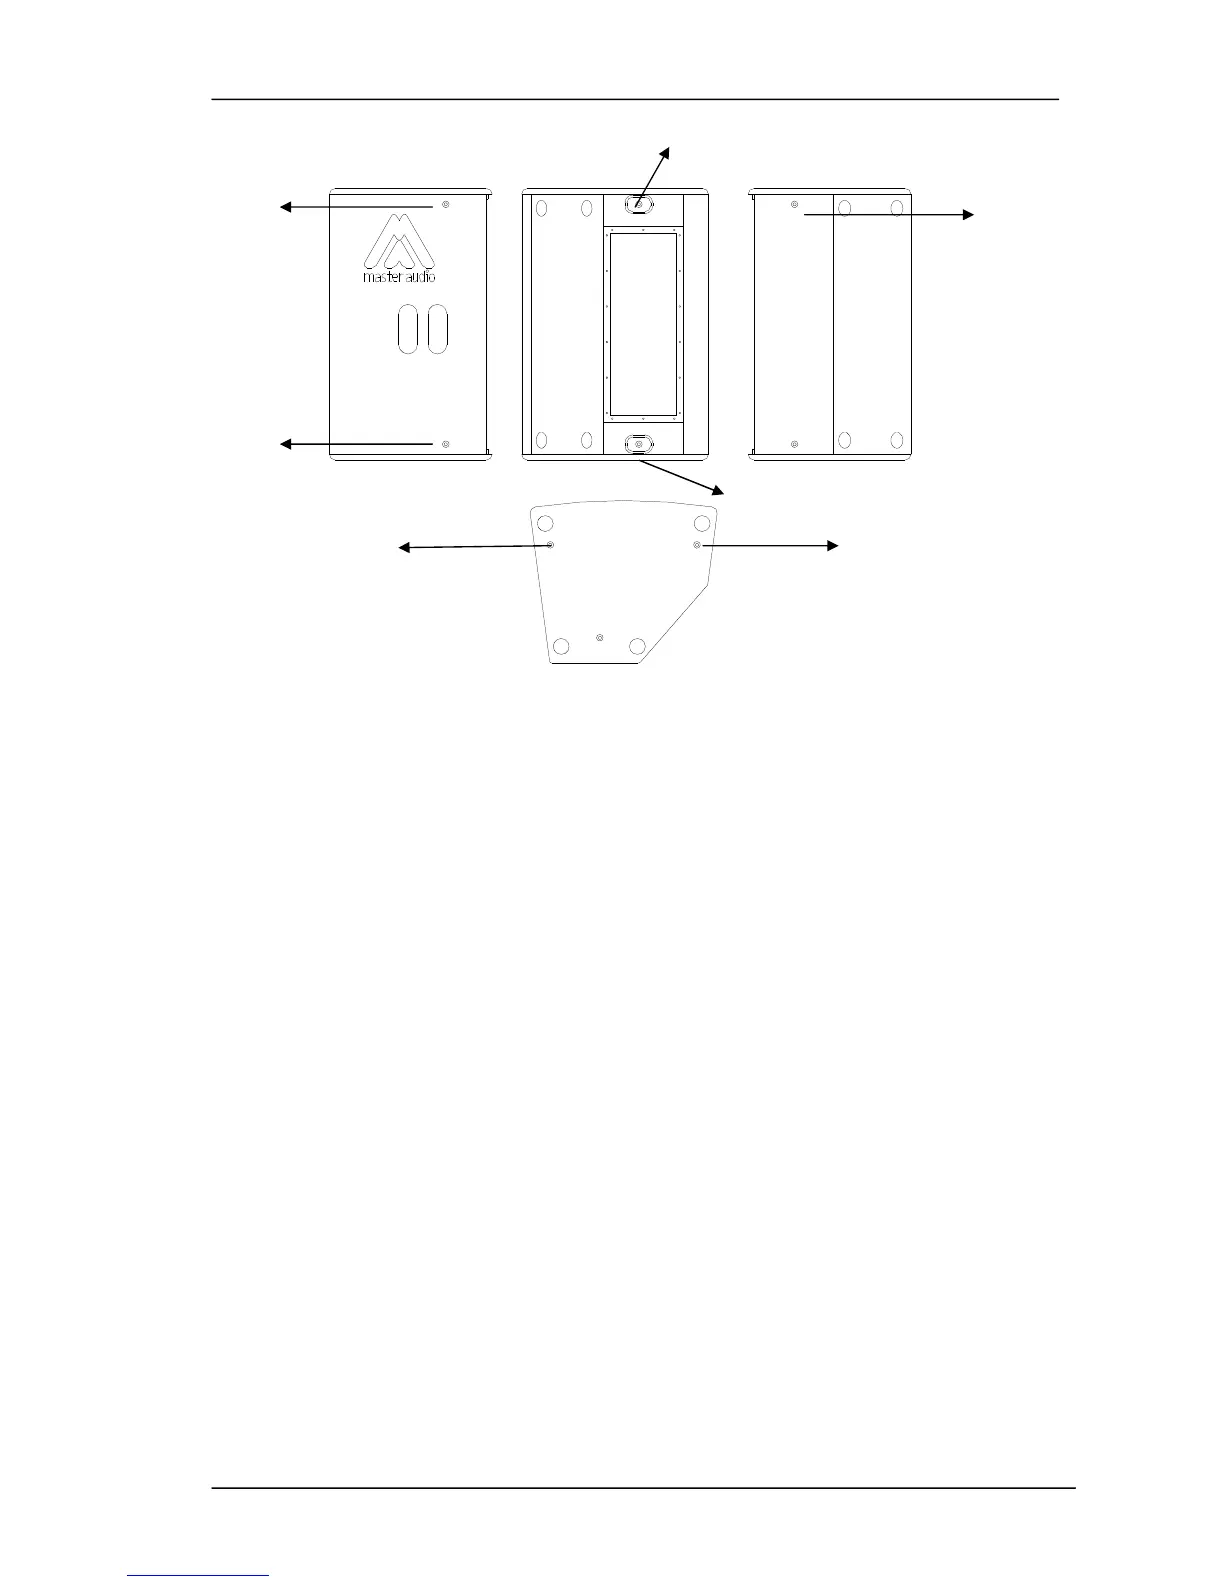
Fig.22. Flying points
3.5.3. U-N10 Bracket (Optional)
The P-26A/P-10A can optionally incorporate a "U" bracket which allows the cabinet to
be mounted on a wall or ceiling. The bracket may be mounted with either nails or
screws, horizontally or vertically.
Mounting:
1- Hold the bracket against the mounting surface, so you can mark the locations of
the mounting holes (1).
2- Drill corresponding pilot holes on the wall and attach the bracket with screws
(included).
3- Unscrew the top hat (located on the bottom of the cabinet) and place the metal
plate (included on the kit) (2).
4- Set the cabinet on the bracket and fix it through the two M8 bracket knobs
(included on the kit). The order must be as follows:
a) Rubber washer (3)
b) U-N10 Bracket
c) M8 bracket knobs (4)
5- Adjust the cabinet for desired position and angle.
It is possible to add a 2mm steel cable through (5) to make the bracket safer.