Installation 4
TESTING FOR BLADDER
LEAKAGE
Step 1. Disconnect power to pump.
Step 2. Drain water from tank bladder by opening
faucet closest to tank.
Step 3. Remove valve cap and release all pressure
by depressing valve core. If the bladder is
leaking, water mist will spray out.
Retained water in tank may cause
sudden weight shift when moving tank. Support tank
so it cannot fall when being lowered or inverted.
Step 4. If replacing bladder, be sure air and water
pressures are relieved before removing
cover flange. When reassembling cover
flange, do not tighten nuts or mounting
studs more than 85 in-lbs. (9.6 Nm).
NOTICE: When using metal pipe with plastic fit-
tings use only Teflon tape or Plasto-Joint Stik
1
on
male threads.
For parts or assistance, call Master Plumber Customer Service at 1-800-628-9439
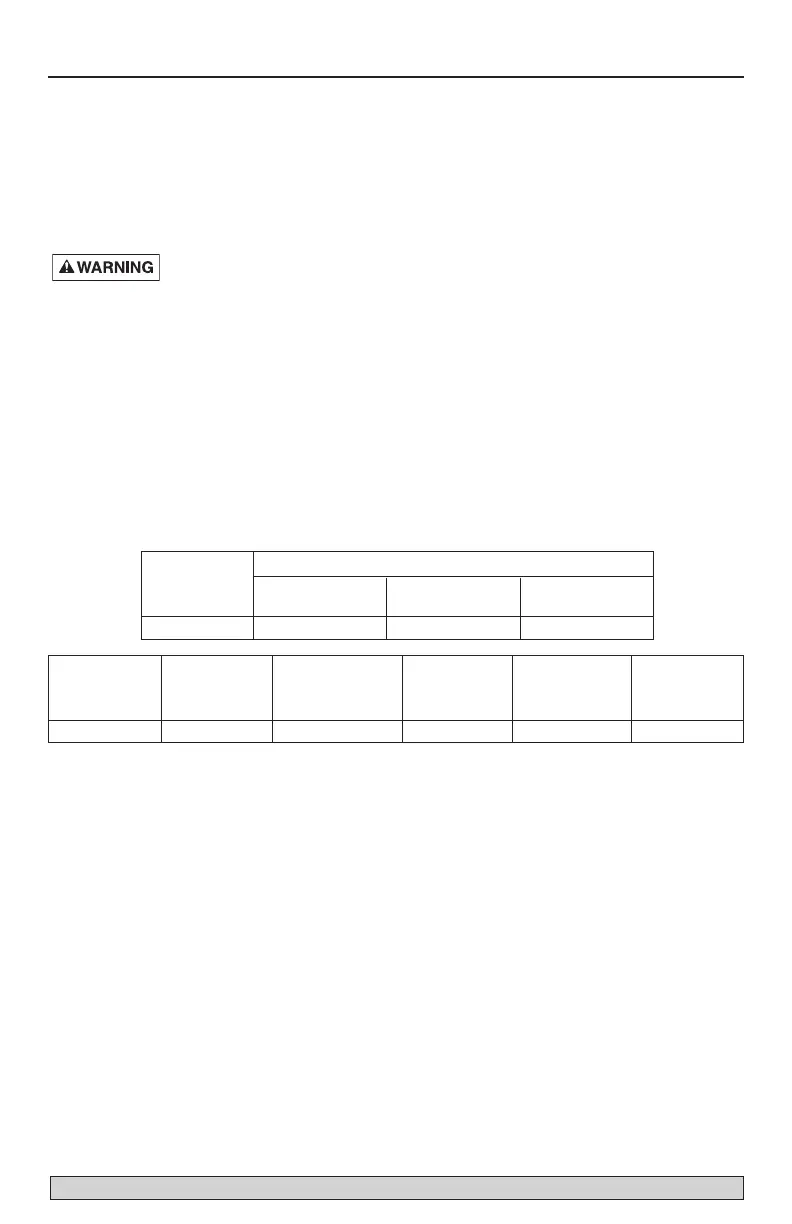
Maximum Equivalent Tank Tank Tank
Catalog Capacity to Standard Diameter Length Discharge
Number US Gals (L) Tank US Gals (L) (mm) (mm) Tapping
123352 6 (23) 15 (57) 12" (305) 16-1/2" (419) 3/4"
Drawdown - Gals (L)
Catalog
20-40 PSI 30-50 PSI 40-60 PSI
Number (138-276kPa) (207-345kPa) (276-414kPa)
123352 2.2 (8.3) 1.8 (6.8) 1.6 (6.1)
Product Information – Pre-Charged Tanks