In case you want to change this parameter, operate as described.
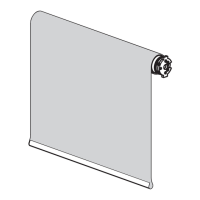
During the installation, the motor calculates the optimum torque value needed to properly stretch the fabric when this is
completely unrolled. The value set by the factory is: 1 MINIMUM TENSIONING.
N° of movements
Setting
1
2
3
Minimum tensioning
Medium tensioning
Maximum tensioning
6. Disconnect the power supply.
4. Connect the power supply. Wait 30 seconds, the motor makes a signal: « ».Radio code deleted
1. If possible, bring the motor to the intermediate position.
If you want to delete also the limit switch wait, otherwise go to point 6.
5. After 15 seconds, the motor makes another signal: « ».Limit switch deleted
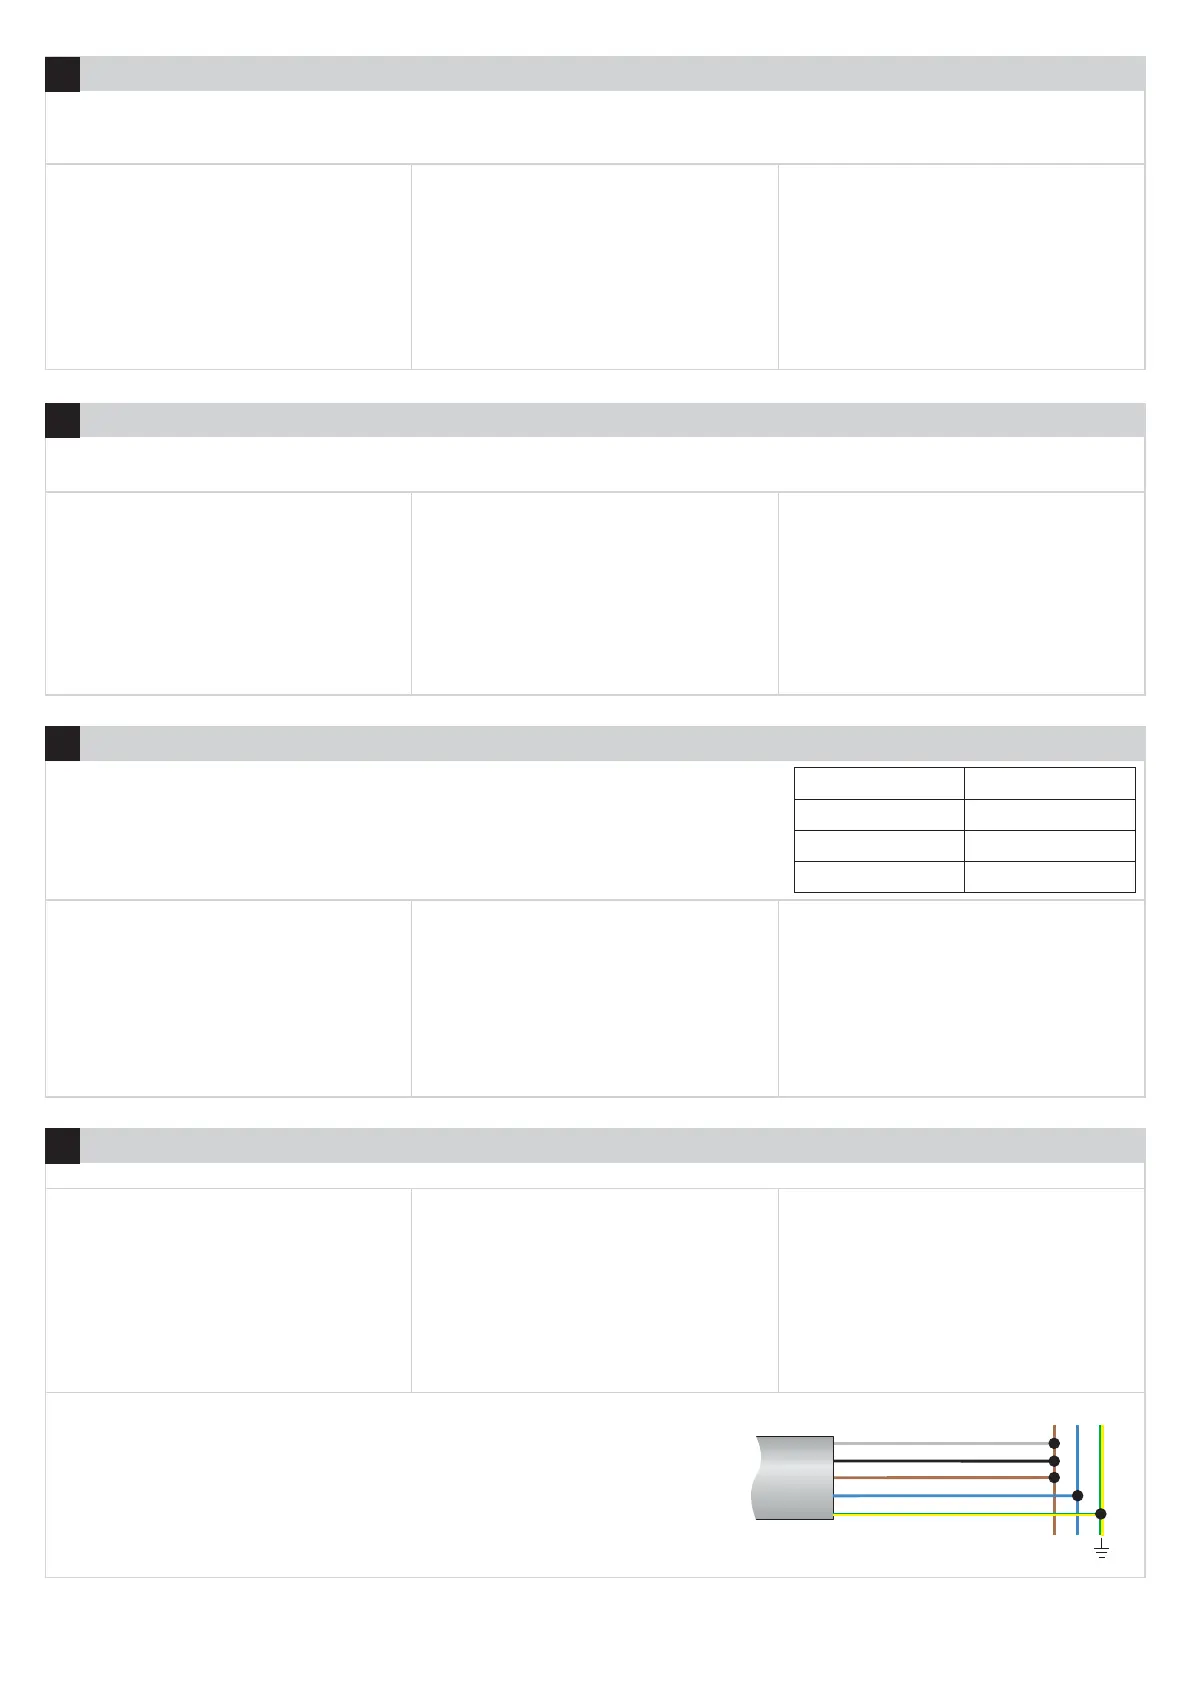
3. Connect as on the diagram.
7. Restore the connections (see diagram on section 2).
8. Reinstall the motor (see section 3).
2. Disconnect the power supply.
13.2 USING COMMAND BUTTONS
All rights reserved.
All rights reserved. All products and technical specifications given in this document are subject to variation without notice. Unless previously and specifically authorised by the manufacturer, the device must be used
exclusively with transmitters produced by the same manufacturer.The manufacturer shall not be liable for damage resulting from improper, incorrect or unreasonable use.
5 poles
cable
gray
brown
blue
yellow/green
black
L
N
05
The buttons can be operated either in PULSE logic or HOLD-TO-RUNlogic.
PULSE: to activate the motor press a button for at least 0.5 seconds, to stop the motor press briefly (less than 0.5 seconds) one of the two buttons.
HOLD-TO-RUN: to activate the motor press a button for at least 0.5 seconds, to stop the motor release the button.
The factory sets the device to work in PULSE logic.To modify this parameter operate as described.
As soon as the module stores a wind sensor, a communication control is automatically activated between the sensor and the device. If the communication is lost for more than 60
minutes, the motor performs an upward movement to protect the blind. This automatic manoeuvre is performed every 60 minutes until the reactivation of the radio communication.
The factory recommends to keep the “test radio” active in order to identify in good time any malfunction of the radio sensor or of the radio communication.
OPERATION LOGIC OF COMMAND BUTTONS
9
MASTER S.p.A. via Pertini 3, 30030 Martellago (VE)
To select HOLD-TO-RUN: press NEXT
1 UP = hold-to-run, 1 DOWN = pulse
3. Press 1 time PREV / 8 times NEXT.
1 UP = hold-to-run, 1 DOWN = pulse
5. To select PULSE: press PREV
6. Press STOP. The motor signals:
2. Press MENU for about 5s, until «rS» appears
«18» appears on display
4. Press STOP. The motor signals:
1. Bring the motor in an intermediate position
ARCO
2. Holding down STOP, press PROG for about 1 sec,
until LEDs light
3. Press 1 time UP / 8 times DOWN.
4. Press STOP. The motor signals:
5. To select PULSE: press DOWN
6. Press STOP. The motor signals:
To select HOLD-TO-RUN: press UP
1. Bring the motor in an intermediate position
1 UP = hold-to-run, 1 = pulse
DOWN
1 UP = hold-to-run, 1 = pulseDOWN
FLUTE, KUADRO, KORT
1 UP = hold-to-run, 1 DOWN = pulse
5. To select PULSE: press DOWN
6. Press STOP. The motor signals:
1 UP = hold-to-run, 1 DOWN = pulse
3. Press 17 times NEXT. «18» appears on display
To select HOLD-TO-RUN: press UP
4. Press STOP. The motor signals:
2. Press MENU, «Menu rx» appears on display
1. Bring the motor in an intermediate position
VISIO
2. Press MENU for about 5 sec, until «rS» appears
5. Press together PREV and NEXT for about 2
seconds until the motor indicates that the reset
was performed (1 moving up / down).
3. Press 2 time PREV / 9 times NEXT.
1. Bring the motor in an intermediate position.
«29» appears on display
4. Press STOP. The display flashes, the motor
performs some movement
6. Reinstall the motor (see section 3).
ARCO
2. Holding down STOP, press PROG for about 1
sec, until LEDs light
3. Press 2 time UP / 9 times DOWN.
5. Press together UP and DOWN for about 2
seconds until the motor indicates that the reset
was performed (1 moving up / down).
6. Reinstall the motor (see section 3).
1. Bring the motor in an intermediate position.
4. Press STOP. The LEDs flash, the motor performs
some movement
FLUTE, KUADRO, KORT
1. Bring the motor in an intermediate position.
3. Press 3 time PREV. «29» appears on display
4. Press STOP. The display flashes, the motor
performs some movement
5. Press together PREV and NEXT for about 2
seconds until the motor indicates that the reset
was performed (1 moving up / down).
6. Reinstall the motor (see section 3).
2. Press MENU, «Menu rx» appears on display
VISIO
RESET
12
13.1 USING A TRANSMITTER
«17» appears on display
5. To deactivate: press PREV
To activate: press NEXT
1. Bring the motor in an intermediate position
1 UP = active, 1 DOWN = inactive
3. Press 1 time PREV / 7 times NEXT.
2. Press MENU for about 5s, until «rS» appears
6. Press STOP. The motor signals:
1 UP = active, 1 DOWN = inactive
4. Press STOP. The motor signals:
ARCO
1 UP = active, 1 DOWN = inactive
3. Press 1 time UP / 7 times DOWN.
1. Bring the motor in an intermediate position
5. To deactivate: press DOWN
1 UP = active, 1 DOWN = inactive
4. Press STOP. The motor signals:
6. Press STOP. The motor signals:
To activate: press UP
2. Holding down STOP, press PROG for about 1s,
until LEDs light
FLUTE, KUADRO, KORT
4. Press STOP. The motor signals:
1. Bring the motor in an intermediate position
2. Press MENU, «Menu rx» appears on display
3. Press 16 times NEXT. «17» appears on display
1 UP = active, 1 DOWN = inactive
5. To deactivate: press DOWN
1 UP = active, 1 DOWN = inactive
To activate: press UP
6. Press STOP. The motor signals:
VISIO
«09» appears on display
4. Press STOP. The motor signals the current
value (1 to 3 movements)
5. Press NEXT the number of times equal to the
desired setting (1 to 3)
1. Bring the motor in an intermediate position
2. Press MENU for about 5s, until «rS» appears
3. Press 9 times NEXT.
6. Press STOP. The motor signals the new value (1
to 3 movements)
ARCO
1. Bring the motor in an intermediate position
3. Press 9 times DOWN.
5. Press DOWN the number of times equal to the
desired setting (1 to 3)
6. Press STOP. The motor signals the newt value
(1 to 3 movements)
2. Holding down STOP, press PROG for about 1s,
until LEDs light
4. Press STOP. The motor signals the current value
(1 to 3 movements)
FLUTE, KUADRO, KORT
6. Press STOP. The motor signals the new value (1
to 3 movements)
4. Press STOP. The motor signals the current value
(1 to 3 movements)
3. Press 9 times NEXT.
2. Press MENU, «Menu rx» appears on display
5. Press UP the number of times equal to the
desired setting (1 to 3)
1. Bring the motor in an intermediate position
«09» appears on display
VISIO
TENSIONING ADJUSTMENT
11
TEST RADIO
10
 Loading...