110498-2
2
INSTALLATION
CAUTIONS:
Before installing the cooler, note the following items:
• Before installation, ensure your existing electrical system is rated for the additional amperage draw from unit.
• Installation inside attic areas is NOT recommended.
• If installing unit on ground, ensure surface area is level, well packed and will not erode or become unstable with water
erosion.
• If installing on brace, or existing construction, ensure structure will hold the operating weight of the cooler. (See specifi cation
table for operating weight.)
• Ensure entire unit is suffi ciently supported. If supporting the unit with legs at each corner, the middle of the unit where the two
sections join must be supported as well.
• We strongly recommend consulting a professional contractor if installation will require cutting through existing structure such
as walls or roof.
• Do not screw or drill within 5 inches of the bottom of the wet section as you could puncture the reservoir.
• Ensure all electrical work is accomplished to local standards. An electrician may be needed for correct and safe wiring.
WARNING: Disconnect all electrical service that will be used for this unit before beginning the installation
and DO NOT reconnect until installation is complete.
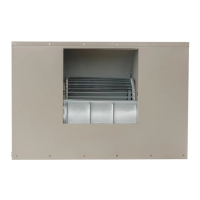
MOTOR INSTALLATION
Note: Motor must be purchased separately. See Motor Specifi cation Table for
motors that can be used.
1. For typical 120V installation, install motor cord (provided) to motor
(purchased separately). Follow motor electrical diagram using the following
color code:
BLACK - HIGH; RED - LOW; WHITE- COMMON; GREEN - GROUND
2. When installing a 1 hp motor, reverse the adjustable yolk to accommodate
the larger motor. Adjust the cradle spacing as needed for size of motor.
Mount the blower motor onto the yokes of the motor mount. Fasten with
provided motor clips.
3. Leave motor cord unplugged until electrical portion of installation is
complete.
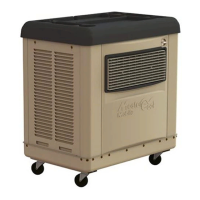
PULLEY INSTALLATION
1. Open adjustable pulley about 5 full turns to the least diameter.
2. Install the motor pulley onto the motor shaft so that it aligns with the blower
drive pulley and tighten with Allen wrench.
3. Loosen adjustment screw on motor mount.
4. Install belt onto pulleys.
5. Rotate motor mount until belt is tight, then tighten adjustment screw to
secure belt. Check belt tension per instructions on page 5.
Note: Further adjustment to belt and pulley may be required after installation is
complete.
PARTS AND TOOLS NEEDED:
• Motor with Motor Pulley (purchased separately)
• 5/32 Allen Wrench (for pulley installation)
• 7/16 Wrench or Crescent Wrench
• Phillips Screwdriver
• Sill cock or water valve and tubing
• Multimeter (for amp reading)
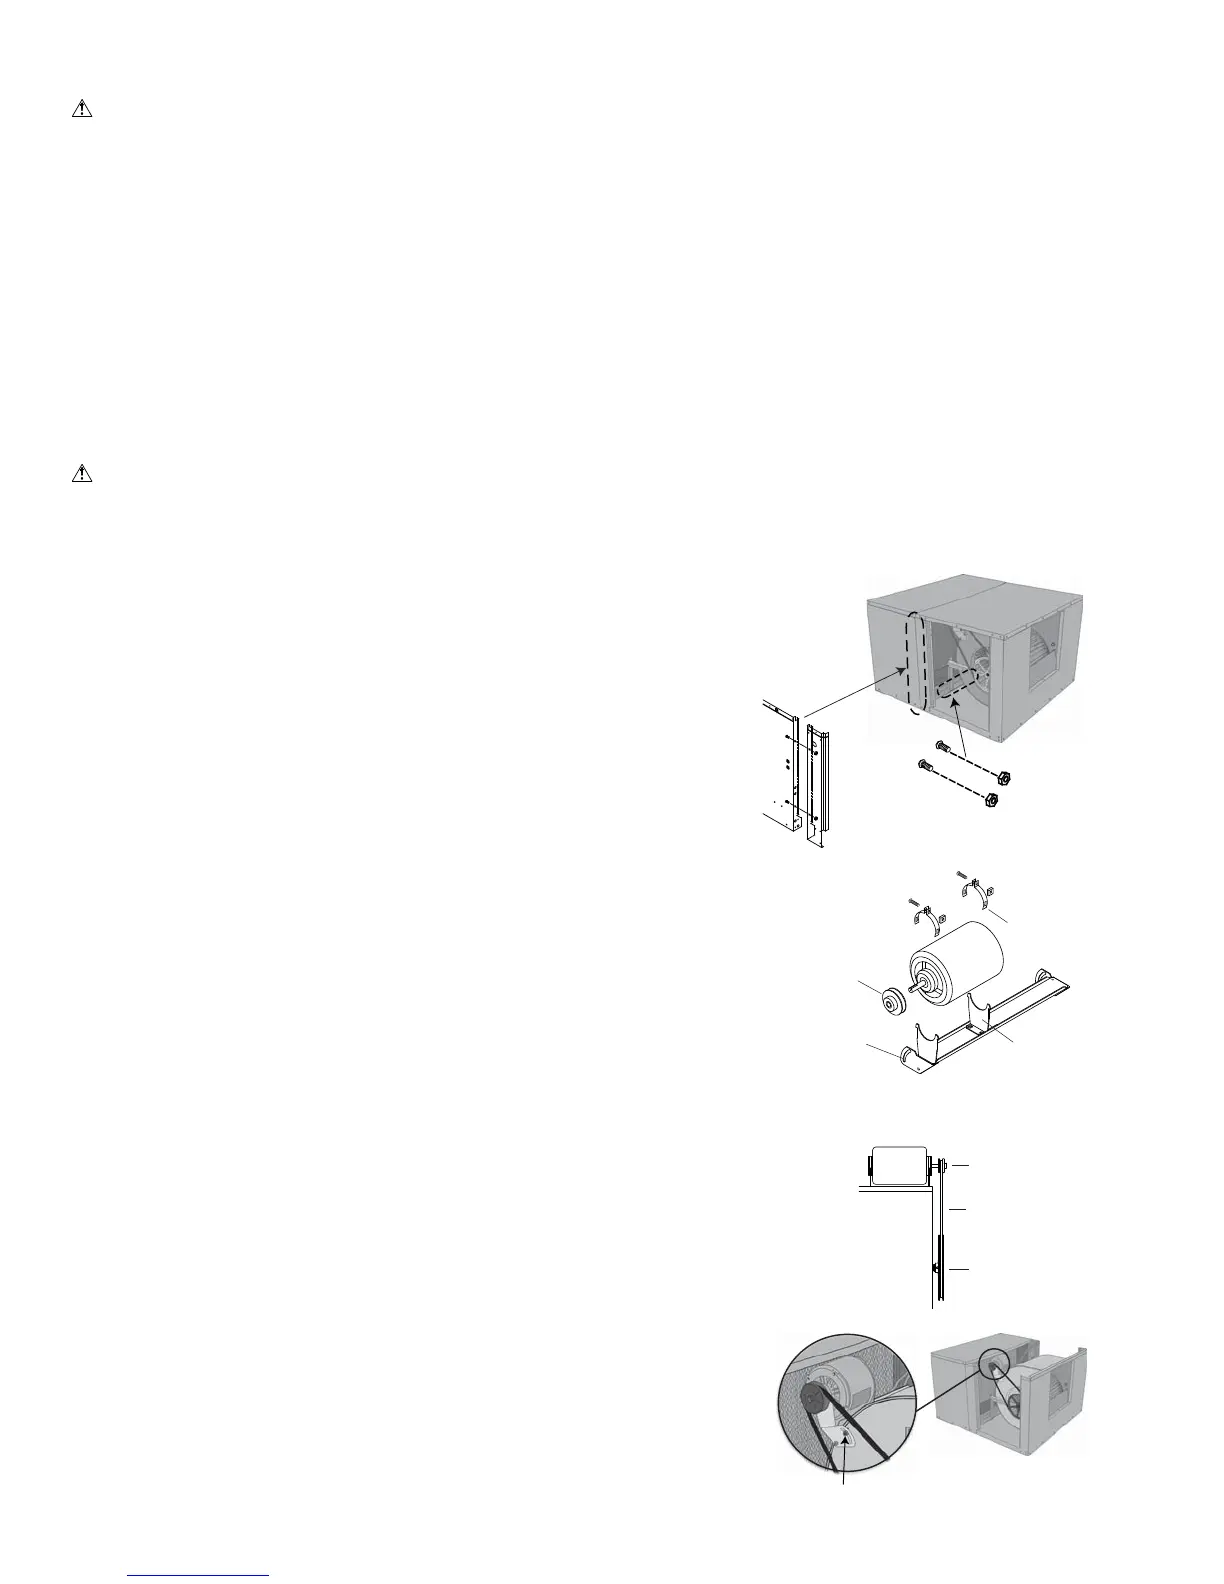
SEPARATING SECTIONS
Follow the steps below to separate the sections of the unit, if desired for ease of
installation.
1. Remove four bolts (two on each side) from the inside center post of the unit
connecting the wet section to the blower section.
2. On a few models, two bolts on the interior of the unit attaching the bottom
pans of the two sections will need to be removed as well.
Motor
Clips
Adjustable
Yoke
Motor
Pulley
Adjustable
Motor Mount
Motor
Remove
Two Bolts
(Each Side)
Connecting
Wet And
Blower
Sections
Remove Two Bolts
Connecting Bottom Pans
Adjustment Screw
Motor
Motor
Pulley
Blower
Pulley
Belt
ALIGN PULLEYS