28 www.mastercool.com
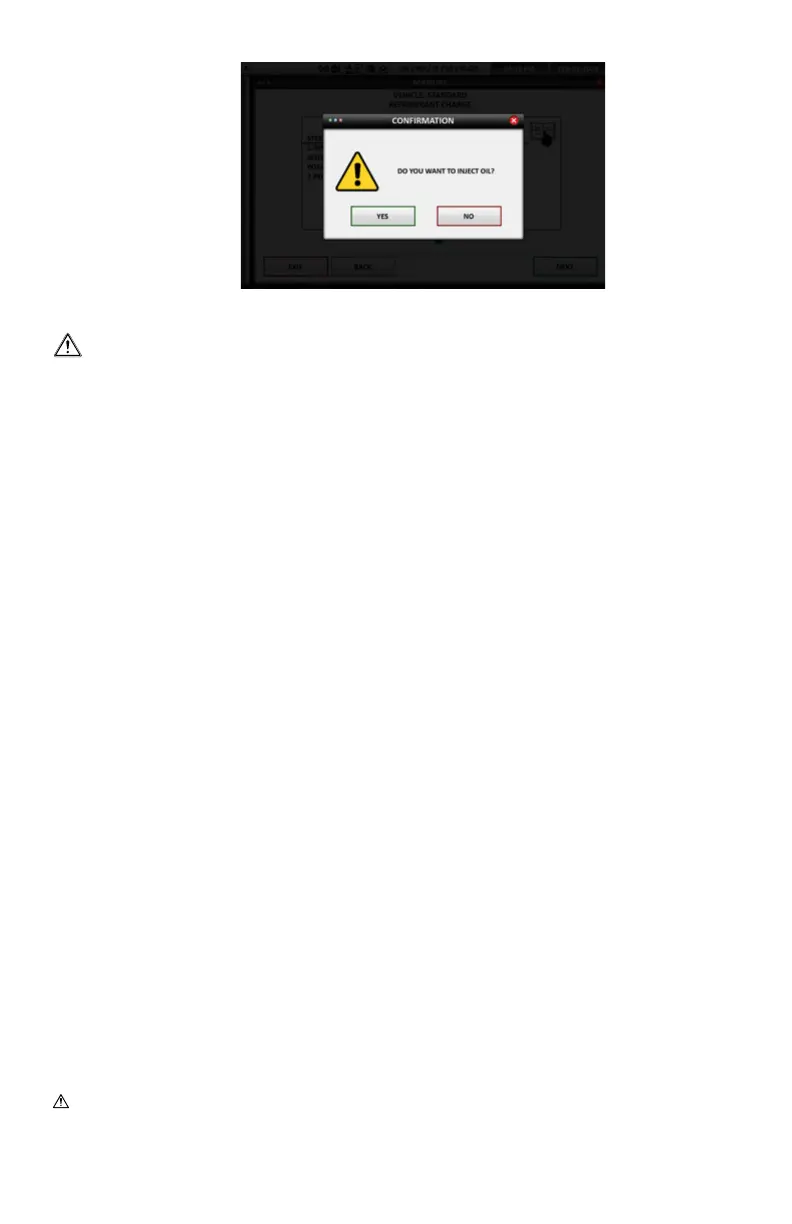
Oil Injection:
• DO NOT INJECT OIL AFTER THE VACUUM PROCESS
• DAMAGE TO THE IDENTIFIER MAY OCCUR
• WHEN USING AUTOMATIC OR MANUAL PROCEDURE, PLEASE FOLLOW THESE INSTRUCTIONS FOR OIL
INJECTION
1. Start the charge process
2. Let the machine run the vacuum and decay process
3. Let the machine charge 15%
4. Check for evaporator leaks
5. Check for rear evaporator leaks
6. Before the “next” button is pressed
7. Disconnect the low side coupler and inject the oil
8. Re-attach the low side coupler
9. Press the “next” button
End of Charge / Hose Clearing Process:
This process allows for the verification of the operating AC pressures and the removal of refrigerant from the
hoses into the internal tank. The machine will then perform a short vacuum to prepare for the next vehicle.
Follow the instruction on the screen.
1. Close the high and low side valves on the machine, press next to continue.
2. Close and remove the high side coupler. Press next to continue.
3. Start the vehicle, turn the AC system on high. Press next.
4. Open the valves on the machine. Press next.
5. Allow the AC system pressures to equalize. Press next
6. Close and remove the low side coupler, turn off the vehicle. Press next.
7. Hose clearing will be displayed. The tank graphic with weight will be displayed. The tank pressure
and temperature will be displayed.
8. The machine will recover any residual refrigerant and ready itself for the next vehicle.
9. Process Completed, will be displayed when finished.
COMMANDER4100-INST
If you have difficulty with a procedure please call
Mastercool’s Technical Service at 973-252-9119
WARNING: This product can expose you to chemicals including lead and Di (2-ethylhexyl) phthalate, which
are known to the State of California to cause cancer and birth defects or other reproductive harm. For more
information go to www.P65Warnings.ca.gov
 Loading...