Do you have a question about the MasterCraft 199-5705-2 and is the answer not in the manual?
Indicates this document is the official instruction manual for the product.
Provides critical safety warnings and precautions for operating the air compressor.
Recommendations for selecting and using appropriate extension cords for safe operation.
Lists and describes each numbered part shown in the diagram.
Guidance on matching air tools with the compressor for optimal performance and warranty.
Procedure for the initial break-in period required before first use.
Pre-operation checks and preparations before starting the compressor.
Steps for safely starting the air compressor and preparing it for use.
Procedure for safely turning off and disconnecting the air compressor.
Routine checks and cleaning procedures for the air compressor.
Guidelines for properly storing the air compressor when not in use.
An itemized list of all components with corresponding numbers.
Details on warranty limitations, legal rights, and consumer advice.
This document provides comprehensive instructions for the Mastercraft Air Compressor, model no. 199-5705-2, covering its function, usage, and maintenance. It emphasizes safety guidelines and proper operation to ensure longevity and prevent injury or damage.
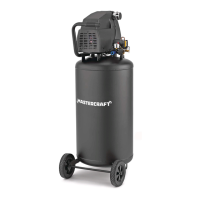
The Mastercraft Air Compressor is designed to compress ambient air and store it in a tank for various applications. At its core, an electric motor (A) powers an air compressor pump (B). The pump, an oil-less, direct-drive type, compresses air by means of a piston moving within a cylinder and discharges it into the air tank (J). The compressor operates on a nominal 120 V grounded circuit and is equipped with a power cord (K) featuring a grounding plug for safety.
A pressure switch (C) controls the automatic operation of the compressor, turning it on when the air tank pressure drops below a factory-set cut-in pressure and turning it off when the pressure reaches a factory-set cut-off pressure. This switch can also be manually set to the OFF position. For safety, a pressure relief valve (D) is incorporated into the system. This valve automatically opens to release pressure if the pressure switch fails to shut down the motor, preventing system failure when pressure reaches a preset level. It can also be activated manually by pulling a ring.
The air pressure regulator (E) allows users to adjust the pressure of the air delivered to tools, ensuring that the outlet pressure is appropriate for the specific application and does not exceed the tool's maximum operating pressure. The tank pressure gauge (F) displays the current air pressure stored in the tank, while the outlet pressure gauge (G) shows the regulated outlet pressure. Compressed air is delivered through an air outlet (H), which is a 1/4" (6.4 mm) NPT connection for an air hose. An air tank drain valve (I) is located at the bottom of the tank to facilitate the removal of moisture that accumulates during operation. The motor is protected by a thermal overload protector, which automatically shuts down the motor if it overheats to prevent damage.
Before initial use, the compressor requires a "breaking-in" period for the pump. This involves setting the pressure switch to OFF, opening the tank drain valve to prevent pressure build-up, and turning the air pressure regulator clockwise until it stops. The compressor is then plugged in, the pressure switch is set to ON, and the unit is allowed to run for 30 minutes with the drain valve open. After this period, the pressure switch is turned off, the drain valve is closed, and the pressure switch is set to ON again, allowing the air receiver to fill to its cut-out pressure. This ensures the compressor is ready for use.
The compressor is designed for household use and is suitable for a wide range of applications, including inflation/recreation, various nailing tasks (brad, finishing, framing, roofing, flooring), impact wrench use, die grinder/angle grinder/air ratchet operation, cut-off tools, drill hammer chisel shears, sander/polisher, paint spraying (20-45 PSI), and grease/caulking gun applications. It is crucial to match the air compressor's output (volume, pressure, and delivery rate) to the requirements of the air tools being used to avoid continuous running, which could void the warranty. The compressor is intended for maximum 30-minute intervals of operation, followed by a 30-minute rest period.
Proper positioning of the compressor is essential for safe and efficient operation. It should be placed near an electrical outlet, at least 12" (31 cm) away from any wall or obstruction to ensure adequate airflow and cooling. The unit must be on a hard, level surface to facilitate proper drainage of moisture from the tank. An air filter needs to be screwed onto the pump during assembly. When connecting an air hose, a 1/4" (6.4 mm) NPT air hose (not provided) is required for connection to the air outlet.
Safety is paramount during operation. Users are advised to wear ANSI Z87.1 approved safety goggles to protect against eye injury and hearing protection to prevent hearing loss. The compressor should never be pointed at people or parts of the body. When spraying flammable or toxic materials, the compressor should be kept at least 20' (6 m) away from the spray area, which must be well-ventilated. A minimum of 25' (7.6 m) of hose is recommended for connecting a spray gun. Smoking near the spray area is prohibited. The compressor should not be exposed to rain and must be stored indoors. It is critical to ensure the regulator is adjusted so that the outlet pressure is below the maximum operating pressure of the tool. All pressure in the hose should be relieved before removing or attaching accessories. The pressure switch and safety valve are factory-preset and should not be adjusted.
For electrical safety, the compressor must be grounded, and grounding adaptors should not be used. It is recommended to use a dedicated circuit for the compressor to ensure best performance and reliable starting, as it uses the full capacity of a typical 12 A household circuit. Low voltage or an overloaded circuit can cause sluggish starting or trip the motor overload protection. Extension cords, if used, must be of an adequately heavy gauge to prevent voltage drop and potential product damage. The manual provides a chart for recommended minimum wire gauges based on ampere rating and cord length. Outdoor extension cords must be marked with the suffix "W-A" ("W" in Canada) for outdoor suitability and should be properly wired and in good electrical condition, protected from sharp objects, heat, and damp areas.
Regular maintenance is crucial for the longevity and safe operation of the Mastercraft Air Compressor. Daily maintenance includes draining condensation water from the air tank and checking the safety valve. Condensation accumulates in the tank during normal operation, and if not drained, it can lead to corrosion and weakening of the tank, posing a risk of rupture. Users should wear protective goggles, relieve air pressure, and open the drain valve at the end of each workday. In cold conditions, draining the tank after each use is particularly important to prevent freezing of condensation. To check the safety valve, the ring on the valve should be pulled before starting the compressor to ensure it operates freely. If it is stuck or does not move smoothly, a trained service technician should be contacted.
Weekly maintenance involves cleaning the air filter. A dirty air filter reduces compressor performance and life. The foam filter should be cleaned by immersing it in warm, soapy water and thoroughly drying it. Regular replacement of the air filter is also recommended.
Monthly maintenance includes checking all connections for tightness. Small leaks in the tank, hoses, connections, or transfer tubes can significantly reduce compressor and tool performance. Suspected leak areas can be sprayed with soapy water; if bubbles appear, the faulty component should be repaired, replaced, or resealed. Over-tightening connections should be avoided.
Before storing the air compressor, several steps should be taken. The tank should be drained of all moisture. The pressure safety valve should be pulled to release all pressure from the tank. An air blow gun can be used to clean dust and debris from the compressor. The power cord should be disconnected and wound up. The ventilation openings on the motor enclosure should be cleaned with a damp cloth. The entire unit should be covered to protect it from moisture and dust. The compressor should be stored in a clean and dry location. In cold weather, storing the compressor in a warm building when not in use will help prevent starting problems and the freezing of water condensation.
The manual also provides a troubleshooting guide to address common issues such as the motor not running or starting, the motor running continuously, the regulator not regulating pressure, low air pressure, moisture in the discharge air, and compressor overheating. For instance, if the motor does not run, possible causes include the power cord not being plugged in, the power switch being in the OFF position, an incorrect extension cord gauge, a tripped thermal overload protector, a blown fuse or tripped circuit breaker, or low voltage conditions. Solutions range from simple actions like plugging in the cord or resetting the switch to more involved steps like checking for proper amperage, disconnecting other electrical appliances, or contacting a qualified technician for defective components. For issues like low air pressure, checking for leaks, restricted air intake, or excessive air use are suggested. Moisture in the discharge air can be addressed by draining the tank more often and using an air-line filter. Overheating issues can be resolved by relocating the compressor to a well-ventilated area, cleaning cooling surfaces, or replacing worn parts. Any repairs that involve internal components or safety-critical parts should ideally be performed by an authorized service center.
| Maximum Pressure | 150 PSI |
|---|---|
| Horsepower | 1.5 HP |
| Max PSI | 150 PSI |
| Voltage | 120 V |
| Amperage | 12 A |