ANNUAL MAINTENANCE
19-2
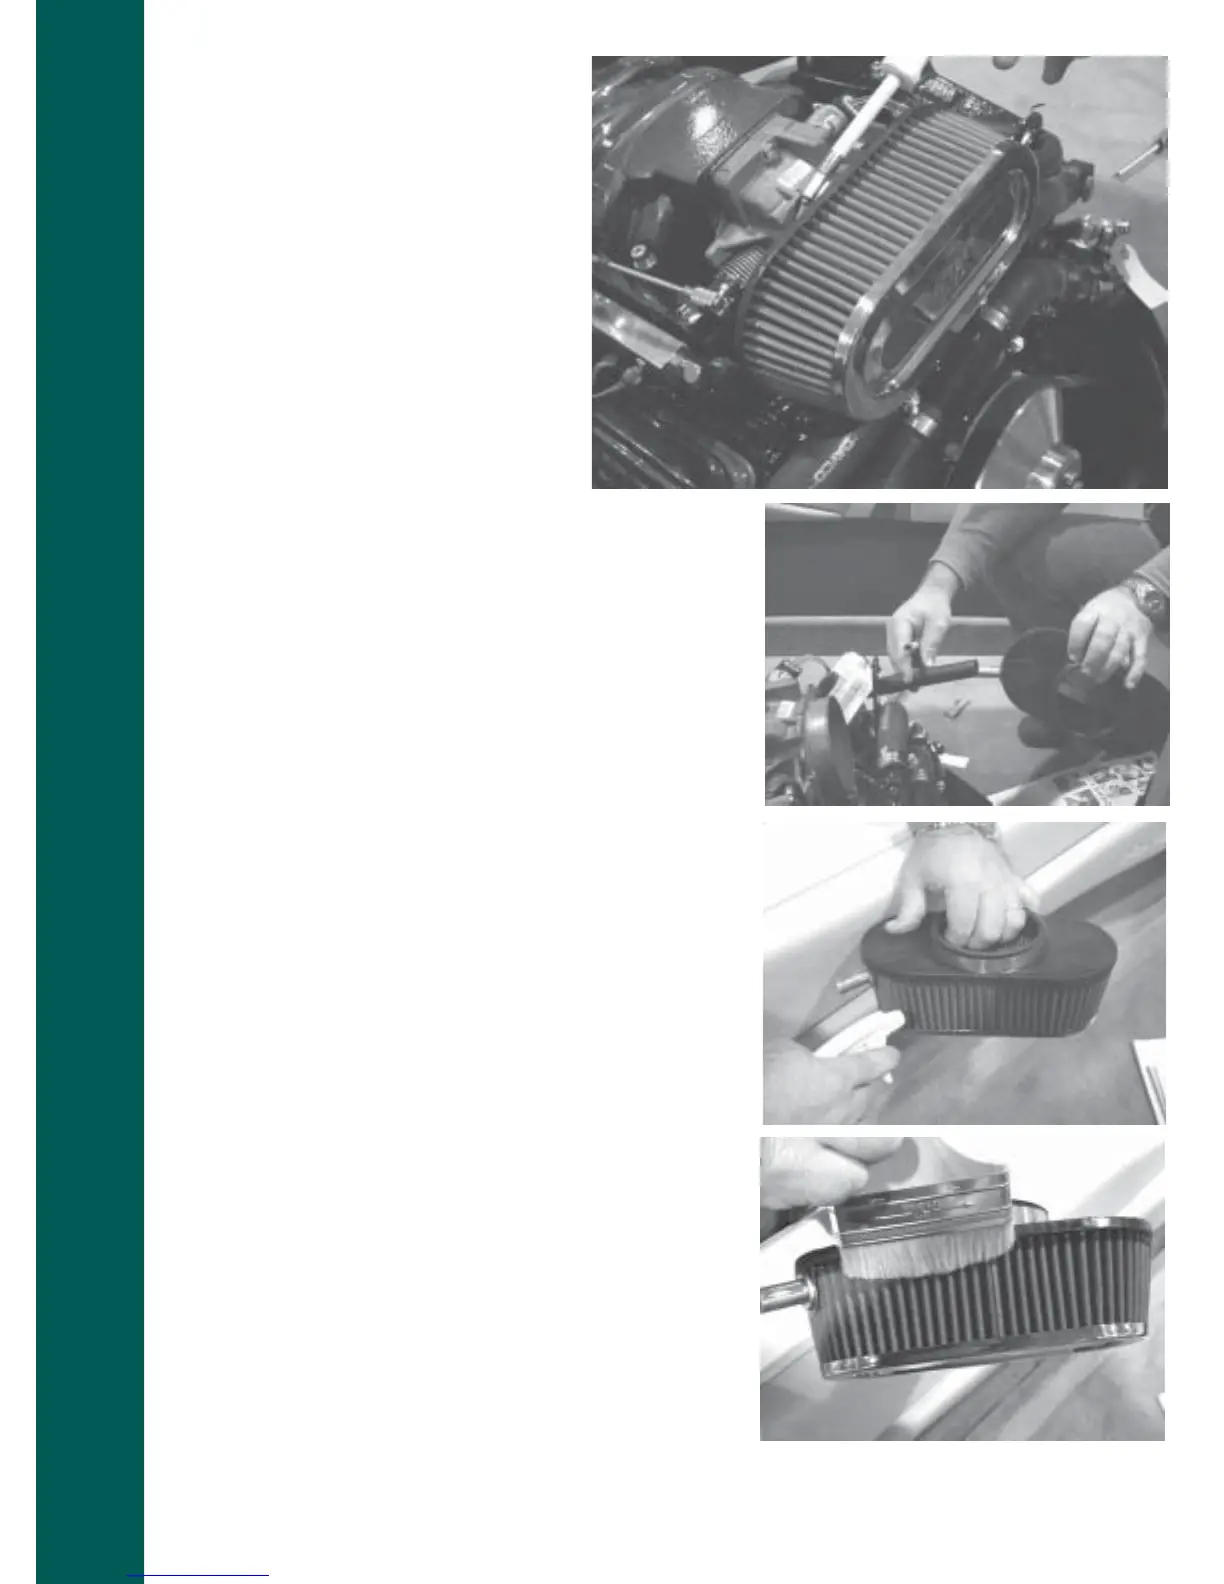
For MCX, LQ-9 and 8.1L Engines:
Step 1: Ensure the engine is OFF and the en-
gine safety starting switch disconnected. Be cer-
tain that the throttle/shift control lever is in neu-
tral. The engine must be cool.
Step 2: Carefully remove the flame arrestor from
the back of the engine using a screw driver on
the clamp screw.
Step 3: Tap the element to dislodge any large
embedded dirt and then gently brush with a soft
bristle brush.
Note: Do not use gasoline, steam, caustic
cleaning solution, strong detergent, high-pressure car wash or parts
cleaning solvents. Any of these can harm the cotton filter media, as
well as shrink and harden the rubber end caps.
Step 4: Either spray on K&N air filter cleaner or allow the air filter to
soak in a pan filled with air filter cleaner. Allow the cleaner to work for
approximately 10 minutes.
Step 5: Rinse off the filter with low-pressure water. Tap water is okay.
Always flush from the clean side to the dirty side. This removes the dirt
and does not drive it into the filter.
Step 6: Always dry naturally. After rinsing, shake off all excess water
and let the element dry naturally.
Note: Do not use compressed air, open flame nor heat dryers.
Excess heat will shrink the cotton filter media. Compressed air will
blow holes in the element.
Step 7: After cleaning the air filter, always re-oil before using. Spray
K&N air filter oil down into each pleat with one pass per pleat. Wait
10 minutes and re-oil any white spots still showing. Or use the oil from
a squeeze bottle, down into the bottom and along each pleat with just
one pass in each pleat. Let the oil wick into the cotton for 20 minutes.
Re-oil any white spots still showing.
Note: Never use the K&N air filter without oil. The filter will not
stop the dirt without the oil. Red dye is added to K&N air filter oil
to assist in determining whether you have complete coverage af-
ter application. Never use automatic transmission fluid, motor oil
diesel fuel, WD-40, LPS or other lightweight oils for this purpose.
Step 8: Re-install. Make sure the element seats properly before
tightening the clamp screw.