11
3. Move the tool gently forward:
4. Use your hand on the front handle [5], to apply pressure on the front of
the tool at the start of planing and use your hand on the back handle [4] to
apply pressure at the rear of the tool towards the end of the planing stroke.
5. Push the planer beyond the edge of the workpiece without tilting it
downwards.
NOTE: Planing is easier if you incline the workpiece slightly away from you
so that you plane “downhill”.
• The rate of planing and the depth of cut determine the quality of the nish.
• For rough cutting, you can increase the depth of cut.
• To achieve a smooth nish, you will need to reduce the depth of cut and
advance the planer slowly across the workpiece.
• The proper feed rate will depend on the type of material being cut and the
depth of the cut.
• Practice rst on a scrap piece of material to gauge the correct feed rate
and the cut dimensions.
• The proper feed rate will depend on the type of material being cut and the
depth of the cut.
• Practice rst on a scrap piece of material to gauge the correct feed rate
and the cut dimensions.
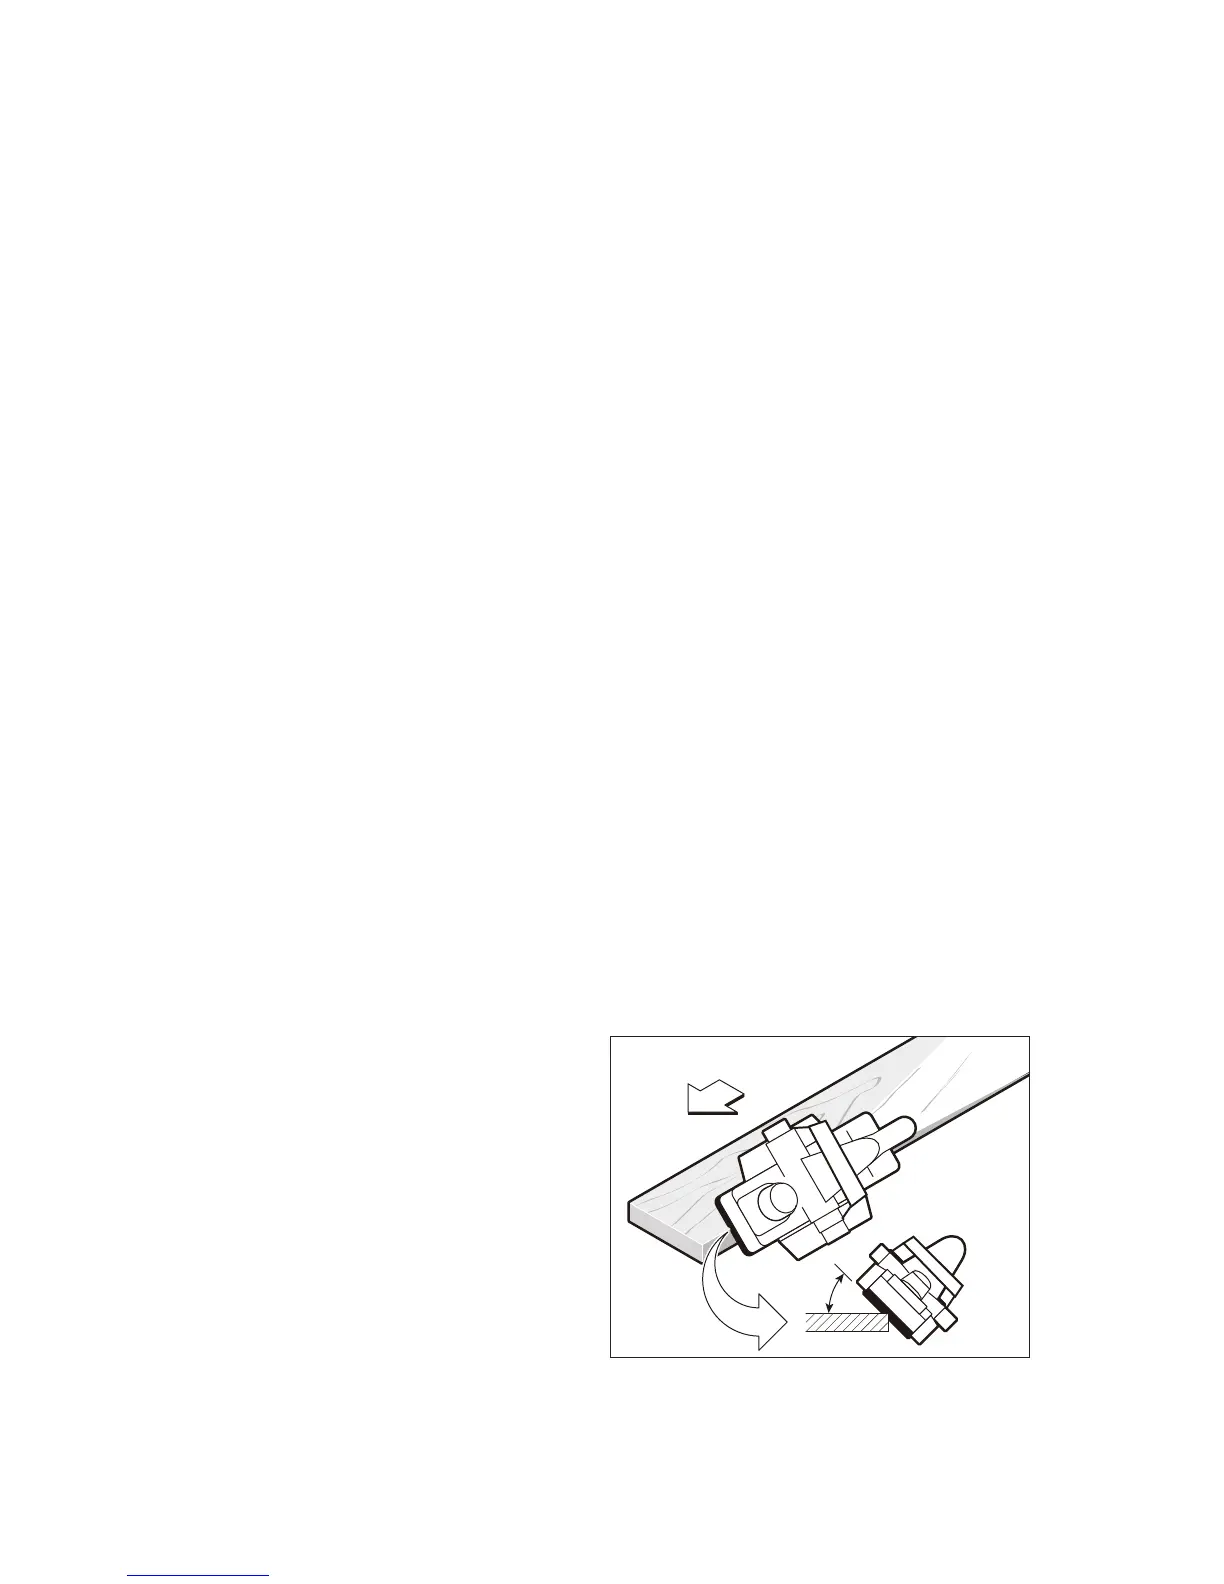
3. CHAMFERING (See Fig.7)
1. To make a chamfered cut, first align
the “V” grooves in the front base
(12) of the planer with the corner
edge of the workpiece.
2. Run the planer along the corner
edge.
4. CUTTING WITH EDGE GUIDE (See Fig. 8-10.)
CAUTION: Always ensure that the tool is switched OFF and unplugged
from the power supply before making adjustments or installing or removing