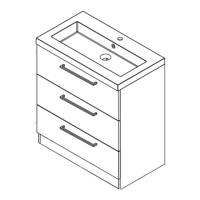
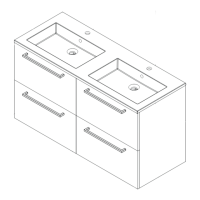
This document provides installation instructions for a bathroom cabinet, identified as C19/C13-600/800/1000/1200. It is a multi-drawer vanity unit designed for bathroom use, likely to support a washbasin or washbowl.
Function Description:
The bathroom cabinet serves as a storage unit and a base for a washbasin or washbowl in a bathroom setting. It features multiple drawers for organizing bathroom essentials. The installation process involves assembling the cabinet, attaching legs, mounting it to the wall, installing drawer runners and fronts, and connecting the siphon to the drain plug. Adjustable feet and drawer mechanisms allow for precise leveling and alignment.
Important Technical Specifications:
While specific dimensions for the C19/C13-600/800/1000/1200 models are not detailed, the naming convention suggests varying widths (600mm, 800mm, 1000mm, 1200mm).
The installation requires specific drill bit sizes: Ø6mm for wall plugs, Ø2mm for handle holes, and Ø4mm for handle holes (drilled halfway from both sides).
The drawer fronts have marked center-to-center distances for handle installation, with examples of 256mm, 352mm, and 640mm.
The cabinet is designed to be wall-mounted using brackets and plugs, ensuring stability and weight support.
Usage Features:
- Storage: The cabinet features multiple drawers, providing ample storage space for bathroom items.
- Adjustable Leveling: Adjustable feet (A7) are provided to ensure the cabinet is perfectly level on uneven floors (Step 5.0).
- Wall Mounting: The cabinet is designed to be securely attached to the wall using wall brackets (A9) and plugs (A10), enhancing stability and safety (Steps 8.1, 9.0, 9.1, 9.2).
- Drawer System: The drawers operate on runners (Step 14.0) and feature adjustable fronts.
- Drawer Front Adjustment:
- Vertical Adjustment: A right-side screw allows for vertical adjustment of the drawer front (Step 16.0).
- Horizontal Adjustment: A left-side screw allows for horizontal adjustment of the drawer front (Step 16.2).
- Depth Adjustment: Clips on the bottom of the drawer are used to adjust the distance between the front panel and the cabinet (Step 16.1, 17.0).
- Removable Drawer Fronts (Optional): The drawer fronts can be optionally removed by turning a specific screw a quarter turn, which pushes the front out of the drawer (Step 15.1).
- Siphon Connection: The manual details the assembly and connection of a siphon to the drain plug, with instructions to shorten the siphon if necessary (Steps 23.0, 23.1).
- Washbasin/Washbowl Integration: The cabinet is designed to accommodate either a washbasin (Step 21.0) or a washbowl, with specific instructions for sealing the washbasin to ensure a waterproof installation (Step 22.0).
Maintenance Features:
- Waterproof Sealing: The installation guide emphasizes placing silicone covers (A4) under the side panels (Step 3.1) and plinth (Step 7.0), and using stickers (A6) for a watertight seal (Step 3.3). Crucially, the washbasin must be sealed along its entire backside with kit to guarantee a waterproof installation (Step 22.0). This is a key maintenance aspect to prevent water damage.
- Cleanliness during Installation: The instructions recommend having a clean cloth at hand to immediately remove excess kit when applying mounting kit for the washbasin (Step 21.0).
- Careful Drilling: To prevent damage, the manual advises holding a small piece of wood behind the drill hole when drilling for handles (Step 12.0) and drilling halfway from both sides for Ø4mm holes (Step 12.1). This attention to detail during installation contributes to the longevity and appearance of the cabinet.
- Gentle Tool Use: The guide specifies using a hand screwdriver instead of an electric screwdriver for certain steps, such as attaching handles (Step 12.2) and adjusting cabinet height/distance from the wall (Step 10.1), to prevent damage. This suggests a focus on careful assembly to ensure the product's durability.
General Installation Guidelines:
- Two-Person Job: The installation is explicitly stated to require two people (Step "Voordat u begint").
- Wall Strength: It is crucial to ensure the wall can support the weight of the cabinet.
- Soft Surface for Assembly: The cabinet should always be rested on a soft surface (e.g., a blanket or mat) and in an upright position during assembly to prevent scratches or damage.
- Read Before Assembly: The document stresses the importance of reading the instructions before starting the assembly ("Lezen voor montage | Read before assembly").