EasyManua.ls Logo

maxaro MODULO C18-1200 - User Manual

maxaro MODULO C18-1200
9 pages
Print Icon
To Next Page IconTo Next Page
Loading...
MODULO
Badkamermeubel | Bathroom cabinet
C18-1200
Hulp nodig? | Need help?
Whatsapp naar
06 - 82 04 89 03
Bel onze klantenservice
088 - 205 47 00
EN: Whatsapp
+31 6 82 04 89 03
EN: Call our support desk
+31 88 205 47 00
Lezen voor montage | Read before assembly
Question and Answer IconNeed help?

Do you have a question about the maxaro MODULO C18-1200 and is the answer not in the manual?

Summary

Important Before Use

Two people required for the job

Requires two people for the task.

Verify wall strength

Ensure the wall can support the cabinet's weight.

Protect cabinet during placement

Place the cabinet on a soft surface, like a blanket or mat.

Advice on Hanging Height with Washbasin

Determine desired hanging height and calculate installation height

Measure basin height (A) and cabinet-to-bracket distance (B) to find installation height.

Advice on Hanging Height with Washbowl

Determine desired hanging height considering the washbowl

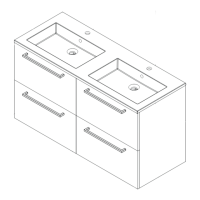
Measure countertop height (A) and cabinet-to-bracket distance (B) for installation.

1 Mark Holes for Wall Brackets

1.1 Measure distance between hanging brackets

Measure the distance between the hanging brackets.

1.2 Mark measured distance on the wall

Mark the measured distance on the wall at the predetermined height.

1.3 Draw a line between marked positions

Use a level to draw a straight line between marked positions.

1.4 Place wall brackets and mark holes

Place wall brackets on the line and mark the drill holes.

2 Drill Holes and Install Wall Brackets

2.1 Drill holes with a drill

Use a Ø6 mm drill bit to drill the holes.

2.2 Insert plugs into drilled holes

Insert plugs into the drilled holes, using a hammer if needed.

2.3 Attach wall brackets by screwing

Install wall brackets by screwing them into the plugs.

3 Hang Cabinet on Wall Brackets

Ensure hanging brackets align with wall brackets

Make sure the hanging brackets are placed on the wall brackets.

4 Level the Cabinet

Adjust height and distance to wall using screws

Use screws to adjust cabinet height and distance from the wall.

5 Install the Side Panel

5.1 Remove the lower drawer

Remove the lower drawer using the clips at its bottom.

5.2 Attach the side panels

Attach the side panels to the cabinet.

5.3 Place stickers for watertight seal

Place stickers for a watertight seal.

6 Mark Handle Drilling Holes

6.1 Mark the center of the front panel

Mark the center of the front panel.

6.2 Drill holes

Use a Ø2 mm drill bit to drill the holes.

6.3 Drill holes to correct size

Use a Ø4 mm drill bit to drill holes to the correct size.

6.4 Attach the handle

Attach the handle using a screwdriver.

7 Install Metal Adapters to Front Panel

8 Place Lower Drawer Back In

9 A Click Front Panel onto Drawer

9 B Remove Front Panel

Turn screw to push front panel out of drawer

Turn the indicated screw a quarter turn to push the front panel out.

10 Adjust Drawer Position with Screws

10.1 Adjust front vertically using right screw

Use the right screw to adjust the vertical position of the front panel.

10.2 Align front using drawer clips

Use the clips on the bottom of the drawer to ensure front alignment.

10.3 Adjust front horizontally using left screw

Use the left screw to adjust the horizontal position of the front panel.

11 Remove Drawers from Cabinet

Use clips at the bottom of the drawer

Use the clips at the bottom of the drawer to remove it.

12 Secure Front Panel to Bracket

Prevent front panel shifting after adjustment

Secure the front panel once it is in the desired position.

13 Place Drawer Back into Cabinet

Extend runners and click drawer into place

Extend drawer runners, place drawer, and click into place at the back.

14 Place Cover Caps

15 Install Basin onto Cabinet

Use drops of mounting kit on sides

Use several drops of kit on the left and right sides of the cabinet.

16 Seal the Washing Basin

Seal entire backside for waterproof installation

Seal the entire backside of the washing basin for a waterproof installation.

17 Install Space-Saving Siphon

17.1 Assemble siphon and shorten if necessary

Assemble siphon, turn ends 90 degrees, and shorten as needed.

17.2 Attach siphon to drain plug

Attach the siphon to the drain plug.

maxaro MODULO C18-1200 Specifications

General IconGeneral
Brandmaxaro
ModelMODULO C18-1200
CategoryIndoor Furnishing
LanguageEnglish