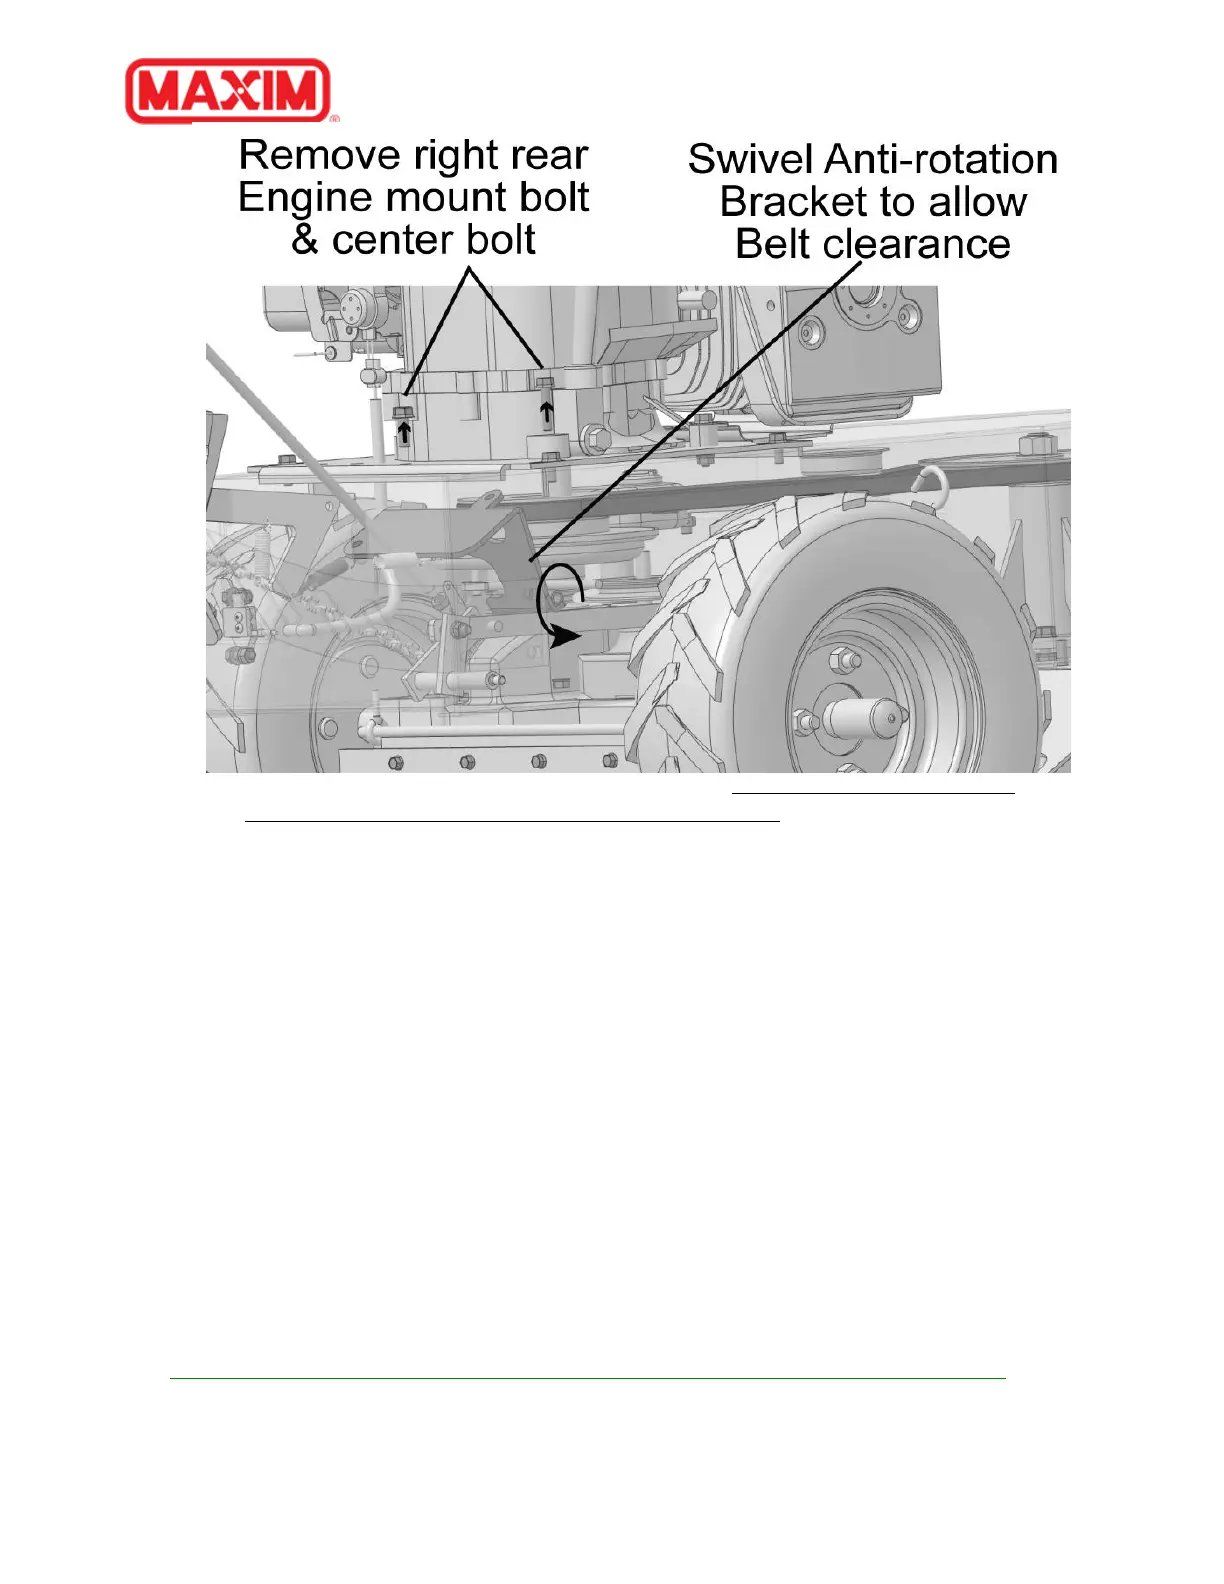
4. Through the Rear cover opening, lower the Anti rotation bracket by removing the
center bolt and the right rear engine mounting bolt. It is NOT necessary to remove
adjuster bolt from the Clutch to the Anti rotation bracket.
5. Lower Blade belt, over clutch and guide it around the Anti rotation bracket to remove.
6. It may be necessary to rotate the top of the Anti-rotation bracket towards the back,
until there is enough space to remove the belt from the clutch.
7. Reinstall Blade belt into clutch pulley groove and in reverse order, reassemble – along
with remounting the Anti rotation bracket.
8. Re-mount the Blade Engagement spring.
9. Reinstall the Blade engagement lever, friction nut, compression spring & bolt. Tighten
only enough for friction slippage.
10. Slide Engine mounting plate forward and install Transmission belt.
11. Slide Engine mounting plate towards the rear of the mower, to tighten Transmission
Belt. Pull the Engine plate to the rear tightening the Transmission belt as you tighten
the four mounting bolts.
12. Make certain the Blade belt goes around both the clutch and the front blade pulley.
13. Using a 9/16 socket wrench on Idler pulley center mounting bolt, pull back the idler
pulley and slip the belt into place with the Idler pulley running on the back side of the
Blade belt. Once in position release wrench and allow the Idler pulley/bracket spring
to hold it tight.
14. Replace covers and hardware to complete belt replacement.


 To Next Page