EasyManua.ls Logo

Maxx 13151 User Manual

Maxx 13151
32 pages
Go to English
To Next Page IconTo Next Page
Page #1 background imageLoading...
Page #1 background image
BREVETTATO
PATENT PENDING
PATENTIERT
BREVETÉ
GEPATENTEERD
PATENT
PATENTERET
ISTRUZIONI PER L’USO
OPERATING INSTRUCTIONS
Click Here for English
NOTICE D’EMPLOI
GEBRAUCHSANLEITUNG
INSTRUCCIONES PARA EL USO
INSTRUÇÕES DE USO ÏÄÇÃÉÅÓ
×ÑÇÓÇÓ
MODEL 13151 120 VOLT
Question and Answer IconNeed help?

Do you have a question about the Maxx 13151 and is the answer not in the manual?

Maxx 13151 Specifications

General IconGeneral
BrandMaxx
Model13151
CategoryGrinder
LanguageEnglish

Summary

SPECIFICATIONS

WARRANTY

SAFETY

WARNINGS ABOUT THE GRINDING WHEEL

RESIDUAL RISK

TRANSPORT

INSTALLATION

MACHINE ADJUSTMENT

Clean the chain before grinding

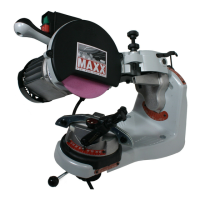
Prepare the chain for grinding by cleaning it.

Position tooth against chain stop

Align the tooth correctly with the chain stop for grinding.

Adjust head tilt angle

Set the grinding head's angle to match the tooth's cutting angle.

Lower arm to skim tooth

Adjust grinding wheel depth to lightly touch the tooth.

Adjust connecting rod screw

Modify the screw to set the tooth's forward/backward position.

Adjust depth stops with 6.0 mm wheel

Correct depth stops using the thicker grinding wheel.

GRINDING

Plug in and lower grinding wheel

Connect power and begin lowering the wheel towards the tooth.

Carry on with grinding

Perform the grinding operation smoothly and gradually.

Raise head and move chain

Lift the head and advance the chain to the next tooth.

Rotate vice for left teeth grinding

Adjust the vice orientation for grinding opposite teeth.

Grind left teeth

Perform grinding on the left-side teeth of the chain.

MAINTENANCE

Keep machine clean

Maintain the grinder's cleanliness for visibility and function.

Replace worn grinding wheel

Replace the grinding wheel when its diameter is too small.

Contact dealer for parts

Seek authorized service for repairs or part replacements.

SCRAPPING

ELECTRICAL DIAGRAM