10
ÉTAPES D’INSTALLATION
1.Réalisezuneouverturedanslepoulailleradaptéeàlatrappeàpoules.
2. Fixez les deux poutres latérales du rail au bas avec une poutre horizontale en forme de L.
3.Placezl’étagèredeportedanslerailetxezlabarrehorizontalerectangulaireen
haut du rail latéral.
4.Installezlabaseduboîtierdecommandeavec4visautotaraudeusespourlaxer,
couvrez le boîtier de commande avec le couvercle et verrouillez-le avec 4 vis en
plastique, puis attachez le panneau de porte avec la corde.
5.Utilisez4rouespourxerleparcoursdelacorde,assurez-vousquelacordenereste
pascoincéeanquelaportesedéplaceendouceur.
RÉGLAGES AVANT LA MISE EN SERVICE
A. Ajuster la hauteur de la porte
1. Aprèsavoirallumél’écran
maintenez le bouton test enfoncé et ne le relâchez pas, attendez que la porte
ait atteint la hauteur souhaitée puis relâchez-la.
2.Aprèsafchagecommeindiquésurl’image
appuyez et maintenez le bouton test pendant 1 seconde puis relâchez-le,
la porte descendra vers le bas.
3. Aprèsafchagecommeindiquésurl’image
celasigniequeleréglagedelahauteurdelaporteestterminé.
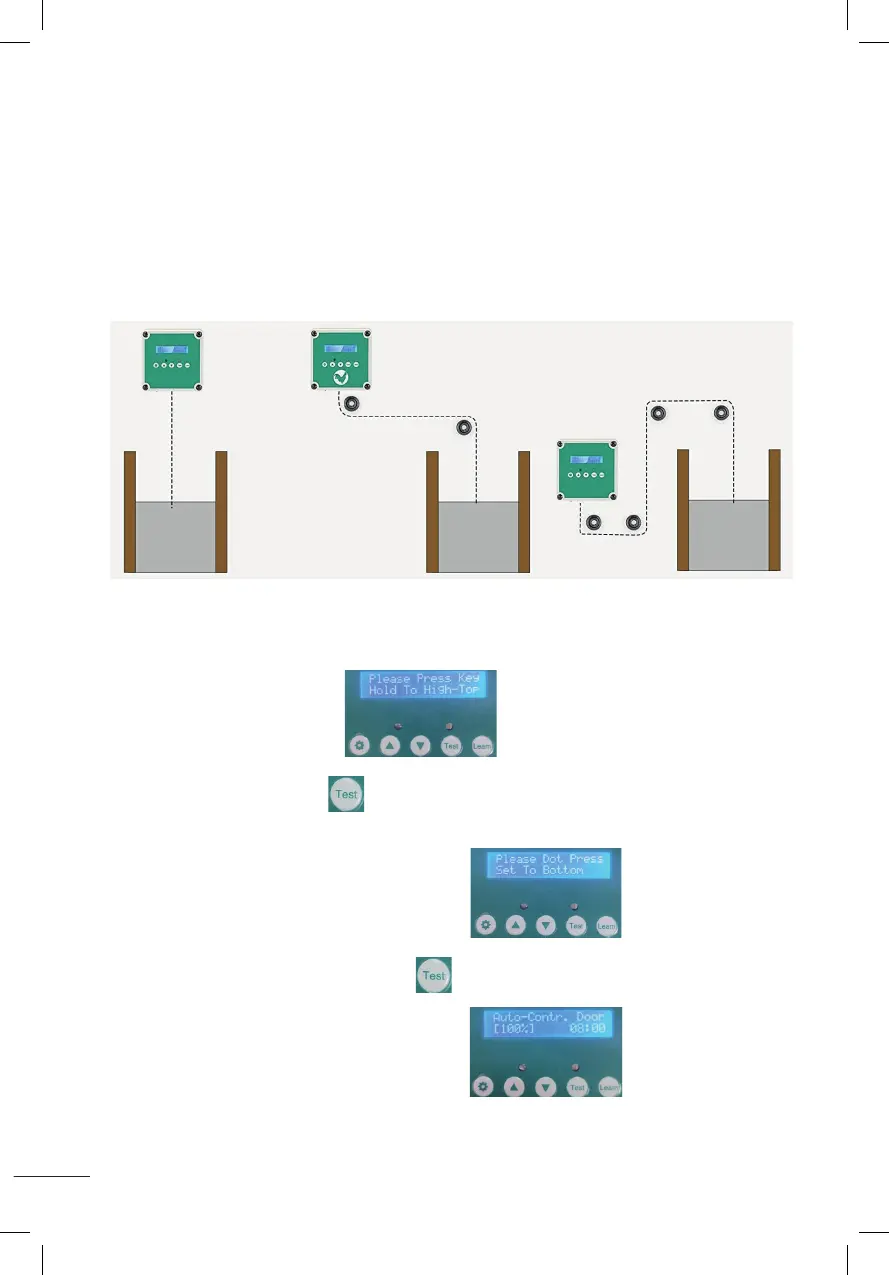
Installation steps:
1. Adjust and fix the size of the chicken cage;
2. Fixed at the bottom of the two side bars of the track with L-shaped horizontal bar ;
3. Put the door plank into the track, and fix the rectangular horizontal bar at the top of the track side bar;
4. Install the control box base with 4 self-tapping screws to fix, cover the control box wtih the cover and
lock with 4 plastic screws, then tied up the door plank with the rope.
5. Use 4 wheels to fix the route of the rope, the rope can not be stuck so that the door activities smoothly.
Please take a few minutes to read and follow these steps to set up before using.
A
::Set the height of the door::
1.After power-on display (Please Press Key Hold To High-To p),
hold down the test button and do not release,wait until the door rises to the height you need and
then release it.
2.After displaying as shown (Please Dot Press Set To Bottom) ,
press and hold the test button for 1 second and then release, the door will drop to the bottom.
3.When the LCD screen is displayed as shown (Auto-Contr.Door(100%)), it means
the door height setting is completed.
 Loading...