4
INSTALLATIESTAPPEN
1. Maak een opening in het kippenhok aangepast aan het kippenluik.
2. Bevestig aan de onderkant de twee zijbalken van de baan met een L-vormige
horizontale balk.
3. Plaats de deurplank in de rail en bevestig de rechthoekige horizontale balk aan de
bovenkant van de rails aan de zijkant.
4. Installeer de basis van de schakelkast met 4 zelftappende schroeven om deze vast
te zetten, bedek de schakelkast met het deksel en vergrendel hem met 4 plastic
schroeven, en bind vervolgens de deurplank vast met het touw.
5. Gebruik 4 wielen om de route van het touw vast te leggen, zorg dat het touw niet
vastloopt zodat de deur soepel beweegt.
INSTELLINGEN VOOR INGEBRUIKNAME
A. Stel de hoogte van de deur in
1. Na het inschakelen van het display
houd de testknop ingedrukt en laat hem niet los, wacht tot de deur de gewenste
hoogte heeft bereikt en laat hem dan los.
2. Na weergave zoals op de afbeelding
houd de testknop 1 seconde ingedrukt en laat hem vervolgens los, de deur zakt
naar de bodem.
3. Na weergave zoals op de afbeelding
betekend dit dat de instelling van de deurhoogte is voltooid.
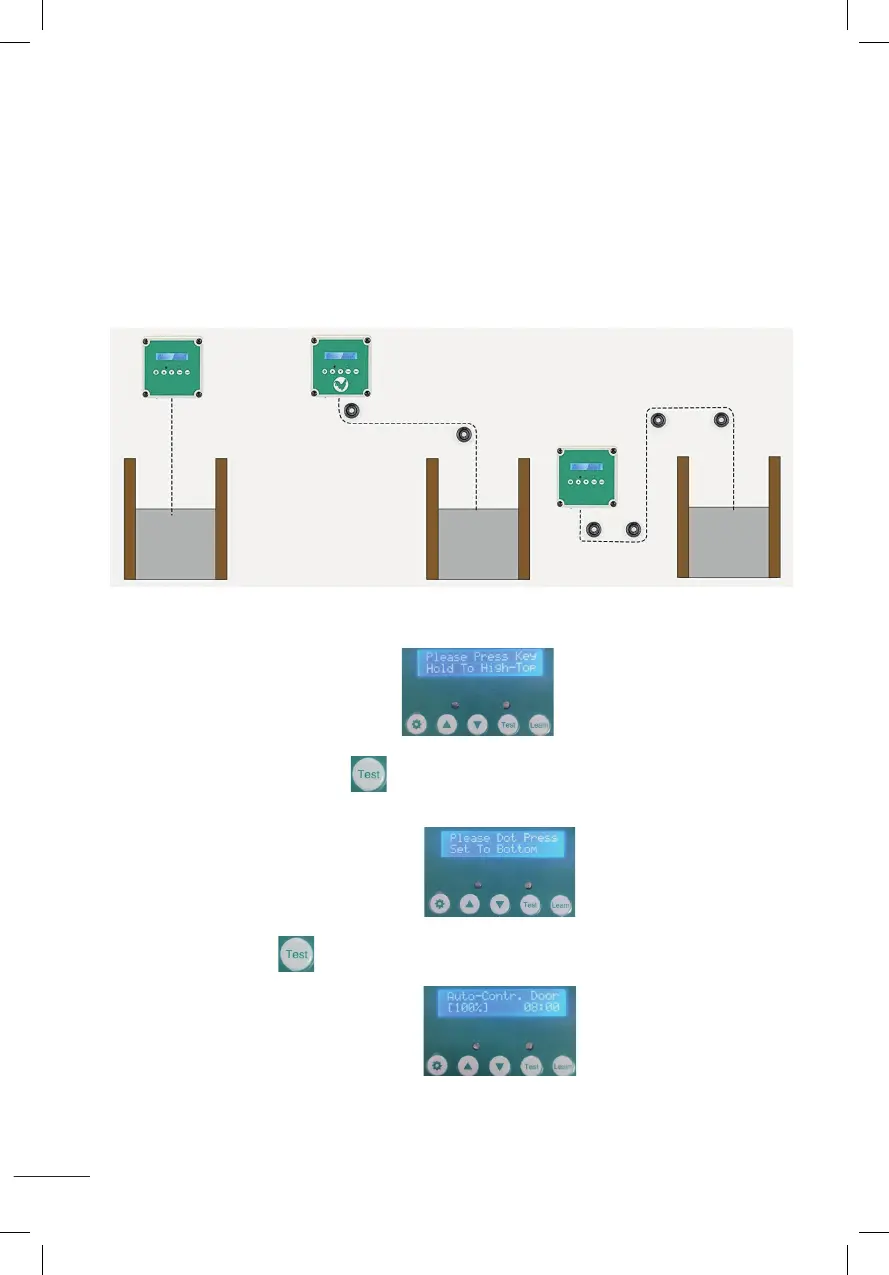
Installation steps:
1. Adjust and fix the size of the chicken cage;
2. Fixed at the bottom of the two side bars of the track with L-shaped horizontal bar ;
3. Put the door plank into the track, and fix the rectangular horizontal bar at the top of the track side bar;
4. Install the control box base with 4 self-tapping screws to fix, cover the control box wtih the cover and
lock with 4 plastic screws, then tied up the door plank with the rope.
5. Use 4 wheels to fix the route of the rope, the rope can not be stuck so that the door activities smoothly.
Please take a few minutes to read and follow these steps to set up before using.
A
::Set the height of the door::
1.After power-on display (Please Press Key Hold To High-To p),
hold down the test button and do not release,wait until the door rises to the height you need and
then release it.
2.After displaying as shown (Please Dot Press Set To Bottom) ,
press and hold the test button for 1 second and then release, the door will drop to the bottom.
3.When the LCD screen is displayed as shown (Auto-Contr.Door(100%)), it means
the door height setting is completed.
 Loading...