6
____________________________________________________________
ASSEMBLY
● Read the Owner’s Manual in its entirety before assembly.
● Remove all parts from the box.
● Check to confirm receipt of all parts and quantities shown in the Packing Parts List on
page 5.
(Note: Some parts may be pre-assembled.)
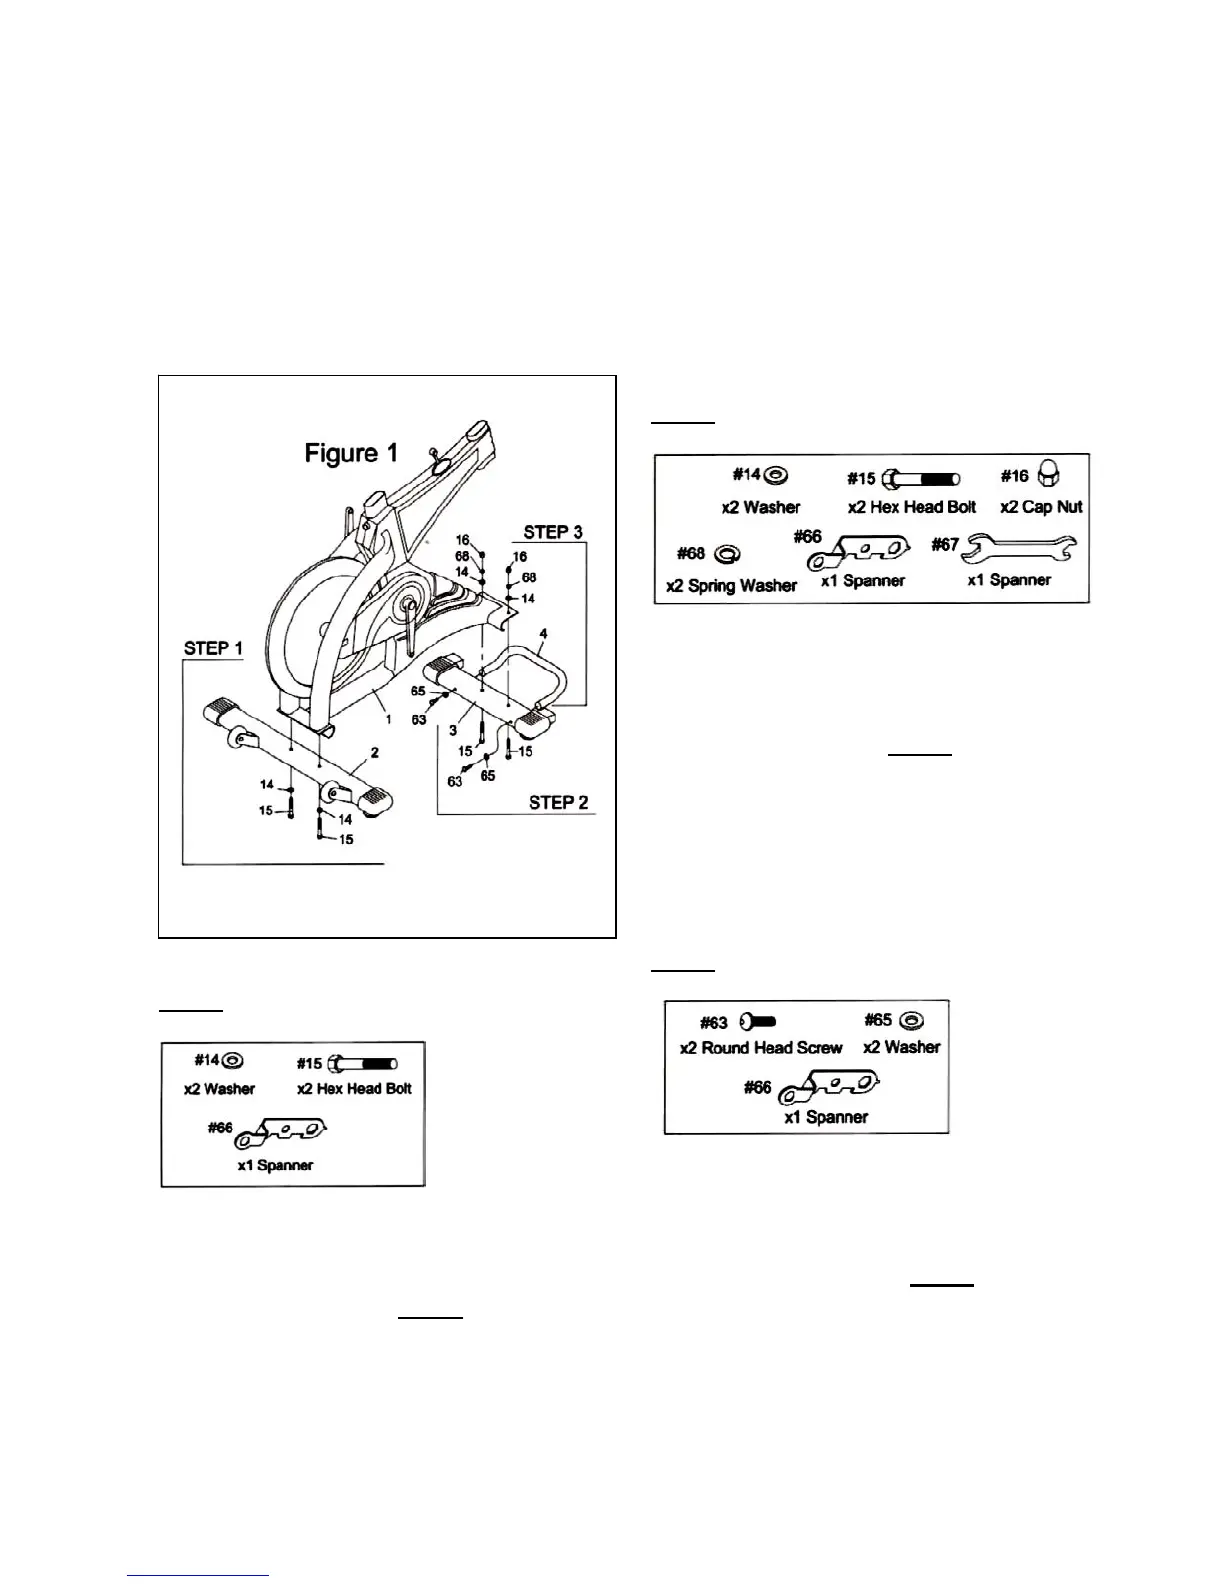
STEP 1
Slide the Rear Foot Bar (2) to the rear of the Main
Frame (1) adding two Washers (14) and two Hex
Head Bolts (15) as shown in Figure 1.
** Tighten all bolts used in STEP 1 with the
Spanner Tool (66).
STEP 2
Slide the Front Foot Bar (3) to the front of the
Main Frame (1) adding two Washers (14), two
Spring Washers (68), two Cap Nuts (16), and two
Hex Head Bolts (15) as shown in Figure 1.
** Tighten all bolts used in STEP 2 with the two
Spanner Tools (66) & (67).
** You can use the Styrofoam (inner packing
material) as a support to keep the Front Foot
Bar (3) higher for easier tightening of the
bolts and nuts.
STEP 3
Insert the U-Zone Bar (4) into the holes of the
Front Foot Bar (3) adding two Washers (65)
and two Round Head Bolts (63) as shown in
Figure 1.
** Tighten all bolts used in STEP 3 with the
Spanner Tool (66).