8
____________________________________________________________
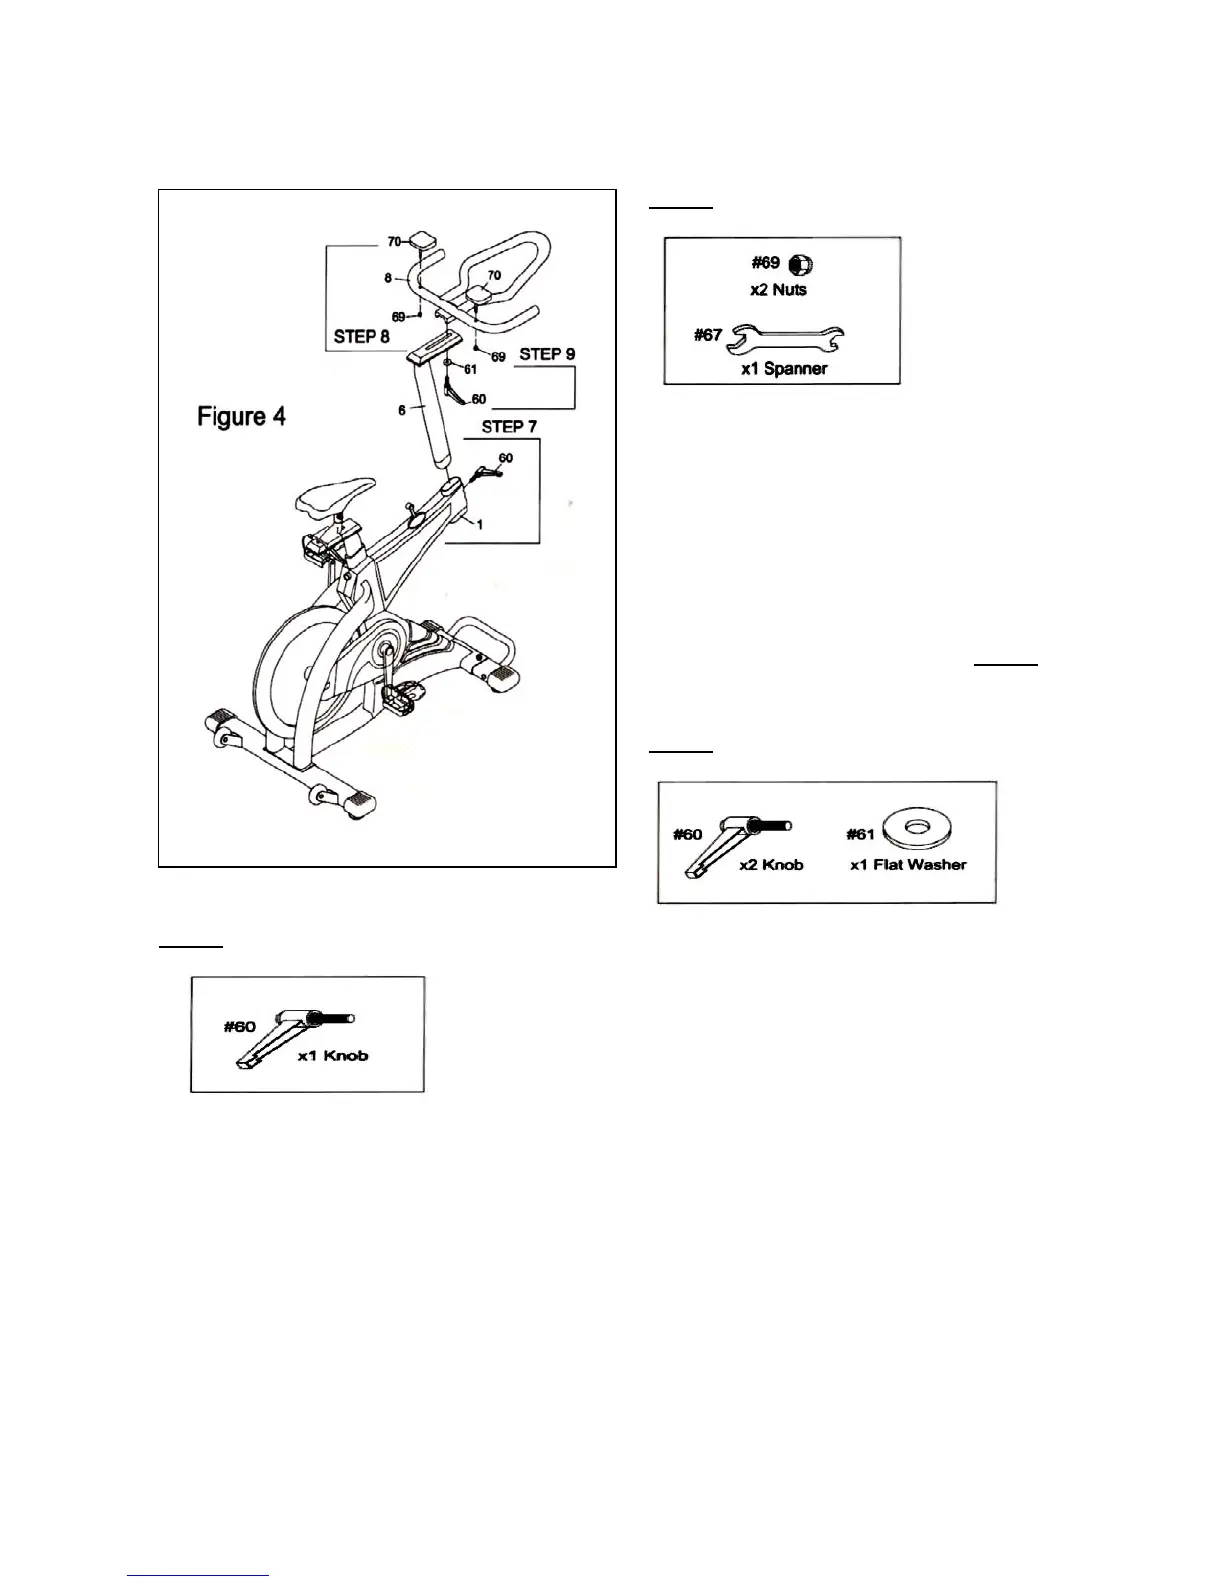
ASSEMBLY
STEP 7
Insert the Handle Post (6) into the tube of the Main
Frame (1) with Knob (60) as shown in Figure 4.
** Hand tighten ONLY.
STEP 8
Insert the bolts on the underside of each Elbow
Pad (70). Next, slide the other end of the bolts
into the holes on the Handle Bar (8) and screw on
one nut (69) on each side as shown in Figure 4.
There are two holes on either side of the handle
bar (8) for elbow pad (70) adjustments.
You can choose the hole which is suitable for you
and tighten the elbow pad (70) onto the handle
bar (8).
** Tighten all bolts and nuts used in STEP 8
with the Spanner Tool (67).
STEP 9
Attach the Handle Bar (8) onto the Handle Post (6)
with one Flat Washer (61) and Knob (60) as
shown in Figure 4.
** Hand tighten ONLY.
IMPORTANT NOTE:
Please make sure all Screws, Nuts, Bolts,
Pedals and Seat are tightened in correct
position.