EasyManua.ls Logo

Maytag CME9010CAB - User Manual

Maytag CME9010CAB
27 pages
Print Icon
To Next Page IconTo Next Page
Loading...
The Quick Cook Feature
The Quick Cook feature is a short-cut method to To Quick Cook your food or beverage:
set time for 1-5 minutes. Touch a number pad (from 1 to 5) for 1 to 5 minutes
of cooking at Power Level 10. For example, touch the
_1-] _ _3-] _-] _-_ 2 pad for 2 minutes of cooking time. No need to touch _,_
START, the oven will start immediately.
_6-] _] _-] _9-] _0-_ The oven will signal and tum off automatically
when finished. _,
fltQ
How to Use Auto Start _
The Auto Start feature allows you to program your Step 2: Enter the time you want the oven to start.
oven to begin cooking at a preset time of day--up (Be sure your microwave oven clock shows the _
to a 12-hour delay, correct time of day.)
¢D
| Step 1: Touch AUTO START pad. Step 3: Enter your desired cooking program.AUTO ] Step 4: Touch START pad. The oven will
START automatically start at the desired time. The display
will show the time you entered. The time of day may
be displayed by touching the CLOCK pad.
+ 30 Seconds
The + 30 Seconds feature provides a convenient way This pad may also be used as a quick cook for 30
to extend cooking time by 30 seconds while the oven seconds of cooking. No need to touch START, the
timer is counting down. It will add 30 seconds to the oven will start immediately.
time shown each time the pad is touched.
POPCORN
Step 1: Remove the outer wrapper from the
NOTE: Do NOT use the metal shelf with the microwave popcorn.
Popcorn program. Step 2: Open oven door and place package of
popcorn in the center of the oven floor as directed by
The Popcorn feature is designed to be used only with the package instructions. Close oven door.
prepackaged microwave popcorn weighing 3.0 to Step 3: Touch POPCORN pad. No need to touch
3.5 ounces. START, the oven will start immediately.
How to Adjust the Popcorn Program to Provide a Shorter or Longer Cook Time
If your favorite popcorn is not completely popped, If your favorite popcorn is overcooked, there is a
there is a simple adjustment you can make. simple adjustment you can make.
Touch the POPCORN I Touch the POPCORN
pad. (The oven will start I
immediately.) Then touch I I_ _'_ _ _ pad. (The oven willstartimmediately.)Then touch l_
F'I
number pad 9. A plus sign [ I [.J _
wilt appear on the disp!ay signnumberwillPadappearl"aonminuSthe LJ I "_
beside the word POP . display beside the word
The plus sign indicates 20 seconds more cooking time "POP". The minus sign indicates 20 seconds less
is being provided, cooking time is being provided.
13
Question and Answer IconNeed help?

Do you have a question about the Maytag CME9010CAB and is the answer not in the manual?

Overview

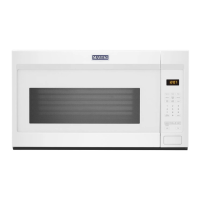
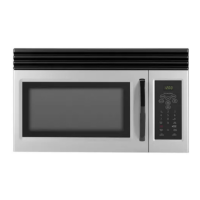
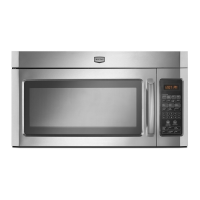
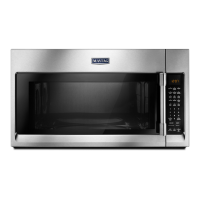
This document describes a Maytag microwave oven, focusing on its various cooking functions, operational features, and maintenance guidelines.

Function Description

The Maytag microwave oven offers a range of cooking and convenience features designed to simplify food preparation.

Quick Cook Feature: This provides a shortcut for setting cooking times from 1 to 5 minutes at Power Level 10. To use it, simply touch a number pad from 1 to 5, and the oven will start immediately without needing to press START. It signals and turns off automatically when finished.

Auto Start Feature: This allows users to program the oven to begin cooking at a preset time of day, with up to a 12-hour delay. To activate, touch the AUTO START pad, enter the desired start time, program the cooking sequence, and then touch START. The oven will automatically begin at the set time, displaying the entered time or the time of day if the CLOCK pad is touched.

+ 30 Seconds Feature: This function offers a quick way to add 30 seconds to an ongoing cooking time or to initiate a 30-second cook cycle instantly. Touching the pad adds 30 seconds to the timer, and for quick cooking, no START button press is needed.

Popcorn Feature: Specifically designed for prepackaged microwave popcorn weighing 3.0 to 3.5 ounces, this feature simplifies popcorn preparation. Users remove the wrapper, place the popcorn in the oven center, close the door, and touch the POPCORN pad. The oven starts immediately. The manual explicitly warns against using the metal shelf with this program. The popcorn program can be adjusted for shorter or longer cook times. If popcorn is under-popped, touching the POPCORN pad followed by number pad 9 adds 20 seconds, indicated by "POP+" on the display. If overcooked, touching POPCORN followed by number pad 1 subtracts 20 seconds, shown as "POP-".

Time Cook 1 and 2: These features allow for microwave cooking for a selected duration. Time Cook 1 uses automatic Power Level 10 (High) by default, but the power level can be changed. Time Cook 2 enables setting two distinct cooking functions within one program, allowing for changes in power levels during the cooking operation. This is useful for recipes requiring different power settings at various stages.

Reheat Feature: This short-term program automatically reheats previously cooked foods, turning off after a preset time. It offers codes for different food groups (e.g., pasta, meats, vegetables, beverages, sauces, plate meals) and allows for reheating multiple servings (up to three) by touching number pads 2 or 3 before START.

Cook Feature: This function automatically sets cooking times and power levels for a variety of foods based on a selected food code and weight in ounces. Users touch the COOK pad, enter the food code and weight, then START. The oven calculates and adjusts power levels for optimal cooking results.

Time Defrost (Power Level 3): Designed for speedy thawing, this feature is ideal for bread, rolls, vegetables, fruits, and frozen dinners. Power Level 3 is automatically set but can be adjusted. The process involves setting a defrosting time, often in two halves with a pause to turn the food over.

Auto Defrost Feature: This advanced defrosting function automatically sets defrosting times and power levels based on the food's weight in pounds and tenths of a pound. The oven signals twice during defrosting ("TURn" flashes) to prompt users to turn or separate the food, ensuring even thawing.

Temp Cook/Hold: This feature uses a temperature probe to cook food to a desired internal temperature. Once the preset temperature is reached, the oven automatically switches to a "Hold" setting, maintaining the temperature until the CLEAR/OFF pad is touched. This eliminates guesswork in cooking.

Auto Roast: Similar to Temp Cook/Hold, Auto Roast uses the temperature probe to cook tender roasts to a desired serving temperature. It employs up to three power settings that automatically switch during roasting, ensuring even and tender results without overcooking. The oven signals ("TURn" flashes) to prompt turning the roast.

Automatic Simmer (Auto Roast Code 4): This program brings food to 180°F and then holds it at that temperature until done. It functions similarly to Auto Roast, with the oven switching to "Hold" at 180°F.

Min/Sec Timer: This versatile timer has three functions: a kitchen timer (up to 99 minutes and 99 seconds) that operates without microwave energy, a holding period between cooking functions, and a delay timer before cooking.

Vent Fan: Controls the exhaust fan speed (HI, LO, OFF). The fan can also operate automatically to protect the oven from excessive heat from the cooktop.

Light: Controls the surface light (ON, NIGHT, OFF).

Usage Features

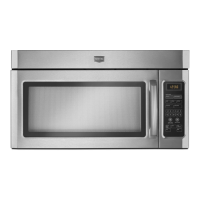
Control Panel: The touch control panel is designed for ease of use, displaying time of day, cooking time, temperature, power level, cooking mode, and instructions. Number pads are used for programming.

Door Handle and Latches: The door is opened by pulling the handle and must be securely latched for operation.

Window with Metal Shield: Allows viewing of food during cooking while containing microwaves.

Temperature Probe Receptacle: The probe must be securely inserted for temperature-based cooking functions to start.

Shelf: An accessory for cooking multiple foods simultaneously. It is recommended for cooking on two levels, with denser foods on the oven floor and lighter foods on the shelf. The manual advises against using the metal shelf with the Popcorn program or for storing/cooking with metal items on the oven floor.

Cooking Complete Reminder: For most cooking features, the oven displays "End" and beeps once a minute after cooking is complete until the door is opened or CLEAR/OFF is touched.

Automatic Fan Feature: The exhaust fan automatically turns on at a low speed if it senses too much heat from the cooktop, protecting internal components. It will turn off once the internal parts cool, which may take 30 minutes or more.

Clock Display On/Off Feature: The clock display can be turned on or off by touching the 0 number pad without affecting the actual time. This feature is unavailable during active cooking.

"PRObE" Display: This message appears if the temperature probe is not securely seated or if a probe-dependent function is selected without the probe.

Oven Floor Warmth: It is normal for the oven floor to feel warm, even when not in use, due to the cooktop lamp located directly beneath it.

Normal Operating Sounds: A dull thumping sound during operation is normal, indicating the magnetron is active. Steam or vapor escaping around the door, light reflection, and dimming oven light with changes in blower sound at different power levels are also normal. Some TV-Radio interference may occur, similar to other small appliances.

Microwaving Tips:

  • Cookware: Use microwave-safe cookware. A test is provided: place the dish and a cup of water in the oven, microwave for 1 minute at high; if the dish heats, it's not safe.
  • Covering Food: Paper towels, waxed paper, and plastic wrap can be used to retain moisture and prevent splattering. Vent plastic wrap for steam escape.
  • Stirring/Rotating: Some foods require stirring, rotating, or rearranging for even cooking.
  • Pressure Buildup: Pierce foods with tight skins (e.g., potatoes, egg yolks) to prevent bursting.
  • Meat Thermometer: Ensure any meat thermometer used is microwave-safe.
  • Storage: Do not use the oven for storage of paper products, utensils, or food.
  • Ignition: If materials inside ignite, keep the door closed, turn off the oven, and disconnect power or trip the circuit breaker.
  • Explosive Foods: Avoid heating whole eggs or sealed containers (e.g., closed jars) as they can explode.
  • Baby Food: Heat baby food in glass jars with lids off, stir thoroughly, and test temperature before feeding.
  • Frozen Beverages: Do not defrost frozen beverages in narrow-necked bottles due to pressure buildup.
  • Foil Use: Use foil only as directed, keeping it at least 1 inch away from oven sides.
  • Hot Cookware: Use pot holders for hot cookware.
  • Boiling Liquids: Foods cooked in liquids may boil over more rapidly.
  • Thermometers: Use only microwave-safe thermometers.
  • Probe Storage: Remove the temperature probe from the oven when not in use for cooking with it, as it can cause arcing and damage if microwave energy is turned on.
  • Plastic Cookware: Use microwave-safe plastics carefully, ensuring they are not subjected to overcooking or used empty. Supervise children.
  • Pork Cooking: Cook pork to at least 170°F internal temperature.
  • Boiling Eggs: Do not boil eggs in the microwave.
  • Piercing Skins: Pierce foods with unbroken outer skins to allow steam to escape.
  • Plastic Wrap: Check if plastic wrap is suitable for microwave use.
  • Spontaneous Boiling: Stir liquids briefly before removing from the oven to prevent splashing burns.
  • "Boilable" Pouches: Slit, pierce, or vent cooking pouches and tightly closed plastic bags as directed to prevent bursting.
  • Hot Foods/Steam: Be careful when opening containers of hot food, directing steam away from hands and face.

Maintenance Features

Cleaning the Inside:

  • Walls and Floor: Remove spatters with a paper towel or damp cloth. For greasy spatters, use a sudsy cloth and rinse. Do not use abrasive cleaners or commercial oven cleaners.
  • Door (inside): Wipe the window daily for spatters and wash with a damp cloth when soiled. For metal and plastic parts, wipe frequently with a damp cloth; do not use abrasives.
  • Brown 'N Sear Dish: If grease burns onto the oven tray, it can be removed with Bon Ami® cleanser, followed by thorough rinsing. Avoid using Bon Ami® on painted surfaces.
  • Automatic Temperature Probe: Clean with a sudsy cloth, rub lightly with a plastic scouring ball if needed, rinse, and dry. It can also be washed in a dishwasher.
  • Shelf: Clean with mild soap and water or in the dishwasher. Do not clean in a self-cleaning oven or use a browning dish with the shelf.

Cleaning the Outside:

  • Case: Clean with soap and a damp cloth, rinse, and dry.
  • Window: Wipe clean with a damp cloth.
  • Chrome Trim: Wipe with a damp cloth and dry towel.
  • Control Panel: Wipe with a damp cloth and dry thoroughly. Do not use cleaning sprays, large amounts of soap, water, abrasives, or sharp objects.
  • Door Surface: For surfaces where the door and oven meet, use mild, non-abrasive soaps or detergents with a sponge or soft cloth.
  • Power Cord: If soiled, unplug and wash with a damp cloth. For stubborn spots, use sudsy water, rinse, and dry thoroughly before plugging in.
  • Hood Surfaces: Clean off grease and dust often with warm water and detergent, optionally adding ammonia (avoid contact with filters and enamel surfaces as it may darken metal).

Light Bulb Replacement:

  • Cooktop Light/Night Light: Disconnect power. Remove the screw on the right side of the light compartment cover and lower the cover. Gently unscrew the old 40-watt incandescent bulbs (ensure they are cool) and replace them.
  • Oven Light: Disconnect power. Remove the top grill by unscrewing two screws. Remove the single screw above the door securing the light housing. Replace the burned-out bulb with a 30-watt incandescent bulb.

Exhaust Feature Maintenance:

  • Reusable Grease Filters: Clean at least once a month. Never operate the microwave without filters. To remove, grasp the "finger hold," slide to the rear, and pull downward and front. To clean, soak and agitate in hot water and detergent (no ammonia). Brush if needed, rinse, shake, and dry. To replace, slide the filter into the frame slot on the back, pull upward and front to lock.

Grounding Instructions:

  • The appliance must be grounded to reduce electric shock risk. It is equipped with a 3-prong grounding plug that must be plugged into a properly installed and grounded outlet.
  • Do not use adapter plugs or extension cords. Consult a qualified electrician if grounding instructions are unclear.

Installation:

  • The microwave oven is UL listed for installation above regular gas and electric ranges and cooktops.
  • It can be vented to the outside or non-vented (requiring a Charcoal Filter Kit).
  • Not recommended for use above grill ranges/cooktops requiring updraft ventilation.

Maytag CME9010CAB Specifications

General IconGeneral
TurntableYes
ColorBlack
Pre-programmed SettingsYes
Child LockYes
Control TypeElectronic
Cooking ModesSensor Cooking, Defrost, Reheat
Dimensions17.3 x 10.2 x 14.1 inches
Exterior Dimensions17.3 x 10.2 x 14.1 inches

Related product manuals