Do you have a question about the Maytag MHW8630HC and is the answer not in the manual?
Explains safety symbols, DANGER, and WARNING terms for user safety.
Lists required tools and parts needed before starting the washer installation process.
Details requirements for water, electrical, floor, and temperature conditions for proper installation.
Describes different drain system setups including floor, wall, and laundry tub configurations.
Covers electrical hazards, grounding instructions, and outlet requirements for the washer.
Instructions for safely moving the appliance to its installation location.
Steps for removing transport bolts and connecting the drain hose to the washer.
Steps for connecting water inlet hoses and flushing lines to prevent clogs.
Intermediate checks for leaks and securing the drain hose before leveling.
Steps to ensure the washer is level and stable by checking foot contact.
Steps to adjust and secure the washer's leveling feet for proper stability.
Checklist to confirm all installation steps are complete before operating the washer.
Details connection types, user responsibilities, and grounding instructions for dryers.
General safety information, including hazard warnings and precautions for dryer operation.
Specific warnings regarding fire and explosion hazards, including gas safety.
Lists required tools and parts needed before starting the dryer installation process.
Details requirements for dryer location and potential hazards like explosion or fire.
Details connection types, user responsibilities, and grounding instructions for US dryers.
Details electrical connection and grounding requirements for dryers in Canada.
Details electrical connection and grounding for gas dryer power hookup.
Covers recommended and alternate gas supply line methods and connection requirements.
Steps for preparing the dryer and attaching its leveling legs for stability.
Guides users to select between power supply cord or direct wire connection methods.
Steps for attaching the power supply cord strain relief and connecting the power cord.
Steps for connecting the neutral ground and neutral wires for a 4-wire connection.
Completes the 4-wire power supply connection by attaching ground and remaining wires.
Steps for connecting the neutral and remaining wires for a 3-wire power supply cord.
Steps for attaching the strain relief and direct wire cable to the dryer.
Steps to prepare the 4-wire cable and connect ground and neutral wires.
Completes the 4-wire direct wire connection by attaching ground and remaining wires.
Steps to prepare the 3-wire cable for direct connection.
Steps for connecting neutral and external ground wires for a 3-wire connection.
Steps to connect the gas supply line and test all connections for leaks.
Covers exhaust hood types, materials, elbows, and clamp usage for proper dryer venting.
Guides on selecting the vent path and determining length based on elbows used.
Steps for installing the exhaust hood and connecting the dryer vent to it.
Steps to connect inlet hoses to the dryer's fill valve for steam models.
Steps to connect the dryer vent to the outlet and move the dryer to its final location.
Steps to adjust and secure the dryer's leveling legs for proper operation.
Checklist to confirm all dryer installation steps are complete before use.
Steps for disconnecting wiring and removing the dryer door for reversal.
Steps to remove and reinstall the door latch and hinge components.
Steps to reinstall the hinge and rotating assembly on the opposite side of the door.
Steps to reassemble the dryer door and reconnect any necessary wiring.
Steps to remove the door, strike, and inner door components for square-shaped doors.
Steps to reassemble door components and attach the door back to the dryer.
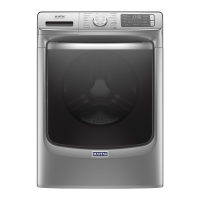
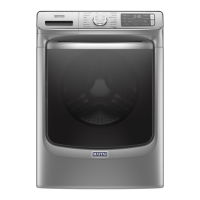
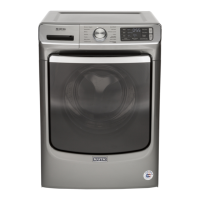
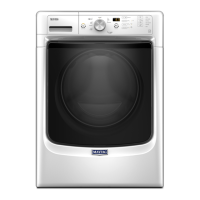
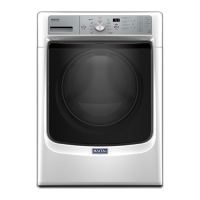
| Style | front load |
|---|---|
| Color | metallic slate |
| Washer Capacity | 5 cu. ft. |
| Max Spin Speed | 1, 160 |
| Spin Speeds | 5 |
| Number of Cycles | 14 |
| Cycle Selections | normal; heavy duty; whites; towels; bulky items; delicates; quick wash; wrinkle control; drain & spin; clean washer with affresh; colors; sanitize; overnight wash & dry (12hr); custom cycle |
| Options | steam clean; delay wash; remote enable; extra power /boost option |
| Temperature Settings | 5 |
| Temperature Selections | cold; cool; warm; hot; extra hot |
| Soil Levels | 4; extra heavy; normal; heavy; light |
| Internal Heater | yes |
| Control Panel | knobs |
| Steam | yes |
| Add Wash | yes |
| Soak Settings | no |
| Remote Control | yes |
| Wi-Fi | yes |
| Electrical Requirements | 120v/60hz |
| Voltage | 120 volts |
| Current | 15- or 20- a; 20 |
| Depth | 32 15/16 inch |
|---|---|
| Height | 38 5/8 inch |
| Width | 27 inch |
| Net Weight | 230 lbs. |