EasyManua.ls Logo

Maytag MMV1153AAW User Manual

Maytag MMV1153AAW
19 pages
To Next Page IconTo Next Page
Page #1 background imageLoading...
Page #1 background image
iiiiiiiiiiiiiiiiiiiiiiiiiiiiiiiiiiiiiiiiiiiiiiiiiiiiiiiiiiiiiiiiiiiiiiiiiiiiiiiiiiiiiiiiiiiiiiiiiiiiiiiiiiiiiiiiiiiiiiiiiiiiiiiiiiiiiiiiiiiiiiiiiiiiiiiiiiiiiiiiiiiiiiiiiiiiiiiiiiiiiiiiiiiiiiiiiiiiiiiiiiiiiiiiiiiiiiiiiiiiiiiiiiiiiiiiiiiiiiiiiiiiiiiiiiiiiiiiiiiiiiiiiiiiiiiiiiiiiiiiiiiiiiiiiiiiiiiiiiiiiiiiiiiiiiiiiiiiiiiiiiiiiiiiiiiiiiiiiiiiiiiiiiiiiiiiiiiiiiiiiiiiiiiiiiiiiiiiiiiiiiiiiiiiiiiiiiiiiiiiiiiiiiiiiiiiiiiiiiiiiiiiiiiiiiiiiiiiiiiiiiiiiiiiiiiiiiiiiiiiiiiiiiiiiiiiiiiiiiiiiiiiiiiiiiiiiiiiiiiiiiiiiiiiiiiiiiiiiiiiiiiiiiiiiiiiiiiiiiiiiiiiiiii!!__
Installation Instructions
Contents
Important Safety Information ................ 2
Parts, Tools, Materials ..................... 6
STEP 1: Prepare The Electrical Connection .. 8
STEP 2: Prepare The Venting System ....... 9
STEP 3: Prepare The Venting Blower ....... 1 1
STEP 4: Prepare The Wall & Upper Cabinet
For Installation ................... 13
STEP 5: Install The Mounting Plate ......... 15
STEP 6: Attach The Oven To The Walt ..... 17
Electric Microwave
Keep instructions for future reference.
Be sure manual stays with microwave.
Part No. 8101 P632-60
3828W5U0337
(08-02-01)

Other manuals for Maytag MMV1153AAW

Question and Answer IconNeed help?

Do you have a question about the Maytag MMV1153AAW and is the answer not in the manual?

Maytag MMV1153AAW Specifications

General IconGeneral
BrandMaytag
ModelMMV1153AAW
CategoryMicrowave Oven
LanguageEnglish

Summary

Important Safety Information

Precautions to Avoid Excessive Microwave Energy

Specific warnings to avoid harmful exposure to microwave energy during operation.

General Cautionary Advice

Advice to prevent personal injury or property damage, including handling liquids and food.

Important Safety Information

General Warning for Electrical Equipment

Basic safety precautions when using electrical equipment to reduce risks.

Oven Cavity Fire Risk Reduction

Precautions to take to reduce the risk of fire within the microwave oven cavity.

Important Safety Information

FCC Radio Frequency Interference Statement

FCC statement regarding radio and television interference from microwave equipment.

Grounding Instructions

Essential instructions for grounding the microwave oven to reduce electric shock risk.

Parts, Tools, Materials

STEP 1: Prepare The Electrical Connections

STEP 2: Prepare The Venting System

Venting Options

Details the three available venting methods: roof, wall, and room venting.

Venting Installation Reminders

Key points to remember for efficient and proper installation of the venting system.

STEP 2: Prepare The Venting System

Standard Venting Fittings

Lists standard ductwork fittings and their equivalent lengths for system calculation.

Duct Length Considerations

Explains limitations on total duct system length and elbow usage for optimal performance.

STEP 3: Prepare The Venting Blower

Before You Start Installation

Initial steps to take before proceeding with blower preparation and installation.

STEP 3: Prepare The Venting Blower

Root-Vented Installation Procedures

Specific steps for preparing the blower unit for a root-vented installation.

STEP 4: Prepare The Wall & Upper Cabinet

Measure and Template Mounting Location

Guidance on measuring and marking the wall and upper cabinet for mounting plate placement.

Mounting Plate Alignment

Instructions for aligning the mounting plate with wall studs and cabinet structure.

STEP 4: Prepare The Wall & Upper Cabinet

Drilling Holes for Installation

Instructions on drilling necessary holes in the wall and upper cabinet for mounting and venting.

STEP 5: Install The Mounting Plate

STEP 5: Install The Mounting Plate

Wall-Vented Installation Cutout

Steps for creating the box cutout in the rear wall for a wall-vented installation.
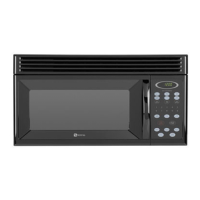
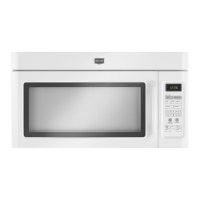
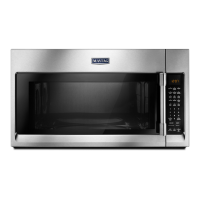
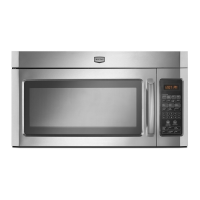
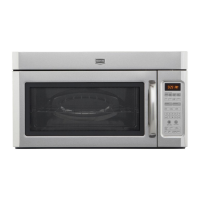
STEP 6: Attach The Oven To The Wall

STEP 6: Attach The Oven To The Wall

Related product manuals