STEP 6: Attach The Oven To The Wall
18
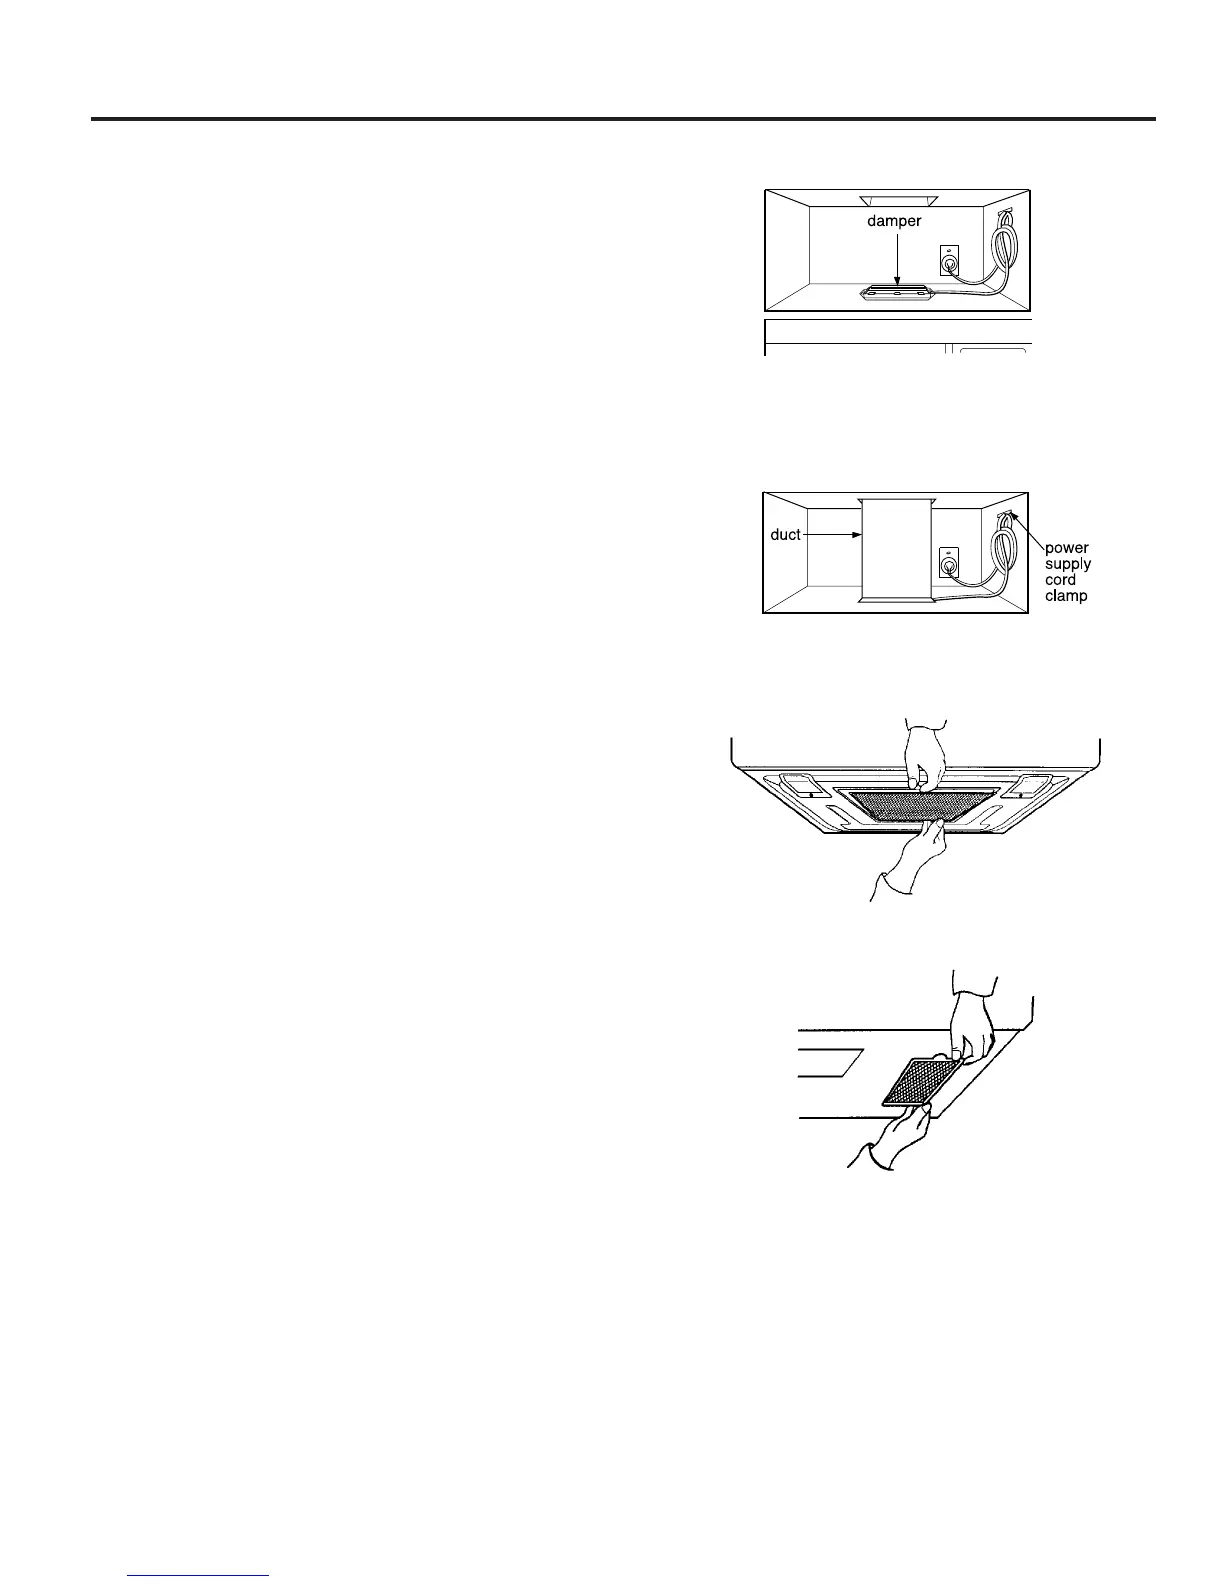
5. Roof venting installation: See Figure 33.
Install ductwork through the vent opening in the
upper cabinet. Complete the venting system through the
roof according to the method needed. See
"
Prepare The
Venting System
"
STEP 2.
Use caulking gun to seal the exterior roof opening
around the exhaust cap. See Figure 6 on page 9.
6. Use the power supply cord clamp to bundle the power
supply cord. Install the power supply cord clamp, using a
screw as shown in Figure 34, to inside of the cabinet.
7. Grasp filter screen with one hand holding the ring and
the other hand holding the opposite end. Insert the end
of the filter screen without ring into the opening and slide
towards the side of the microwave oven. Insert ring end
of filter screen into the opening and slide entire screen
towards the center of the microwave until screen is
securely in position. Repeat for other filter screen. See
Figure 35.
8. Plug in the power supply cord.
9. Read your Owner’s Manual, then check the operation of
your microwave oven.
Figure 33
Figure 34
Figure 35
 Loading...