HEAD IMPACT PAD
HEAD IMPACT PAD REMOVAL/INSTALLATION
1. Remove the following parts:
a. Roof side trim(See ROOF SIDE TRIM REMOVAL/INSTALLATION .)
b. A-pillar trim(See A-PILLAR TRIM REMOVAL/INSTALLATION .)
c. Rear seat(See REAR SEAT REMOVAL/INSTALLATION .)
d. Inner scuff plate(See INNER SCUFF PLATE REMOVAL/INSTALLATION .)
e. Tire house trim(See TIRE HOUSE TRIM REMOVAL/INSTALLATION .)
f. Rear pillar trim(See REAR PILLAR TRIM REMOVAL/INSTALLATION .)
g. Map light(See MAP LIGHT REMOVAL/INSTALLATION .)
h. Interior light(See INTERIOR LIGHT REMOVAL/INSTALLATION .)
i. Sunvisor(See SUNVISOR REMOVAL/INSTALLATION .)
j. Assist handle(See ASSIST HANDLE REMOVAL/INSTALLATION .)
k. Headliner(See HEADLINER REMOVAL/INSTALLATION .)
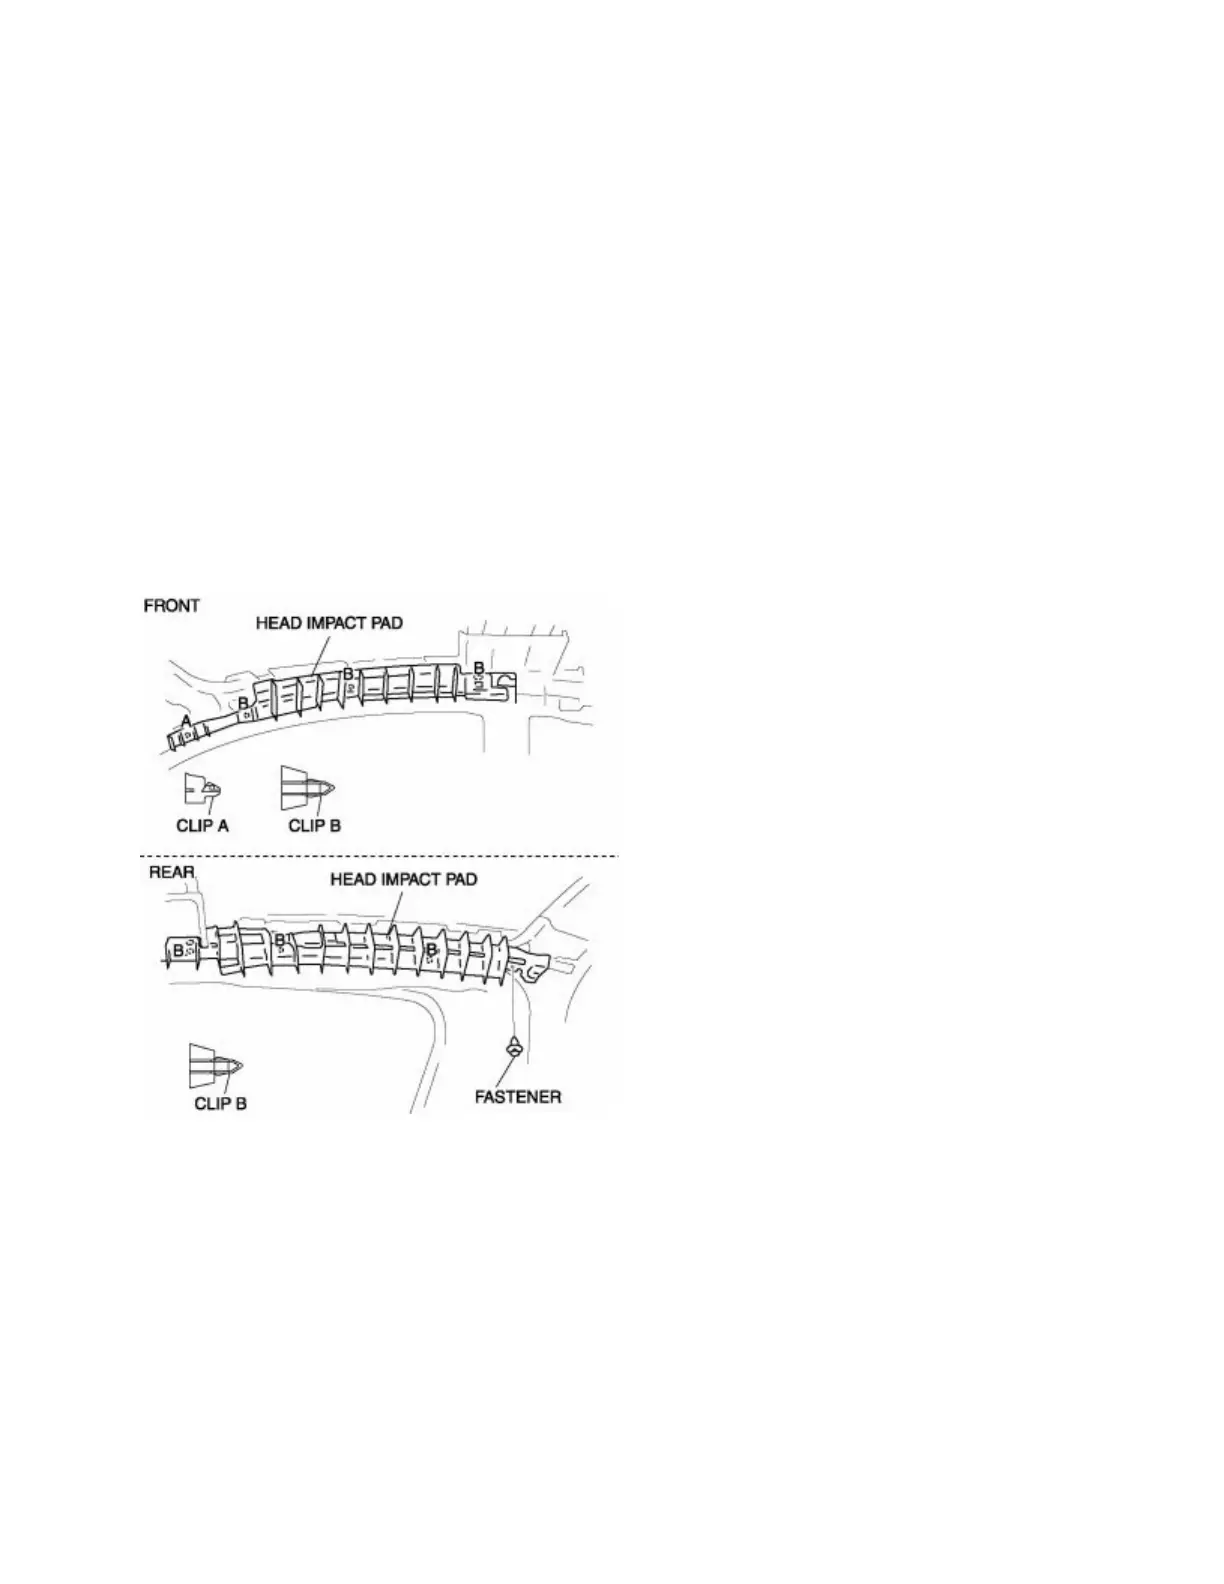
2. Remove the fastener.(Rear)
3. Pull the head impact pad outward and detach clips A and B.(Front)
4. Pull the head impact pad outward and detach clips B.(Rear)
5. Remove the head impact pad.
6. Install in the reverse order of removal.
HEADLINER
HEADLINER REMOVAL/INSTALLATION
1. Disconnect the negative battery cable.
2. Partially peel back the seaming welt.
3. Remove the following parts:
a. Roof side trim (See ROOF SIDE TRIM REMOVAL/INSTALLATION .)