F and G. LOUD (loudness) and BALANCE (concentric controls)
BALANCE control, (large outer knob), adjusts the volume of the channels relative to each
other. The BALANCE control affects only the MAIN, SWITCHED 1 and 2, and BALANCED (Area
A) outputs.
L, (Left): Turn the control to the left to accent the left channel by reducing the volume
of the right channel.
R, (Right): Turn the control to the right to accent the right channel by reducing the volume
of the left channel.
LOUDness control, (small inner knob), provides frequency response contoured to compen-
sate for the behavior of the human ear at softer listening levels. At the fully counterclockwise
detent position, the frequency response is perfectly flat and the loudness circuit components
are removed from the signal path. Turn the control clockwise to modify the frequency response
in the correct proportion required for softer listening levels. The compensated frequency
response is not affected by changes in the volume control settings. First adjust the volume
for the desired listening level, then adjust the Loudness Control to the setting you personally
prefer.
The Loudness Control affects only the MAIN, SWITCHED 1 and 2, and BALANCED (Area
A) outputs.
NOTE: The flat frequency response setting of the LOUDness Control is at the fully COUNTER
CLOCKWISE position, not at the center or 12 o'clock position where the Balance Control is
neutral.
THE SIX PUSHBUTTONS ARE PRESS AND RELEASE, WITH RED LED INDICATORS TO SHOW
THE SELECTED OPERATING MODES.
H. RECord LOCK
Press the RECord LOCK button to temporarily disable the Area B IR sensor so the unit
cannot be controlled by the Hand Held HR38. An example of this feature allows the C38 to
be set up to record a program on tape, without danger of someone accidentally changing
the previously made settings. The red LED above the pushbutton will blink on and off to in-
dicate the RECord LOCK function is operating.
I. MONOphonic
Press the MONO button to add the left and right channel signals together for mono opera-
tion. The MAIN, SWITCHED 1 and 2, and BALANCED (Area A) outputs will all be mono. A
red LED above the MONO pushbutton will light to indicate the MONO mode of operation.
MONO operation does not affect the TAPE and Area B outputs, which are always stereo.
J. MUTE
Press the MUTE button to turn off the signals at the MAIN, SWITCHED 1 and 2, and
BALANCED (Area A) outputs. A red LED above the MUTE pushbutton will blink on and off
to indicate signals are muted. Press MUTE again to restore normal sound. The TAPE and Area
B outputs are not affected by the front panel MUTE pushbutton.
Area B can be muted by pressing the MUTE pushbutton on the HR38, when in Area
B, and transmitting to the IR sensor located in that area.
K. HEADPHONES
Plug in a pair of low impedance dynamic headphones to this jack for headphone listening.
L. SPEAKERS 1 AND 2
Press SPEAKERS 1 to turn on the rear panel SWITCHED 1 OUTPUT jacks. These out-
puts allow you to switch C38 signals to other power amplifiers or accessories. Press the push-
7
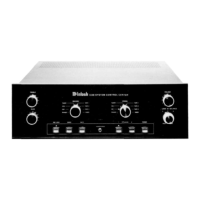
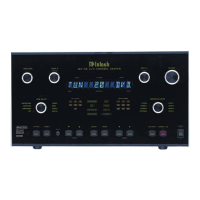
FRONT PANEL
CONTROLS,
SWITCHES
AND
PUSHBUTTONS
 Loading...