3
border of the top center edit window.
Note: When naming a new file, please keep in mind
the file name will become the Voicing Name
as indicated on the MEN220 Front Panel
Information Display. The Information Display
is designed to display Voicing Names of eight
characters or less.
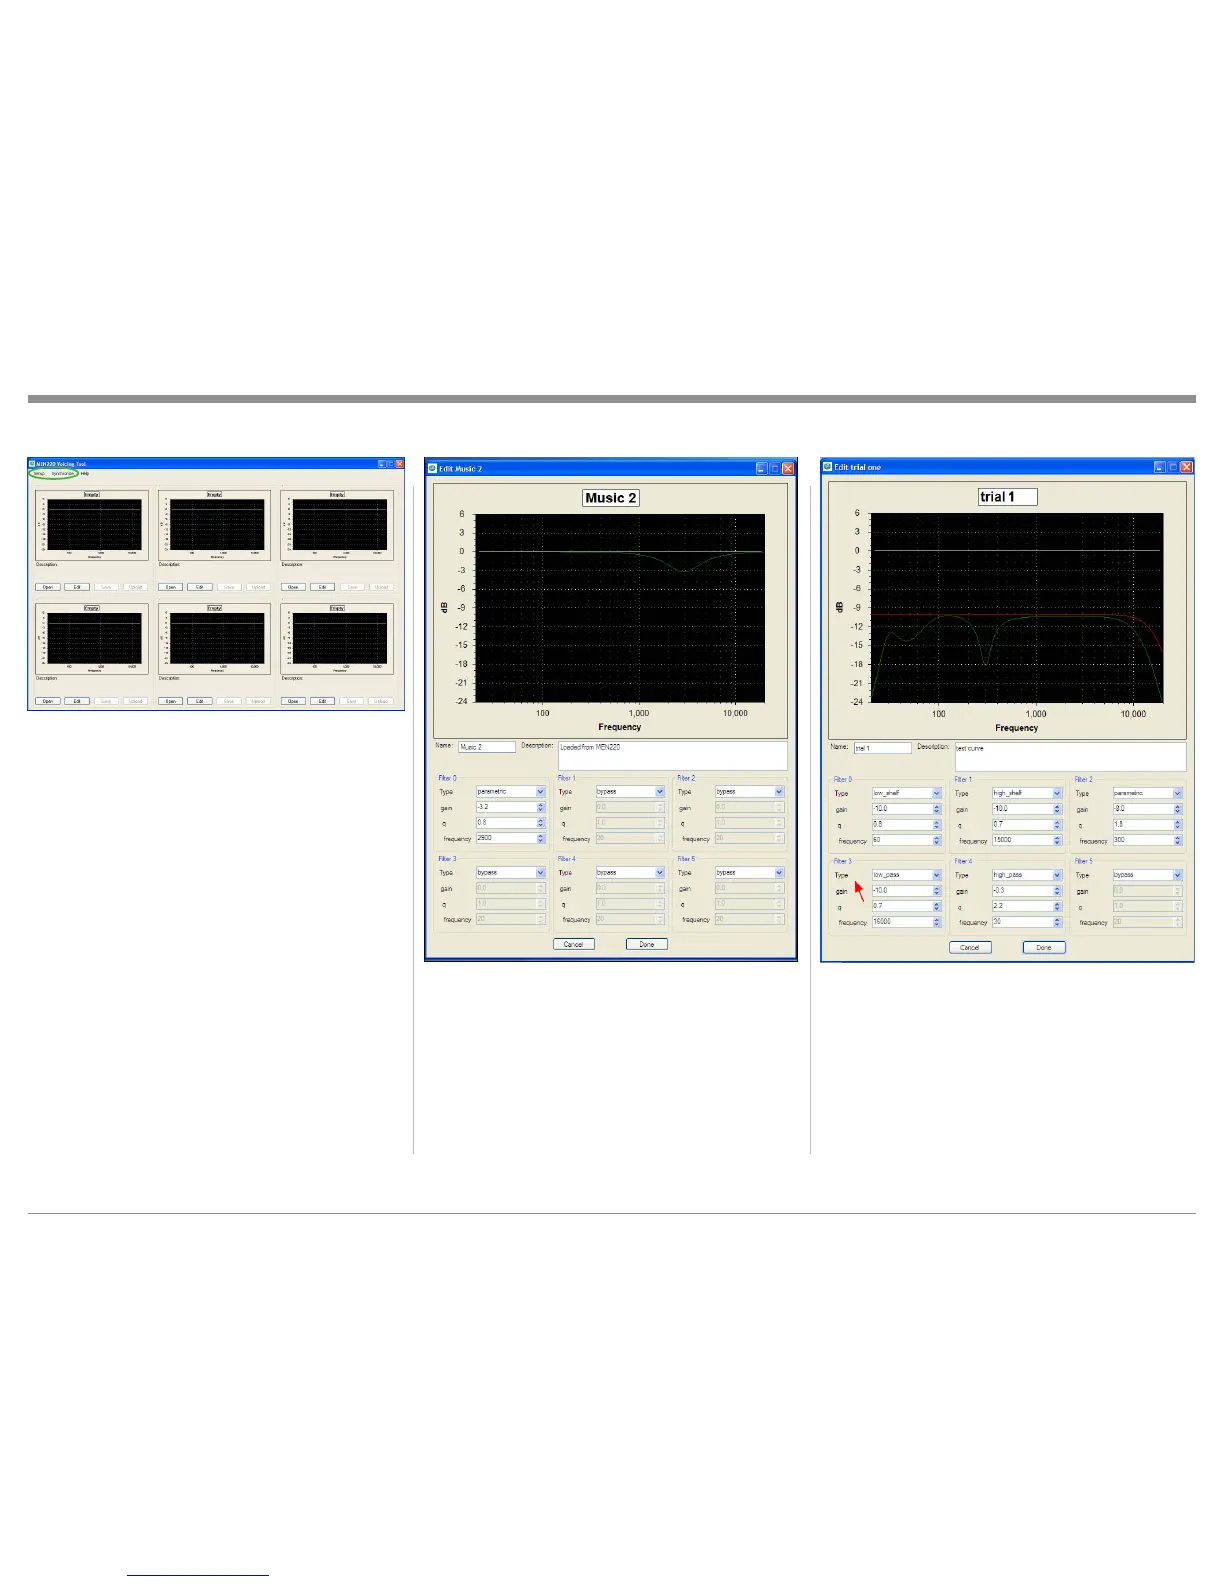
There are up to six adjustment settings for each of the
MEN220 Voicing Settings (1-6). The basic filter types
of adjustment include the following:
A. Low_Shelf
4. Select the “Synchronize” then “Download all from
MEN220”. Refer to figure 3 and the larger image
on the first page of this guide.
Editing an Equalization Curve
Each one of the six default equalization curves may be
edited and uploaded back to the MEN220. Any new
equalization curve may also be saved on the computer
for later recall and/or uploaded to another MEN220. In
the following steps the default “Music 2” equalization
curve will be changed to become the “trial 1” curve:
1. Click on the EDIT Push-button and a new Window
will open. Refer to figure 4.
2. Click on the SAVE Push-button to save a copy of
the current default MUSIC 2 equalization curve.
The name of the just saved file (MUSIC 2. XML)
will now appear within the gray border of the MU-
SIC2 Edit Window.
3. Click on the EDIT Push-button and a new Window
for editing Music 2 the current equalization curve.
4. Click on the SAVE Push-button to save a new file
with the name of “trial 1”. The name of the just
saved file (trial 1) will now appear within the gray
Creating Custom Voicing Curves
Figure 3
Figure 4
B. High_Shelf
C. Parametric
D. Low_Pass
E: High_Pass
There are variable adjustments for each filter type,
including “gain”, “q” and “frequency”. In the follow-
ing example all five filter types will be used for the
purpose of graphic illustration. It is not intended to
be used for actual listening, as it would not reproduce
desirable sonic results. Refer to figure 5.
Figure 5
 Loading...