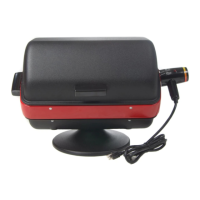
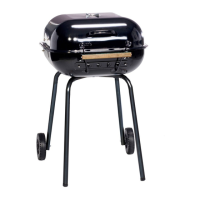
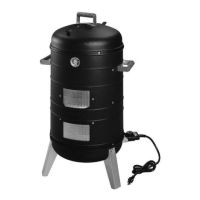
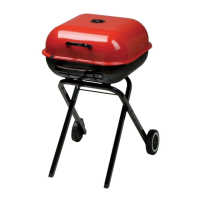
This document is the Owner's & Operator's Manual for the MECO 9300 Series Electric Barbecue Grill, P/N 03.5874.00, REV. 5/99. It provides comprehensive instructions for assembly, operation, maintenance, and safety for outdoor household, non-commercial use.
Function Description:
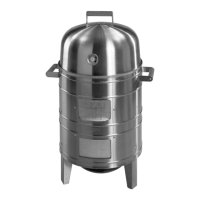
The MECO 9300 Series Electric Barbecue Grill is designed for outdoor cooking, offering a convenient and energy-efficient alternative to traditional charcoal or gas grills. It utilizes an infrared reflectivity concept to save energy and provide a characteristic outdoor barbecue taste by searing and burning dripping fats. The grill is capable of cooking various foods, from steaks and hamburgers to large roasts and poultry, with precise temperature control. It eliminates the need for lava rock, lighter fluids, or fuel cylinders, offering a cleaner and more user-friendly grilling experience. The grill can be used for direct cooking, indirect cooking (with a drip pan), and rotisserie cooking (with an optional kit).
Important Technical Specifications:
- Power: Operates on a 110-120V outlet with at least 15A capacity.
- Heating Element: Vertical element design for even cooking and flare-up prevention during rotisserie use.
- Temperature Control:
- Control Knob: Variable heat control with settings from SETTING 1 (keep warm/low) to SETTING 3 (searing steak/high).
- Dual Level Position: Allows for lower temperatures at the front of the cooking grid and higher temperatures at the back, enabling simultaneous cooking of foods requiring different temperatures.
- Hinged Hood: Can be closed for higher temperatures and smoky flavor (when using wood chips) or left open to allow heat and smoke to escape.
- Construction: High-quality steel forms and tubing, coated with MECO's Dura Fuse™ powder finish for durability.
- Cooking Grid: Porcelain coated.
- Reflector Pan: Energy-efficient, designed to drain drippings and prevent flare-ups while allowing some drippings to burst into small flames for flavor.
- Grease Management: Features a grease cup or pan holder underneath a grease drain hole at the back of the grill. Disposable aluminum drip pans are recommended for large turkeys or roasts.
- Rotisserie: Optional rotisserie kit accommodates cuts up to nine inches in diameter (approximately a twelve-pound turkey).
- Dimensions/Capacity: "Dramatic new shape" designed to fit various outdoor spaces, capable of cooking enough filet mignon to serve 16 people.
Usage Features:
- Quick Start: Ready to cook in less than ten minutes.
- Preheating: Recommended for at least five minutes (longer if outside temperature is below 68°F) for steaks and hamburgers. Other foods can be cooked without preheating, but five minutes should be added to the total cooking time.
- Cooking Methods:
- Direct Method: For foods requiring high heat and short cooking times (e.g., steaks, chops, chicken pieces).
- Indirect Method: For large roasts and poultry requiring low heat and long cooking times. Involves using an aluminum drip pan between the element and the meat.
- Rotisserie Cooking: For larger pieces of meat and poultry, using the optional rotisserie kit.
- Flavor Enhancement: Marinades can be used to tenderize and flavor meats. Barbecue sauces should be applied during the last 10-15 minutes of cooking to prevent burning. Combination butters (e.g., butter with lemon peel or garlic) can be used for chicken, fish, and steaks. Smoke flavor can be added by soaking hickory, mesquite, apple, cherry, or other aromatic wood chips in water and scattering them around the reflector with the hood closed.
- Flare-up Control: In case of excess flare-up from fatty meats, turn the control knob to SETTING 1 and shut the hood to quickly extinguish flames. DO NOT USE WATER TO PUT OUT FLAMES.
- Meat Thermometer: Always use a meat thermometer for checking doneness, especially for indirect cooking.
- Resting Time: Large roasts and poultry should rest for about twenty minutes after cooking to allow internal temperature to rise and meat to firm up.
- Portability: Cart models include wheels (roller legs) for easy movement.
- Side Tables: Some models include wood side tables and utensil hooks for convenience, which can be folded down for storage.
- Window (9300W Series Grills): Allows viewing of food during cooking. Made of heat-resistant tempered glass.
Maintenance Features:
- Cleaning After Each Use:
- Move Handle Control to ROTISSERIE position and turn Control Knob to SETTING 3 for about ten minutes to drain excess drippings into the bottom bowl.
- Empty the grease cup.
- Reflector Pan Cleaning:
- Remove Cooking Grid.
- Rotate Handle Control counterclockwise to "Remove Reflector" position and lock the Rotisserie Lock.
- Pinch the bottom element coil and Reflector Pan with thumbs and first two fingers.
- Push Reflector Pan up off support brackets.
- Slide Reflector Pan up from the rear of the bowl.
- Wash with water and dish detergent.
- To reinstall, slide the Reflector Pan down between the element and back of the bowl, pushing it down over support brackets and squeezing against the pan and top element coil.
- Grill Interior Cleaning: Clean with a soft cloth and hot soapy water or a strong cleaner. DO NOT USE OVEN CLEANER OR ABRASIVE SCOURING POWDERS, as this may remove the paint. Rinse and dry.
- Exterior Cleaning: Wipe with a soft cloth and a mild detergent and water solution. Rinse and wipe dry.
- Window Cleaning (if applicable): To remove glass for cleaning, reverse installation steps. Wash with warm soapy water and a scouring pad for stubborn spots. Dry with a soft towel. Avoid dropping water on hot glass.
- Storage: Store the grill in a dry, sheltered place. Use a cover if storing outdoors to preserve its appearance.
- Part Replacement: If the cord, element, or control is damaged or worn, it must be replaced by an authorized service facility using an electric replacement kit (MODEL NO. 1099). Do not attempt to repair yourself.
Safety Precautions (Highlights):
- Always read all instructions and warning labels before use.
- Intended for outdoor household, non-commercial use only.
- Never touch hot surfaces; use tongs, gloves, or mitts.
- Open hood carefully to avoid burns from hot air/steam.
- Wear appropriate clothing (no hanging shirt tails, frills, or apron strings).
- Use long-handle barbecue utensils.
- Never immerse cord, plugs, or heating element in water.
- Unplug when not in use, before cleaning, or adding/removing parts.
- Allow grill to cool before cleaning.
- Never operate with damaged electrical components.
- Do not use accessory attachments not recommended by MECO.
- Secure electrical supply cords during operation.
- Never let cord touch hot surfaces.
- Close hood before moving.
- Never move a hot grill or leave unattended.
- Only move grill when UNPLUGGED.
- Never use in rain, sleet, or snow.
- Never use near combustible or flammable materials.
- Use baking soda for grease fires; have a fire extinguisher available.
- Attach plug to appliance first, then wall outlet. Turn control knob(s) to OFF before unplugging.
- Avoid longer detachable power supply cords or extension cords; if used, they must be of the same type/rating as the appliance cord, kept dry, off the ground, and as short as possible.
- Store out of reach of children.
- Keep bystanders out of the grilling area.
- WARNING! DO NOT USE CHARCOAL IN AN ELECTRIC GRILL.
- Never use in trailers, tents, houses, garages, or any enclosed area due to carbon monoxide risk. Always use in a well-ventilated area.