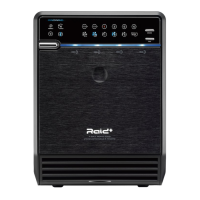
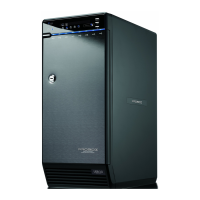
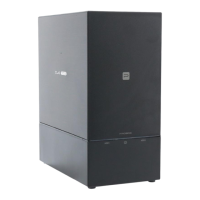
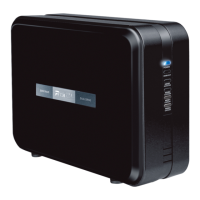
RAID HDD Enclosure
*SATA III at 3.0 Gbps SATA II speed
USB 3.0 + e-SATA
For 3.5'' SATA HARD DRIVE
with RAID 0/1/3/5/10 functions
How To Set Up Your Array│Contents│Quick Installation
RAID Mode Setup│Initialization│Troubleshooting
Quick Installation Guide
Office website
www.mediasonicusa.com http://forum.mediasonic.ca/
Online forum
HFR2-SU3S2
/ Rev.1.7
Press and hold
1
Quick Installation RAID Mode Setup
Initialization
How To Set Up Your Array
Please decide on which RAID you wish to build and prepare the
right amount of hard drives for your array.
Plug in your USB or eSATA cable and power cord.
Connect USB or eSATA cable to a computer and power on the
enclosure.
Press and hold the "MODE" button, located at the top right corner
of the display panel, for 3 seconds until the RAID icon flashes.
Select the RAID you wish to build by clicking on the mode button
while the RAID icon is flashing. (Your RAID selection will be
signal by the flashing RAID icons)
Before the RAID icon stops flashing, you need to press and hold
on the "RAID confirmation button" at the rear end of the unit.
(See "SETUP")
"RAID confirmation button" is hidden behind the enclosure
with a small dust cover. Find that before you start set up.
1.
2.
3.
4.
5.
6.
Please use the provided handles to secure
the 4 HDDs with screws.
Press the circular depression to open the cover.
3.5 HDD
Make sure the HDD is securely installed first at all times.
Otherwise the PC may not recognize the device.
When using RAID function, HDDs with the same brand,
model and capacity is strongly recommended.
1
2
Press down the 2 tabs to detach the metal frame
and remove it.
3
Take the transport paper board
out of the device.
4
Slide 4 HDDs into the chassis
and make sure they are
securely installed
in order from top
to bottom.
5
Reinstall the metal frame that was removed in Step 3.
Please make sure the bottom of the frame stays inside
the track before closing the cover.
6
Connect the power supply to the device, plug in either USB
or eSATA cable in the rear panel and power on the device.
Make sure computer is ON.
7
SINGLE
RAID 0 SPN, RAID 0 STR
RAID 1
RAID 3
RAID 5
RAID 1+0
1-4 HDDs
2-4 HDDs
2 HDDs only
3-4 identical HDDs only
3-4 identical HDDs that are rated for RAID 5
4 identical HDDs
7.
8.
9.
10.
11.
12.
13.
Press and hold the "RAID confirmation button" key until the
enclosure shuts off.
Power on the enclosure again and wait for 20 seconds.
Go to disk management to initialize, partition and format your
array hard drives.
If you have more than 2TBs of hard drive volume, please select
GPT when initializing the drive.
Your array is set to go after partition and formatting.
NTFS has volume size limit based on different cluster size setting.
We suggest user to set cluster size as 64K when formatting a disk
volume over 2TB. For more information, please check Microsoft
Support. (http://support.microsoft.com/kb/302873)
Contents
Main Device x
1
USB 3.0 Cable x
1
eSATA Cable x
1
Power Adapter x
1
Please make sure the bottom of
the "frame stays inside" the track.
Quick Installation Guide x
1
CD(User’s Manual) x
1
Screws for 3.5" HDD x
8
Power Cord x
1
Screw Driver x
1
HDD Handle x
4
There are several mode options for HFR2-SU3S2,
RAID 0 (Spanning), RAID 0 (Stripping), RAID 1, RAID 3, RAID 5
and RAID l 0.
The enclosure is NOT default to any of the above. So If you just
put hard drives in without setting a mode to use, the enclosure
will just turn off after a few seconds of turning it ON.
When using RAID function, HDDs with the same brand,
model and capacity is strongly recommended.
1. First install the HDD from up to down in the enclosure. Make
sure the PC is ON and ready to go, then power on the device.
Press
Front panel
Orange / active
2. The setup procedures are as follows:
Press and hold "MODE"button on the front until mode
option LED flashes then let go of "MODE"button.
•Changing RAID mode may cause data lost, backup your
data before making changes.
•Do not use hard drives containing data to create a RAID array.
•The RAID confirmation button is hidden in the back,
so please find it first before you start.
•If using a new hard drive or change the RAID disk array mode.
All need to format the hard disk, please refer to
"hard disk partitioning and formatting".
Press
A
Default setting is at "RAID 5"
Front panel
Front panel
Back panel
Orange/Flash
2
Orange/Flash
Press"MODE"button again and again until it lands
on the raid mode you wish to use,
B
Power on the device again and the RAID mode set-up
is completed. Now you just need to partition and format
the drives.
Press the button and hold it still
D
C
Then press and hold the "RAID mode Confirmation button"
in the back of the device until enclosure shuts down.
The RAID confirmation button is hidden in the back,
so please find it first before you start.
Press
Front panel
Orange
Single
RAID 0
(Spanning)
RAID 0 (Striping)
RAID 1 (Mirroring)
RAID 3
RAID 5
RAID I0
HDD installed qty
RAID Matrix Limit Table
: Supported : N/A
RAID Mode
HDDx1 HDDx2 HDDx3 HDDx4
Windows
If the HDD is uninitialized, you may have to initialize
it by doing steps as followed:
At first click ''Start'', ''Execute''
on your PC and key in ''diskmgmt.msc''.
After that please press ''Return'' key.
1. Start disk initialization
3. HDD format completed
2. Create new partition and format disk
Mac OS X 11.6.1 or later
1. Click ''Disk Utility'' icon.
2. HDD initialize...
3. Click ''Erase''
2
3
1
4. HDD format in process
5. Format completed
1
2
Troubleshooting
RAID MODE : RAID 1, RAID 3, RAID 5
When one HDD has error, the device still functions
well but you may have to replace it with a new
one immediately.
1.
2.
3.
4.
5.
6.
7.
Changing RAID mode may cause data lost, backup your data
before making changes.
Do not use hard drives containing data to create a RAID array.
Please refer to the instructions when switching the RAID mode,
otherwise the execution might fail.
When using RAID function, HDDs with the same brand,
model and capacity is strongly recommended.
When using RAID function, more than one HDD partition
is not recommended.
In RAID 1, HDD1 and HDD2 must be installed, otherwise the
PC (Windows / Macintosh) can not recognize the device.
The chart below tells you that the device still functions when
one HDD has error.
RAID 10
1. When one HDD has error, the device still functions well but
you may have to replace it with a new one immediately.
2. The chart below tells you that the device still functions
when two HDDs have error.
RAID MODE (RAID 10)
If 2 hard disks are down at the same time,
can I get the data back?
Error1
Error
Error
NG
Error2
Error
Error
OK
Error3
Error
Error
OK
Error4
Error
Error
OK
HDD 1
HDD 2
HDD 3
HDD 4
Status of device
Error status
HDD No.
Power light : Orange / Hibernate
Front panel
When the USB / eSATA cable is plugged out, the device goes to
sleeping mode automatically.
If the transfer rate is not normal, please check if the setting
of SATA disk jumper is 1.5 or 3.0Gbps.
Support USB transfer speeds of Low speed (1.5Mbps),
Full speed (12Mbps),
High Speed (480Mbps), Super Speed (5Gbps),
eSATA transfer speed (1.5~3.0Gbps)
To take the HDD out from the device, slightly press down the
handle of the tray and pull it out.
17.
18.
19.
20.
If users enable MBR by mistake, in order to clean the
partition table, you have to switch to another RAID mode
and do the RAID mode switch all over again referring to
Setup. Then go back to the RAID mode you want, repeat
the previous actions and enable GPT when initializing HDD.
Under Windows 10/11, users can enable GPT when
initializing HDD with a total capacity of more than 2TB.
Do not connect the device to the SATA on board port of the
motherboard. Either use SATA to eSATA PCI-Express or SATA
to eSATA PCI add-on card, otherwise the PC (Windows /
Macintosh) may not recognize the device.
Setting up motherboard's power management in S3 is
recommended. (For more details, please refer to the user guide
of motherboard BIOS setting).
If the device takes too long to initialize, please check if the HDD
is securely installed or update the eSATA host driver version.
Rebuild time is based on the capacity, e.g. it takes about
1 hour for 200GB.
For Macintosh users: the total capacity of more than 2TB could be
recognized only for the operation system is 10.4.11 Tiger or later.
for Macintosh users, under macOS X 10.12 or later, It's strongly
recommended not to have the same name for all the HDDs.
Interface of USB / eSATA can not be used at the same time.
8.
9.
10.
11.
12.
13.
14.
15.
16.
Smart fan controlled by the built-in thermal sensor and it
comes with 2 modes (auto / manual) and 3 levels of speed:
Level 1: higher than 55 °C 2,500rpm ~ 3,500rpm
Level 2: 45 °C ~ 54 °C 1,800rpm ~ 2,500rpm
Level 3 : below 45 °C 1,200rpm ~ 1,800rpm
21.
22.
23.
If there is noise with the fan, power off the device, unscrew
the fan, take out the cover,
clean the fan and assemble it back.
If the noise is still present, you can change the fan with
another identical fan of size 80x80x20mm referring.
Red cable Black cable
Positive
(electrode)
Negative
(electrode)
24.
25.
If the fan stops working, do not dismantle it.
Please send back to the retail store immediately.
If you have forgotten to attach the metal frame before you
closed the cover, simply press down the rib and the cover
will slowly release and open outwards.
Please do not attempt to pull the cover with something sharp.
Please enable GPT if the total capacity is more than 2TB
and enable MBR if the total capacity is less than 2TB.
Activate GPT if total volume is more than 2TB
Activate MBR if total volume is less than 2TB
Start disk initialization