EasyManua.ls Logo

MediaSonic HUR5-SU3 User Manual

MediaSonic HUR5-SU3
2 pages
To Next Page IconTo Next Page
Page #1 background imageLoading...
Page #1 background image
Step 1. Detach the screws,
slide the cover horizontally
and then pull it up.
2
1
3
Step 2. Install hard drives gently.
HDD 2
HDD 1
Step 3. Make sure the hard drives are properly
installed and then scure them with a screw driver
(Front) (Back)
Step 4. Close the cover and secure it with the screws removed
in step 1.
1
2
3
Plug in the
adapter
Connect the
DC power cable
to the device
Connect the
USB cable to the PC
Then, connect the other
side of the USB cable
to the device
Step 6. Raid Mode configuration
6-1. Be sure the power is off when RAID mode switches
Changing RAID mode may cause data lost, backup
your data before making changes.
*CFM BTN: Confirmation Button
CFM BTN
PWR BTN
6-2. Hold (CFM) button and turn on the power (PWR)
to get HDD blue indicator first.
Keep holding (CFM) button until the HDD
purple indicator begins to flash on the front panel,
which means the setting completed.
Then, let go of the CFM button.
2
1
Step 7. Now you just need to partiton and format the drives.
(HDD indicator:Blue)
(HDD indicator : HDD purple indicator begins to flsah)
Step 5. Connect the cables in order.
Single JBOD
1 OFF
2 OFF
1 OFF
2 ON
RAID 1 RAID 0
1 ON
2 OFF
1 ON
2 ON
Quick installation Guide
3.5’’ SATA HARD DRIVE
Single & JBOD
RAID (1/0) functions
User Manual
Version:3.0
HUR5-SU3
www.mediasonicusa.com
http://forum.mediasonic.ca/
Please visit our website for manual
Online forum
Question and Answer IconNeed help?

Do you have a question about the MediaSonic HUR5-SU3 and is the answer not in the manual?

MediaSonic HUR5-SU3 Specifications

General IconGeneral
BrandMediaSonic
ModelHUR5-SU3
CategoryStorage
LanguageEnglish

Summary

Quick Installation Guide

Detach and Remove Cover

Detach the screws, slide the cover horizontally, and pull it up.

Install Hard Drives

Gently install the hard drives into the enclosure.

Secure Hard Drives

Ensure hard drives are properly installed and secure them with a screwdriver.

Close and Secure Enclosure

Close the cover and secure it with the screws removed in step 1.

Connect Power and USB Cables

Connect the DC power cable and USB cable to the device and PC.

Configure RAID Mode

Set RAID mode switches while power is off and confirm settings.

Partition and Format Drives

Partition and format the drives after installation is complete.

Product Overview

Front Panel Components

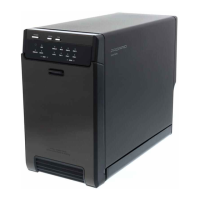
Details the indicators and buttons on the front panel.

Rear Panel Components

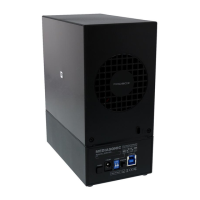
Details the connectors, power, USB port, and RAID switches.

Important Cautions

RAID Mode Cautions

Backup data before changing RAID modes; data formatting occurs in RAID.

HDD Formatting Recommendations

Recommended HDD formats for Windows and macOS operating systems.

Additional Notes

USB Power-Off Support

PC USB port must support power-off for sleep mode.

Compatibility and Updates

Visit website for compatibility lists and manual updates.

Safety and Warning Guidelines

General Safety Precautions

Avoid water, use dry cloth, do not block vents, avoid heat sources.

Electrical and Usage Warnings

Protect power cord, use specified accessories, unplug during storms, avoid damage.

Related product manuals