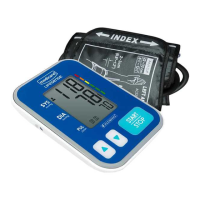
This document describes the Medicare LifeSense® A1 Blood Pressure Monitor, model MD1814 (TMB-1872-A), an arm-type digital monitor designed for home use.
Function Description
The Medicare LifeSense® A1 Blood Pressure Monitor is a digital device intended for measuring blood pressure and heartbeat rate. It utilizes the Oscillometric Measuring method to detect blood pressure. Before each measurement, the unit establishes a "zero pressure" equivalent to the atmospheric pressure. It then inflates the arm cuff and detects pressure oscillations generated by beat-to-beat pulsatile, which are used to determine systolic and diastolic pressure, as well as pulse rate. Readings taken by this monitor are equivalent to those obtained by a trained observer using the cuff and stethoscope auscultation method. The device is designed to provide two years of reliable service.
Usage Features
The monitor features a 60x41mm digital LCD display for clear readability. It can store a maximum of 60 records for each user, allowing for tracking of blood pressure over time. The device incorporates "measuring during inflation" technology.
Before You Start:
The monitor can be powered by either four AAA batteries (6VDC) or an AC adapter (5V == 1A, not included). When using batteries, replace them if the "Lo+" symbol appears, the display is dim, or the display does not light up. It is crucial not to mix new and used batteries or different types of batteries. Batteries should be removed if the device will not be used for an extended period.
Setting Date and Time:
To ensure accurate time stamps for stored records, the date and time must be set. When the monitor is off, a short press of the "SET" button displays the time. Holding the "SET" button for 3 seconds enters the year setting mode (range: 2018-2058, time format: 24H/12H). The "MEM" button is used to increment the numeral, and the "SET" button confirms the selection and moves to the next setting (month, day, time format, hour, minute). After setting the minute, the LCD will display "donE" before showing all settings and turning off.
Selecting the User:
The device supports two users. When the monitor is off, press and hold the "MEM" button to enter user setting mode, where the user ID will blink. Pressing "MEM" again toggles between User 1 and User 2. Once the desired user ID is selected, press "SET" to confirm. The display will show "User ID+ donE" and then turn off.
Tying the Cuff:
For accurate measurements, proper cuff placement is essential. Remove all jewelry from the left arm. If poor circulation is diagnosed in the left arm, use the right arm. Roll up the sleeve to expose the skin, ensuring it's not too tight. Hold the arm with the palm facing up and tie the cuff on the upper arm. Position the tube off-center toward the inner side of the arm, in line with the little finger, or align the artery mark over the main artery (located approximately 2 cm above the bend of the elbow where the pulse is strongest). The cuff should be snug but not too tight, allowing one finger to be inserted between the cuff and the arm.
Starting the Measurement:
Sit comfortably with the tested arm resting on a flat surface, with the elbow on a table so the cuff is at heart level. Turn the palm upwards, sit upright, and take 5-6 deep breaths. For patients with hypertension, it's recommended to rest for 5 minutes before the first measurement and wait at least 3 minutes between subsequent measurements to allow blood circulation to recover. Measurements should be taken in a silent room, with the patient relaxed and not moving or talking. The cuff should remain at heart level. Sit comfortably with feet flat on the ground and back against the chair. For meaningful comparisons, measure under similar conditions (e.g., same time, same arm) or as directed by a physician. When the monitor is off, press the "Start/Stop" button to turn it on and initiate the measurement. The device will automatically adjust to zero, inflate, measure, and then display and save the results. If not manually powered off, the monitor will turn off within 1 minute.
Recalling Records:
When the monitor is off, press the "MEM" button to view the most recent record. If fewer than three records exist, it will display the latest record. Each new measurement is assigned as the first record, pushing older records back. The "MEM" or "SET" button can be used to navigate through stored records. The current record number, date, and time are shown alternately.
Deleting Records:
If a measurement is incorrect, individual records or all records can be deleted.
- Delete one record: In memory recall mode, press and hold the "SET" button for 3 seconds until "dEL one+User ID" flashes. Then, press and hold "Start/Stop" to confirm deletion. The monitor will display "dEL donE+USER ID" and turn off.
- Delete all records: In memory recall mode, press and hold the "MEM" button for 3 seconds until "dEL ALL+User ID" flashes. Then, press and hold "Start/Stop" to confirm deletion. The monitor will display "dEL donE+USER ID" and turn off.
To exit delete mode at any point, press the "Start/Stop" button briefly.
Tips for Measurement:
Measurements may be inaccurate if taken within 1 hour of eating or drinking, immediately after consuming caffeine or smoking, within 20 minutes of taking a bath, when talking or moving fingers, when needing to use the toilet, or in a very cold environment.
About Blood Pressure:
- Systolic and Diastolic Pressure: Systolic pressure is the maximum value reached when ventricles contract and pump blood out. Diastolic pressure is the minimum value reached when ventricles relax.
- Standard Classification: The manual provides a blood pressure classification table based on WHO and ISH guidelines (1999), categorizing blood pressure into Optimal, Normal, High-normal, Mild, Moderate, and Severe hypertension.
- Irregular Heartbeat Detector: The device detects irregular heartbeats when the rhythm varies during measurement. If two or more pulse intervals differ from the average by ±25%, or four or more pulse intervals differ by ±15%, the irregular heartbeat symbol will appear. This indicates a pulse irregularity but is not a cause for concern unless it appears often, in which case medical advice should be sought.
- Fluctuation: Blood pressure fluctuates throughout the day due to individual variations, cuff placement, and measurement position. Medication can also cause variations. It is recommended to wait at least 3 minutes between measurements.
- Home vs. Hospital Readings: Blood pressure can differ between home and hospital due to factors like weather, emotion, exercise, and the "white coat" effect (increased blood pressure in clinical settings). To ensure accurate home readings, ensure the cuff is tied properly (not too tight or loose), placed on the upper arm, and the user is relaxed. Taking deep breaths before measuring and relaxing for 4-5 minutes can help.
- Right Arm Measurement: While both arms can be used, results may vary between individuals. It is recommended to consistently measure on the same arm.
Maintenance Features
To ensure precise measurement, the blood pressure monitor should be calibrated at a specific institute every two years. For optimal performance and longevity, follow these storage instructions:
- Store the device in a dry place, away from direct sunlight.
- Avoid contact with water. If it gets wet, clean it with a dry cloth.
- Avoid intense shaking and collisions.
- Keep it away from dusty and unstable temperature environments.
- Do not attempt to clean the reusable cuff with water, and never immerse the cuff in water.
- Use a soft cloth to clean the unit before and after use; do not use abrasive or volatile cleaners.
- The device does not require calibration within two years of reliable service.
- For any problems with setup, maintenance, or use, contact Fleming Medical Ltd. Do not attempt to open or repair the device yourself. Servicing should only be performed by authorized sales/service centers.
- Report any unexpected operations or events to Fleming Medical Ltd.
- Keep the unit out of reach of infants, young children, or pets to prevent inhalation or swallowing of small parts.
- Be careful to avoid strangulation due to cables and hoses.
- Allow at least 30 minutes for the ME equipment to warm up or cool down to the intended operating temperature between uses.
- Use only accessories and detachable parts specified/authorized by the manufacturer to avoid damage or danger.
- Ensure the device is used in the environment specified in the user manual to maintain performance and lifetime.