Do you have a question about the Medion E7214 and is the answer not in the manual?
Identifies the TFT display, power button, keyboard, indicators, touchpad, speakers, webcam, and microphone.
Lists Kensington lock, power socket, LAN port, Display Port, HDMI, eSATA/USB, and Express Card slot.
Details microphone, audio out, line in, USB port, optical drive, and eject buttons.
Instructions for removing protective foil before device operation.
Guide on inserting the battery, connecting the power adapter, and charging the battery.
Warning against placing objects on the display to prevent damage.
Steps for opening the display, powering on the notebook, and following the Welcome procedure.
Instructions for registering the pre-installed antivirus software and a note on avoiding additional installations.
| RAM | 4 GB |
|---|---|
| Graphics | Intel HD Graphics 4000 |
| Hard Drive | 500 GB |
| Operating System | Windows 8 |
| RAM Type | DDR3 |
| Storage | 500 GB HDD |
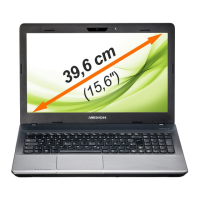
| Display Size | 17.3 inches |
| Display Resolution | 1600 x 900 pixels |
| Ports | HDMI, VGA |
| Wireless | WLAN 802.11 b/g/n |