This document describes a universal remote control, detailing its functions, setup, and maintenance.
Overview
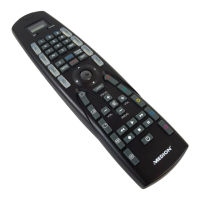
The remote control features a time display, source keys with background lighting for device selection, and a joystick for navigation. It supports programming device codes, learning functions from original remotes, and creating macros for sequential commands.
Safety Instructions
Before use, read the instructions carefully and keep them for future reference. The appliance is not intended for use by young children or infirm persons without supervision. Children should be supervised to ensure they do not play with the appliance. Do not attempt to repair the remote control yourself. The universal remote control has a class 1M infrared diode; do not examine the laser with optical instruments. Avoid exposing the remote control to dust, strong sunlight, moisture, high temperatures, or strong vibrations. Never use old and new batteries together. Do not use corrosive or aggressive cleaning products.
Scope of Application
This universal remote control can replace up to eight normal remote controls and operate the following device types:
- TV: Television set with video text, projector
- VCR: Video recorder
- DVD: DVD player and DVD recorder
- CD: CD player
- CBL: Pay TV decoder
- ASAT: Analogue satellite receiver
- DSAT: Digital satellite receiver
- AUX: For additional devices (amplifier, tuner, MD, etc.)
The names on the source keys (TV, VCR, etc.) are for overview purposes only; any key can be assigned to other device types ("Flex Mode").
Inserting Batteries
Two LR03 AAA micro batteries are required (alkaline batteries recommended for longer durability).
- Remove the battery compartment cover by pushing the clip in the direction of the cover.
- Insert both batteries, observing the +/- polarity.
- Replace the cover.
If batteries are inserted correctly, the time display "0:00" will appear. Programmed settings (codes, learn functions, macros) remain stored when batteries are removed. Date and time are retained during battery changes, but the internal clock will not run without batteries and needs to be reset after insertion.
Setting the Date and Time
Set the date and time using the SET and T/D keys below the display. Use a sharp object (e.g., an unbent paperclip) in the depressions.
- Press SET twice. "12." will appear.
- Press T/D until the current month appears.
- Press SET to save the month and call up date settings.
- Press T/D until the current date appears.
- Press SET to save the date and call up hour settings.
- Press T/D until the current hour appears.
- Press SET once to save the hour and call up minute settings.
- Press T/D until the current minute appears.
- Press SET once more; the set time will be displayed.
- Press T/D to start the clock (double dots flash at one-second intervals).
Time settings in 24 and 12 hour mode:
An 'H' indicates 24-hour mode. Pressing T/D beyond "24" shows 'A' (morning hours, 12-hour mode). Pressing T/D beyond "12" shows 'P' (afternoon hours, 12-hour mode).
Displaying the date and time:
After settings are complete, the time is displayed. Briefly press T/D to show the date for a few seconds. Press SET to see alternating date and time. To stop this, press T/D until the time is displayed.
Displaying the seconds:
When the clock is displayed, press T/D twice to show seconds. When the date is displayed, press T/D once. Use SET to set seconds display to "0". T/D returns to time display.
Programming Device Codes
For each device, program a three-digit device code to a source key (TV, VCR, DVD, CD, CBL, ASAT, DSAT, AUX). Key names are for reminder purposes; any key can be assigned to any device ("Flex Mode"). For combined devices (e.g., TV with video recorder), two source keys may be needed, one for each part. Some combined devices use only one code for both parts.
Entering the device code according to the Code List:
- Switch the relevant device on manually.
- Keep the S (SETUP) key pressed for approx. 3 seconds; the source key's background lighting will flash briefly, then remain permanently lit. (Briefly pressing SETUP activates SHIFT function.)
- Briefly press the desired source key (TV, VCR, DVD, CD, CBL, ASAT, DSAT, AUX).
- Enter the three-digit code from the Code Table. The background lighting extinguishes briefly with each key press.
If the code is valid, the source key light extinguishes after the last digit. If invalid, it flashes for three seconds. If the device doesn't respond, repeat programming or try a different code. If still unsuccessful, try "Automatic Search."
Manual Code Search:
- Switch the relevant device on manually.
- Keep S (SETUP) pressed for approx. 3 seconds; lighting flashes briefly, then remains lit.
- Briefly press the desired source key.
- Keep pressing PROG+ or PROG- (or PLAY for VCR) until the device switches off, changes channels, or responds. Code search starts from the currently stored three-digit number.
- Briefly press OK or ENTER to save the code.
Due to many codes (up to 350 per device type), only common functions may be available. For VCRs, search must be done with a tape inserted and playing.
Automatic Search:
If manual search fails, use automatic search to find codes for unlisted brands.
- Switch the relevant device on manually.
- Keep S (SETUP) pressed for approx. 3 seconds; lighting flashes briefly, then remains lit.
- Briefly press the desired source key.
- Point the remote at the device and briefly press PROG+ once (or PLAY if no program function). Code search begins after 6 seconds, transmitting codes at one-second intervals. The source key lights for each transmission.
- When the device responds, press OK with the joystick. If you miss it, use PROG- to go back. Press EXIT to cancel.
1 second or 3 second intervals:
To transmit a new code every 3 seconds instead of every second, press PROG+ (or PLAY) or PROG- again within 6 seconds of step 4. This takes longer but provides more time.
Code Searching by Brand Name:
This function allows searching by brand name from the Code Table.
- Switch the relevant device on manually.
- Keep S (SETUP) pressed for approx. 3 seconds; lighting flashes briefly, then remains lit.
- Briefly press the desired source key.
- Enter the one-digit code according to the table:
- Key 1 = Medion, Tchibo
- Key 2 = Philips, Radiola, Philco, Erres, Pye
- Key 3 = Sony, Akai, Panasonic, JVC, Sharp, Toshiba, Daewoo
- Key 4 = Thomson, Brandt, Fergusson
- Key 5 = Saba, Nordmende, Telefunken
- Key 6 = Grundig, Blaupunkt
- Key 0 = all brands.
- Keep pressing PROG+ (or for video recorders, or PLAY) until the device responds. Proceed quickly to avoid automatic code search.
- Save the code by pressing OK with the joystick. If all codes are searched, the source key flashes for approx. 3 seconds.
Code Identification:
This determines codes already entered and stored.
- Switch the relevant device on manually.
- Keep S (SETUP) pressed for approx. 3 seconds; lighting flashes briefly, then remains lit.
- Briefly press the desired source key.
- Briefly press the SETUP button. Source key extinguishes briefly.
- To find the first number, press number keys 0-9. If the source key extinguishes briefly, that's the first stored number.
- Repeat for the second and third numbers.
- Source key extinguishes when the third number's button is pressed. Code identification is complete.
Normal Operation
After programming, the remote control operates devices like their original remotes for common functions. Point the remote at the device and press the relevant source key (it lights briefly). Activate functions by pressing the corresponding function key (source key lights briefly with each press).
- Note: Not every original remote function may be directly available. For newer devices, functions might be on different keys or unavailable. Use the learn function to transfer functions.
Recording with the video recorder:
The RECORD key must be pressed twice to record, as a protection against accidental recordings.
Operating combined devices:
- With two device codes: Some combined devices (e.g., TV with VCR) require two codes, one for each part, controlled as separate devices.
- With one device code: Other combined devices need one code. Select the device part to operate. Example: DVD recorder/video recorder with code on DVD source key.
- To activate DVD: Hold DVD source key for >1 second.
- To activate VCR: Briefly press S (SETUP), then DVD source key.
If your combined unit needs one code but you want two source keys:
- Program the device code to two source keys.
- Operate one part with one source key.
- Use the learn function to transfer desired functions of the other part to the other source key.
Learn Function
Manually save functions from an original remote control to your universal remote control. It can "learn" up to 150 commands.
Notes on learn function:
- Use new batteries for both remotes.
- One original remote can be saved per source key (8-in-1 function).
- If memory is full, source key lighting flashes for 3 seconds.
- Programming each key takes approx. 3 seconds.
- If programming an additional function to an existing code, note unassigned keys.
- Keys that cannot be assigned: LEARN, S (SETUP), ALL OFF, MACRO, EPG, and all source keys.
- Some original remotes (for DVD, VCR, SAT) can be programmed with TV device codes for basic TV functions (volume, mute, channel search).
- Do not transfer functions from an original remote programmed with a different TV set code; this can cause programming errors.
- First, try programming any command and test it. Then delete all commands ("Deleting commands for all source keys," page 19) and begin actual programming.
- Do not execute learn function under low-energy lamps (e.g., fluorescent lamps) as they can contain infrared light components that interfere.
Programming the functions:
- Place remotes with infrared diodes facing each other, 15-50 mm apart.
- Keep S (SETUP) pressed for approx. 3 seconds; lighting flashes briefly, then remains lit.
- Briefly press the desired source key for this original remote.
- Press the LEARN key.
- Press the key on the universal remote control to be assigned (source key remains lit).
- Keep the key of your original remote control pressed until the universal remote control's source key extinguishes (faulty programming indicated by flashing).
- Repeat steps 4 and 5 until all desired functions are saved.
- Stop programming by pressing the SETUP key.
SHIFT Function
Some universal remote control keys have double assignments. To use these, briefly press S (SETUP) (source key lights up), then press the function or number key. If no other key is pressed for 15-20 seconds, SHIFT function deactivates.
Deleting Functions
Deleting commands for only one source key:
- Keep S (SETUP) pressed for approx. 3 seconds; lighting flashes briefly, then remains lit.
- Briefly press the desired source key.
- Press the LEARN key twice.
- Press the SETUP key.
All commands for that source key are deleted.
Deleting commands for all source keys:
- Keep S (SETUP) pressed for approx. 3 seconds; lighting flashes briefly, then remains lit.
- Press the LEARN key twice.
- Press the SETUP key.
All codes programmed via the learn function are deleted.
Programming Macros
Macros save a chain of commands for consecutive execution. Three macros can be programmed and stored on number keys 1, 2, and 3. Each macro can include up to ten key commands and different devices. For example, switch on TV, desired channel, VCR, and recording function.
- Switch device(s) on.
- Keep SETUP key pressed for approx. 3 seconds; lighting flashes briefly, then remains lit.
- Press the MACRO key. Source key flashes briefly.
- Press the number (1, 2, or 3) where the macro should be stored.
- Press a source key (e.g., VCR) for the device to start (first key command).
- Carry out functions in desired sequence (up to nine more key commands). Source key extinguishes briefly with each button press.
- To save, press MACRO (macro saves automatically after 10th key). Source key extinguishes permanently.
Incorporating delays:
Useful for TV warm-up phase.
- During macro entry (step 6 above), press PAUSE where delay is needed.
- Press a number key corresponding to seconds for delay (e.g., "4" for 4 seconds). Maximum delay is 9 seconds.
Executing macros:
- Briefly press MACRO once in normal mode.
- Press the number key (1, 2, or 3) where the macro was saved, within 20 seconds.
Deleting macros:
- Keep SETUP key pressed for approx. 3 seconds; lighting flashes briefly, then remains lit.
- Press the MACRO key. Source key extinguishes briefly.
- Press the number key ("1", "2", or "3") of the macro to delete.
- Keep SETUP key pressed until source key extinguishes. Macro is deleted.
Special Functions
ALL OFF function:
Switches off all pre-programmed devices simultaneously.
- Briefly press ALL OFF key. Selected device switches off, source key lights up.
- Immediately press and hold ALL OFF key for 3 seconds. All pre-programmed devices switch off consecutively (approx. 3 seconds). Source key extinguishes afterwards.
Keep remote pointed at devices until source key extinguishes. Some devices can be switched on/off with the key. Devices switched off this way will switch back on after ALL OFF function.
Easy ProGramming and TV Channel Preview:
- Easy ProGramming (EPG): Refers to scheduled recording features using G-Codes published in TV listings. This allows recording the correct program on the correct channel at the correct time. Not all devices are compatible with this button, and functionality may vary. The EPG button might be allocated to another button (e.g., MENU).
- TV Channel Preview: In TV mode, after pressing EPG once, all stored channels will switch through (remote must be pointed permanently at device). Press PROG+ or PROG- to stop.
Universal functions ("Punch Through"):
Allows certain functions on a different device type than programmed. These include volume, mute, and playback.
- In VCR, DVD, SAT, or CBL mode, VOLUME (VOL) and MUTE keys control the TV (if other devices lack volume control).
- In TV mode or modes without playback function, PLAY, STOP, PAUSE, FAST FORWARD/BACK, SKIP, and RECORD will actuate a connected video recorder, DVD player, or DVD recorder. The last selected device is actuated.
Programming the volume/mute universal functions to another device type:
By default, volume and mute functions automatically control the TV when a source key for a device with image transmission is pressed. You can program these functions to actuate another device type.
- Keep SETUP key pressed for approx. 3 seconds; lighting flashes briefly, then remains lit.
- Press the key. Source key extinguishes briefly.
- Press a source key for the device to which volume and mute functions should be transferred. Source key light remains lit.
- Press the key; source key light extinguishes. If an accidental device without its own volume control was selected, source key flashes for 3 seconds.
Programming the volume/mute universal functions to a particular device:
This programs the remote to use only that particular device's own volume and mute functions, switching off the universal function for that mode/device type.
- Keep SETUP key pressed for approx. 3 seconds; lighting flashes briefly, then remains lit.
- Press the key until source key light extinguishes.
- Press the source key for the device that is only to have its own volume and mute functions.
- Press one of the two VOL keys. Source key light remains lit.
- Press the key again, and source key light extinguishes.
Restoring the universal volume/mute functions:
To reset universal volume/mute functions to factory settings ("Punch Through" effect):
- Keep SETUP key pressed for approx. 3 seconds; lighting flashes briefly, then remains lit.
- Keep the key pressed until source key light extinguishes briefly.
- Press again. Source key light extinguishes completely. Volume and mute functions are restored to factory defaults.
Troubleshooting
Remote control does not work:
- Check if devices are properly connected and switched on.
- Check if batteries are correctly inserted with matching +/- polarity.
- Replace weak batteries.
Several device codes listed for my brand; how to determine correct code?
- Try each consecutive code until most functions work properly.
Devices only respond to a few remote control commands:
- Continue testing further codes until devices respond accordingly.
- If manual code entry and automatic code search fail, the device may not be compatible with the universal remote control.
Technical Data
- Batteries (not included): 2 x 1.5V Micro (LR03/AAA) (Alkaline recommended)
- Laser class: 1