2
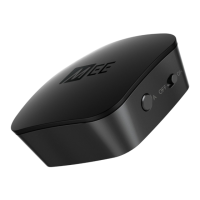
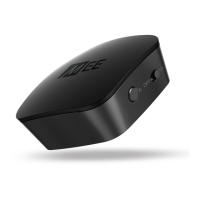
PRODUCT OVERVIEW
1
2
3
4
5
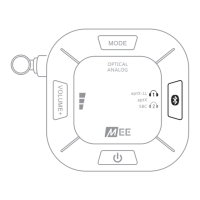
Pairing button “B”
Indicator light “B”
Indicator light “A”
Pairing button “A”
On/off switch
6
7
8
9
Analog audio input (3.5mm)
Digital audio input (TOSLINK optical S/PDIF)
Power/charging indicator light
Micro-USB power/charging port
1
2
3
6
7
8
94 5
Universal Dual Bluetooth
®
Wireless Audio Transmitter
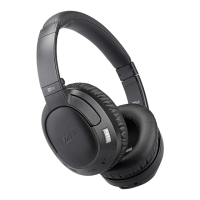
FOR HEADPHONES AND SPEAKERS
1
PACKAGE CONTENTS
B
Universal Dual Bluetooth
®
Wireless Audio Transmitter
FOR HEADPHONES AND SPEAKERS
3.5mm audio cable
Quick start guide3.5mm to RCA adapter Micro-USB charging cable
TOSLINK optical
S/PDIF audio cable
Bluetooth transmitter
Model: AF-T1
QUICK START GUIDE
English
Universal Dual Bluetooth
®
Wireless Audio Transmitter
FOR HEADPHONES AND SPEAKERS
HD WIRELESS SOUND FOR YOUR HDTV
CONNECT SUPPORT PAGE
Please visit the Connect Support Guide page to watch
easy-to-follow video setup guides, download the full
user manual, and view the latest troubleshooting
information.
3
STEP 1: POWERING ON
The
Connect
can be powered via USB or by its built-in battery. When powered via USB,
the
Connect
does not need to be turned off after each use and the internal battery will
be kept fully charged.
USB POWER
Plug the included micro-USB charging cable into a powered USB port** and the
power/charging port of the
Connect
. The green indicator light will pulse slowly while the
built-in battery is charging and stay solid once it is fully charged. Charging time is
approximately 90 minutes.
BATTERY POWER
When unplugged from USB power, the
Connect
will be powered by its built-in battery.
Please allow the
Connect
to charge fully before using it on battery power for the first
time. When the battery is low, the green power LED will blink every second.
To turn the
Connect
on, slide the power switch to the “on” position.
**The USB outputs of some TVs do not provide a stable current. It is recommended to
use a computer or USB wall charger (not included) to charge the
Connect
.
4
STEP 2: CONNECTING TO TV
Remove the protective caps from the included fiber
optic TOSLINK cable.
Plug the cable firmly into the optical audio output
on the TV and the optical input of the
Connect.
A.
B.
The
Connect
features three different connection options for
compatibility with a wide range of devices. Consult the user
manual for your TV/audio device to determine the appropriate
audio output.
OPTION 1: DIGITAL OPTICAL AUDIO OUT (TOSLINK)
Newer TVs are usually outfitted with a TOSLINK
digital optical (S/PDIF) audio out connector.
Note: If you are not receiving any sound through a TOSLINK connection, please make
sure that the audio output settings on your TV, DVR, and other playback sources are set
to “STEREO” or “PCM”.
5
STEP 2: CONNECTING TO TV (CONTINUED)
OPTION 2: RCA AUDIO OUT (RED AND WHITE CONNECTORS)
Older TVs usually have analog audio output with red and white RCA connectors. To use
the RCA output, plug the included RCA adapter into the matching-color RCA jacks on the
TVs and attach to the 3.5mm stereo audio cable. Plug the other end of the audio cable
into the 3.5mm input of the
Connect
.
Note: Some older TVs do not automatically output sound via RCA for certain inputs. To
enable RCA audio output, locate the audio output setting on your TV with the options
“FIXED” and “VARIABLE”, sometimes labeled “SET MONITOR OUT”, and change this
setting to “VARIABLE”. If you still don’t hear any sound, look for a setting that controls the
TV’s internal speakers and set it to “OFF”.
6
STEP 2: CONNECTING TO TV (CONTINUED)
OPTION 3: 3.5MM (1/8”) HEADPHONE JACK
Some TVs and most standalone receivers feature a headphone jack on the front or side.
To use the
Connect
with a headphone jack, plug the included 3.5mm stereo audio cable
into the jack and the 3.5mm input of the
Connect
. A ¼” adapter (not included) may be
used with receivers that have a ¼” jack.
Note: The output volume of the headphone jack can usually be controlled using the TV or
receiver remote control and will affect the volume of the
Connect.