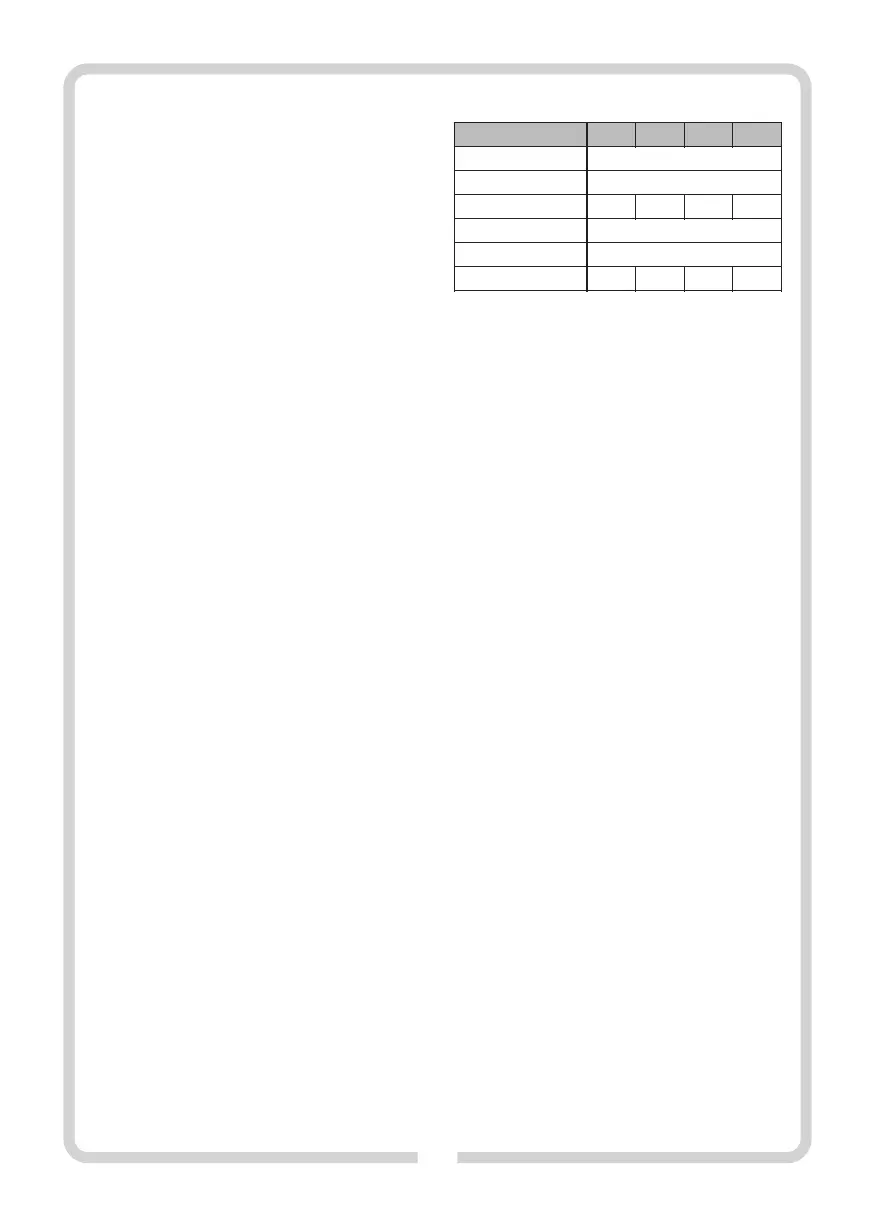
40 W
60072 60074 60076 60080
25 W 60 W 100 W
TECHNICAL DATA:
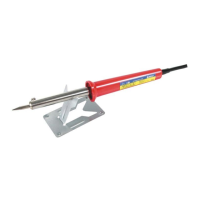
support (6) to prevent its tip and heater
MODEL
casing from contacting the surface they
Rated voltage 230 V~
rest on (see Fig. A on page 1).
Rated frequency 50 Hz
11. The metal support (6) intended for use
Rated power
º
whenever the hot device is not used can
Working temperature Up to 500 C
Equipment class I
become very hot by contacting the tool
Net weight 0,17 kg 0,18 kg 0,19 kg 0,25 kg
heated tip. Do not lift or touch the support
APPLICATIONS:
when hot.
12. A solder or rosin cannot be used for
objects that contact or can contact food.
13. Tip (1) replacement can be carried out
only when the soldering iron plug is
disconnected from the power socket and
the device is cold.
PREPARING FOR OPERATION:
1. Always make sure that its power cord (4) is in good condition before
14. Handle with care. Keep it clean and dry.
you connect the soldering iron to the mains. Do not use the soldering
gun if any damage to the power cord is detected.
Keep away from grease and oil
2. Check the power supply voltage and verify whether power
contaminants.
parameters meet the requirements shown on its nameplate. Do not
plug in the tool when the power supply parameters differ.
15. Never leave the soldering iron unattended
3. The power source (electrical socket) should be equipped with an
when hot or connected to the power
active earthing contact.
4. Before heating check the soldering iron tip (1) – its fixing screw (2)
source.
should be securely tightened.
16. Do not allow the soldering iron to
5. The tip (1) can be removed only when the soldering iron is
disconnected from the power supply and without exerting excessive
overheat as it may result in irreversible
force. A new tip (1) should be always inserted until resistance is felt.
damage to the device. When not in use it
6. Do not heat up the soldering iron without its tip (1) on.
7. Remove any dirt, rust or paint from the items you want to solder using
keep it disconnected from the power
a file.
socket.
OPERATION:
17. Allow the tool to cool down before
n Soldering
storage.
Connect the soldering iron to the power sourced by inserting its plug into
the power socket (5). Wait 3 minutes until the tip (3) reaches its working
18. The soldering iron can be stored only away
temperature. Start soldering:
from children and animals.
ź Heat up the item to be soldered by touching it with the hot tip end (1)
(see: Fig. B, page 1).
19. Should any failure to the soldering iron
ź Apply solder containing flux to the item you would like to bond and
melt with the hot tip end (1) (see: Fig. C, page 1).
occur, stop working and have it repaired
CAUTION: If the wire solder used does not contain any flux then before
by an authorized service (addresses
soldering begins it is necessary to place flux next to the item which is to be
soldered.
available on the warranty card). Using the
ź Wait for the wire solder to cool down and harden (see: Fig. D, page 1).
device when damaged can be dangerous
ź In order to turn off the soldering iron it is necessary to disconnect its
to human health or life.
plug from the mains.
The 25W and 40W models are intended for minor DIY and service
applications, for soldering small components.
The 25W and 40W models are intended for repairing household
appliances, soldering high-volume capacitators etc. Any other
application or modification to the tool is considered improper and may
result in an accident.
This soldering iron is not intended for industrial applications. Do not use it
for applications that need professional tools.
4
 Loading...