EasyManua.ls Logo

Melnor WiFi AquaTimer 15043C User Manual

Melnor WiFi AquaTimer 15043C
4 pages
To Next Page IconTo Next Page
Page #1 background imageLoading...
Page #1 background image
Copyright © 2015, Melnor, Inc. 15043_INS_E_00
1
TM
TM
This guide will help you connect your
WiFi AquaTimer to your home WiFi network using a
smartphone or tablet.
After the initial setup, you can program your timer from
a smart phone, tablet or computer.
If at any time you need assistance, feel free to
contact our support toll-free at:
844-MELNOR1 (844-635-6671)
or by email at: wisupport@melnor.com
2
After opening the package, please ensure you
have all parts.
• Valve Unit
• Control Unit
• Yellow Setup Tool
• Power Adapter
TM
3
Install batteries in the Valve Unit.
You will need to supply
4 alkaline AA batteries.
Ensure the battery
cover is locked.
Note: Do not use lithium
or rechargable batteries in this product.
4
Determine the best location for the
Control Unit. The Control Unit will
need to be plugged in at all times.
It needs to be located in an area that
has good WiFi signal as well as within
200 feet of the Valve Unit.
Walls, electrical equipment and other
materials may aect this range.
7
On your smart device, download and
install the “Melnor AquaTimer
Conguration app.
Before launching the app,
proceed to step 8.
The app is only used to
connect the timer to your home
WiFi network.
6
Ensure that your smartphone or tablet is connected
to the WiFi network you want to use
for your WiFi AquaTimer.
If not, switch your WiFi
network in the smart
device settings.
This is for setup only. Once
connected, you can control
your timer from anywhere.
5
Use the included power
adapter to connect the
Control Unit to an
indoor wall outlet.
You should see
ashing LED lights,
alternating between
“STATUS and
“CONFIG”.
Setup Guide
If you discover that you are missing a part, please contact us:
844-MELNOR1 or wisupport@melnor.com
Question and Answer IconNeed help?

Do you have a question about the Melnor WiFi AquaTimer 15043C and is the answer not in the manual?

Melnor WiFi AquaTimer 15043C Specifications

General IconGeneral
BrandMelnor
ModelWiFi AquaTimer 15043C
CategoryControl Unit
LanguageEnglish

Summary

WiFi AquaTimer Setup

Connecting Your Device to WiFi

Connect your WiFi AquaTimer to your home WiFi network using a smartphone or tablet.

Part Verification and Battery Installation

Ensure all parts are present and install batteries in the Valve Unit.

Control Unit Placement and Power Connection

Determine the best location for the Control Unit and plug it into an indoor wall outlet.

Download Configuration App

Download and install the "Melnor AquaTimer Configuration" app on your smart device.

Completing Setup and Online Registration

Configuring Control Unit Lights

Push the "Setup" button and observe the Control Unit's status and config lights.

Connecting to Your Home WiFi Network

Launch the app and enter your home WiFi network name and password.

Web Registration and Account Setup

Register your account online, enter unit serial numbers and postal code for weather.

Transition to Web Browser Control

The configuration app is no longer needed; control is now via web browser.

Valve Unit Installation and Hose Attachment

Attaching Valve Unit to Faucet

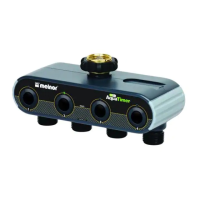
Attach the Valve Unit to an outside faucet and firmly tighten the coupling nut.

Connecting Hoses and Watering Systems

Attach a hose to each outlet and connect sprinklers, soaker hoses, or drip systems.

Planning Watering Programs

Use the grid to determine watering needs before programming Simple or Advanced modes.

Advanced Program Details

Understanding Watering Parameters

Define watering mode, select days, start times, duration, and eco mode settings for each zone.

FCC Compliance Information

Details on device compliance with FCC Rules and Industry Canada license-exempt RSS standards.