Page 1
Step 1
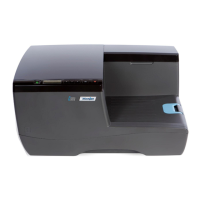
Remove the Printer and Accessories from packaging
Place the Printer on a level, stable surface.
Step 2
Hydrate the Printhead
Before you begin assembling the Printer, it is a good idea to hydrate the Printhead Cartridge for about 20 minutes.
Use electrostatic discharge (ESD) protection when handling Printhead.
Hold the Printhead Cartridge by the handles ONLY.
DO NOT touch the ink couplings, nozzle surface or electrical contacts.
DO NOT unpack the Printhead Cartridge until the Printer is ready for
installation. Once unwrapped, delay in installing the Printhead can
compromise print quality due to dehydration.
DO NOT place an unwrapped Printhead on any surface before installing.
Protect the Printhead from scratches, dust, fibers, dirt and other
contaminants at all times.
1. Carefully remove the Printhead Cartridge from the foil packaging.
2. Moisten the foam strip(s) in the orange plastic cover you removed in Step 1B (or moisten a clean, lint-free
cloth). Carefully snap the Printhead into the plastic cover. Set the Printhead aside for installation later.
AstroJet M1
Quick Start Guide