This document provides fitting instructions for the FIX 501 FP and FIXGAN 16 FP roof rack systems, designed and manufactured by F.lli Menabò S.r.l. in Italy. These systems are intended for vehicle-specific applications, allowing users to transport additional cargo on their vehicle's roof.
Function Description
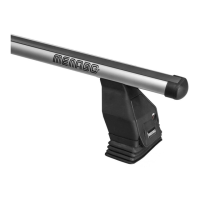
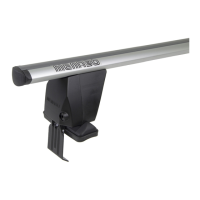
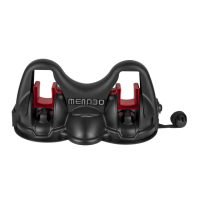
The FIX 501 FP and FIXGAN 16 FP are roof rack systems that provide a secure platform for carrying various items on a vehicle's roof. The system consists of several kits: a Fixing Kit, a Bar Kit (available in standard and aluminum versions), and a Support Kit. These components work together to create a robust and stable attachment to the vehicle's roof, typically utilizing specific mounting points or door frames. The primary function is to extend the cargo capacity of the vehicle, enabling the transport of luggage, sports equipment, or other bulky items that cannot be safely carried inside the vehicle. The system is designed for easy installation and removal, with clear instructions provided for each step.
Important Technical Specifications
The manual details various components and their quantities, essential for proper assembly and function.
Fixing Kit Components:
- Item 0: 1 unit (unspecified component, likely a base plate or cover)
- Item 1: 4 units (unspecified component, likely a foot or base)
- Item 2: 4 units (unspecified component, likely a clamp or bracket)
- Item 3 (A & B): 8 units each (likely different types of clamps or adapters for specific roof types)
- Item 4 (Ø8x18): 4 units (screws or bolts)
- Item 5 (M8x40): 4 units (screws or bolts)
- Item 6 (Ø6x12): 12 units (screws or bolts)
- Item 7 (M6): 8 units (screws or bolts)
- Item 8 (M6x35, M6x40, M6x45, M6x50, M6x55, M6x60): Various quantities (different lengths of M6 screws for specific applications)
Bar Kit Components:
- Item 14: 2 units (likely end caps or covers for the bars)
- Item 15: 4 units (unspecified component, possibly a bar support or adapter)
- Item 16: 4 units (unspecified component, possibly a bar support or adapter)
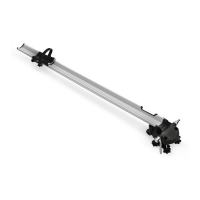
Aluminum Bar Kit Components:
- Item 14: 2 units (end caps or covers)
- Item 15: 4 units (bar supports or adapters)
- Item 16: 4 units (bar supports or adapters)
- Item 17: 2 units (likely the aluminum bars themselves)
Support Kit Components:
- Item 9: 4 units (likely the main support feet that attach to the vehicle)
- Item 10: 4 units (unspecified component, possibly a rubber pad or spacer)
- Item 11: 4 units (unspecified component, possibly a clamp or bracket)
- Item 12: 4 units (unspecified component, possibly a cover or decorative element)
- Item 13 (5mm/0.2"): 1 unit (likely an Allen key or torque wrench for assembly)
Optional Kit (000032900000):
- Item 18: 4 units (unspecified component)
- Item 19: 4 units (unspecified component)
Optional Accessories Kit for "ALU KIT" Profiles (Art.000076200000):
- M6x17 screws: Used for specific attachments, requiring a 20mm (0.8") measurement for proper installation.
Torque Specifications:
- Specific fasteners require a torque of 5 Nm (3.7 lb-ft), indicated by the included torque wrench (Item 13). This ensures secure fastening without overtightening, which could damage components or the vehicle.
Maximum Load Capacity:
- The system has a maximum loaded capacity of 75 kg (165 lb). This limit is crucial for safety and must not be exceeded. Users are also advised to consult their vehicle's manual for its specific roof load limits, as the lower of the two values should always be respected.
Speed Limit:
- A maximum speed of 130 km/h (80 mph) is recommended when the roof rack is installed and loaded. This limit helps maintain vehicle stability and prevent accidents.
Usage Features
The installation process is detailed with visual aids and step-by-step instructions.
Installation Sequence:
- Initial Setup (1=D): Involves preparing the bars (Item 16) and supports (Item 15) by cutting or adjusting them according to the vehicle's dimensions. This step highlights the importance of precise measurements (D1, D2) for a custom fit.
- Mounting Supports (2=B): Attaching the main support feet (Item 9) to the vehicle's roof. This step often involves specific points on the vehicle's roof or door frames. The manual shows different configurations (B1, B2) depending on the vehicle type.
- Securing Components (3): Fastening the support feet using the specified torque (5 Nm / 3.7 lb-ft) with the provided tool (Item 13). This ensures the feet are firmly attached to the vehicle.
- Bar Installation (4): Attaching the bars (Item 17 for aluminum, or standard bars) to the support feet. This step also involves specific fasteners and torque settings.
- Final Assembly (5): Connecting the remaining components, such as covers (Item 12), to complete the aesthetic and protective aspects of the installation.
- Positioning (6): Correctly positioning the front and rear bars on the vehicle's roof, ensuring they are aligned and spaced according to the vehicle's specifications (D1, D2, B1, B2).
- Checking Fit (7): Visually inspecting all attachment points to ensure a secure and flush fit. The manual emphasizes checking for proper engagement and stability.
- Securing Clamps (8): Attaching and tightening the clamps (Item 3, 6, 7, 8) to the vehicle's door frame or designated mounting points. This step also requires the specified torque. The manual illustrates "NO" and "OK" examples for correct clamp installation.
- Bar Attachment (9): Attaching the crossbars (Item 4, 5) to the support feet, ensuring they are level and securely fastened.
- Final Tightening (10): Performing a final check and tightening of all fasteners to the specified torque (5 Nm / 3.7 lb-ft). This step is crucial for safety and stability.
- Locking Mechanism (11): Engaging the locking mechanism (Items 10, 11) to secure the roof rack and prevent theft. The "CLICK!" sound indicates proper engagement.
- Optional Kit Installation (11 OPTIONAL): Instructions for installing optional components (Items 18, 19) if applicable, which may include additional security features or specialized adapters.
Safety Considerations:
- Always adhere to the maximum load capacity of 75 kg (165 lb) and the vehicle's specific roof load limit.
- Do not exceed the recommended speed limit of 130 km/h (80 mph) when the roof rack is installed and loaded.
- Regularly check all fasteners for tightness, especially after the first few kilometers of driving and periodically thereafter.
- Ensure proper positioning of the bars (FRONT/REAR) as indicated in the instructions.
- The manual explicitly shows "NO" and "OK" scenarios for certain installation steps, highlighting critical points for correct assembly.
Maintenance Features
While the manual does not explicitly detail maintenance features, several aspects can be inferred:
- Regular Torque Checks: The emphasis on specific torque values (5 Nm / 3.7 lb-ft) and the inclusion of a torque tool (Item 13) suggest that periodic re-tightening of fasteners is a crucial maintenance activity. This prevents loosening due to vibrations or environmental factors.
- Visual Inspection: Regular visual inspection of all components for wear, damage, or corrosion is recommended. This includes checking rubber pads, clamps, and bar integrity.
- Cleaning: Keeping the roof rack clean from dirt, salt, and other debris will help prolong its lifespan and maintain its appearance.
- Storage: When not in use, removing the roof rack and storing it in a dry place can prevent unnecessary wear and exposure to harsh weather conditions.
- Spare Parts: The manual includes a section for "Ricambi (A Richiesta)" (Spare Parts - Made to order) with specific codes for each component. This indicates that individual parts can be replaced if damaged or lost, extending the overall life of the roof rack system. Users can contact F.lli Menabò S.r.l. for spare parts.
- Product Registration: The manual provides links for product registration in EU, US, and CA regions. Registering the product can be beneficial for warranty claims, safety recalls, and access to customer support.
The FIX 501 FP and FIXGAN 16 FP systems are designed for durability and ease of use, providing a reliable solution for increasing vehicle cargo capacity. Adherence to the installation instructions, technical specifications, and safety guidelines is paramount for optimal performance and user safety.