EasyManua.ls Logo

Mercedes-Benz NTG 6 User Manual

Mercedes-Benz NTG 6
17 pages
To Next Page IconTo Next Page
Page #1 background imageLoading...
Page #1 background image
1
Mercedes-Benz NTG 5.5 / 6 / MBUX Camera Video interface
Compatible with 7” , 8" , 10” and 12" screens
Compatible with cars like:
A-class (W177)
B-class (W247)
CLS-Coupé (C257)
New Sprinter (W907)
E-class W213 / C238
S-class (facelift from June 2017)
Dipswitch settings page 3-4
Rearviewcamera activation and reverse signal page 5
Installation, wiring and LVDS cable page 7 to 11
Troubleshooting page 12-17
Article code: 300 214
Question and Answer IconNeed help?

Do you have a question about the Mercedes-Benz NTG 6 and is the answer not in the manual?

Mercedes-Benz NTG 6 Specifications

General IconGeneral
ManufacturerMercedes-Benz
ConnectivityBluetooth, USB, Apple CarPlay, Android Auto
CategoryCar multimedia system
Voice ControlYes
NavigationYes
Display TypeTouchscreen
FeaturesAugmented Reality Navigation

Summary

Dipswitch Settings

DIP 6 Settings

Configures interface for screen size and touchscreen.

DIP 8 Settings

Controls camera inputs and guide lines.

Rearview Camera Activation

Automatic Reverse Camera Activation

Automatic switching to reverse camera via CANbus.

Analog Reverse Signal Connection

Connects reverse trigger to analog reverse light if CANbus fails.

Installation and Wiring

MB Sprinter MBUX Example Installation

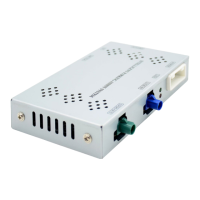
Installation guide for MB Sprinter MBUX models.

Headunit Connector Identification

Identifies power and image connectors on headunit versions.

LVDS Cable Connection

Details connecting the LVDS interface cable.

CANbus and Power Wire Connection (Version 1)

Connects CANbus and power wires for headunit version 1.

CANbus and Power Wire Connection (Version 2)

Connects CANbus and power wires for headunit version 2.

Troubleshooting

No OEM Image Troubleshooting

Steps for resolving no OEM display issues.

No Rearview Image (OEM Image Present)

How to fix no rearview image when OEM image is visible.

Installation Without CANbus Troubleshooting

Troubleshooting steps for non-CANbus installations.

Rearview Image Adjustment

Adjusting black/grey borders in the rearview image.

Related product manuals