correct direction of rotation. Observe the direc-
tion of r
otation when tting.
*
NOTE Damag
e to the wheels' plastic ele-
ments when changing a wheel
Plastic elements on wheels may be damaged
when r
emoving and repositioning the wheel.
#
Do not raise the wheels by the plastic
elements when removing and reposition-
ing.
#
Slide the wheel to be mounted onto the cen-
tring pin and push it on.
&
WARNING Risk of injur
y from tightening
wheel bolts and nuts
If you tighten the wheel bolts or wheel nuts
when the vehicle is raised, the jack could tip.
#
Only tighten wheel bolts or wheel nuts
when t
he vehicle is on the ground.
#
Be sure to observe the instructions and safety
no
tes on "Changing a wheel" (/ page 472).
#
For safety reasons, only use wheel bolts which
ha
ve been approved by Mercedes-Benz and
for the wheel in question.
#
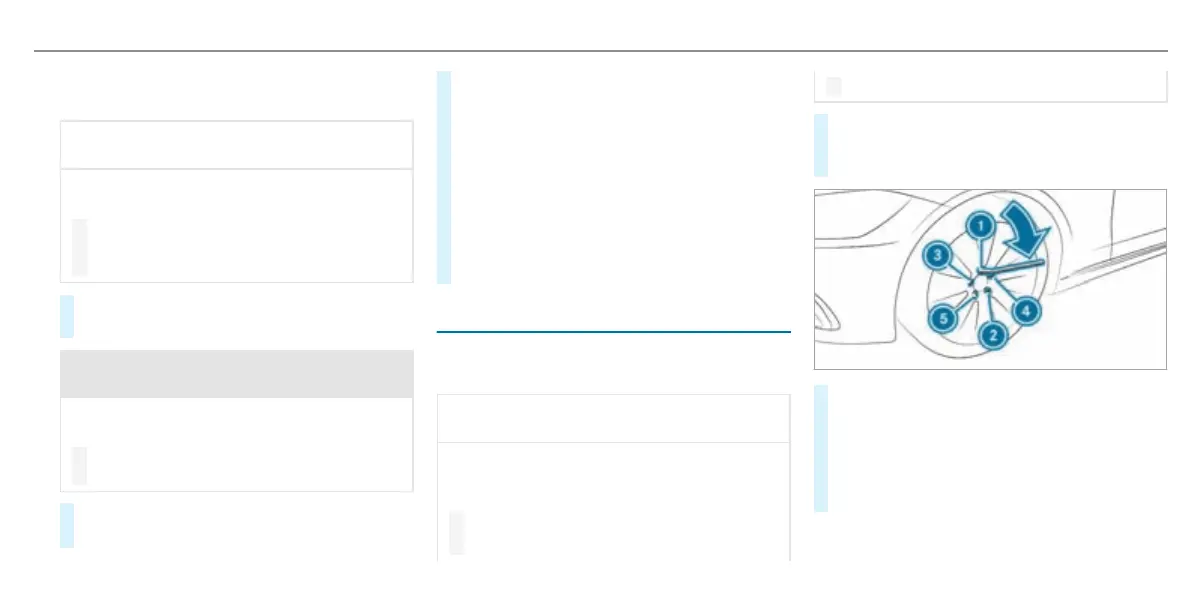
Tighten the wheel bolts evenly in a diagonal
patt
ern in the order indicated until they are
nger-tight.
#
Unscrew and remove the centring pin.
#
Tighten the last wheel bolt until it is ng
er-
tight.
#
Lower the vehicle (/ page 481).
Lowering the vehicle aer a wheel c
hange
Requirements:
R
The ne
w wheel has been tted (/ page 480).
*
NOTE Risk of v
ehicle jack becoming trap-
ped by the AIRMATIC system
If the AIRMATIC system has released air when
r
aising the vehicle, the jack can become trap-
ped when the vehicle is lowered.
#
Start the engine. This adapts the vehicle
le
vel.
#
Remove the jack from under the vehicle.
#
To lower the vehicle: place the ratchet onto
the hexagon nut of the jack so that the letters
"AB" are visible and turn anti-clockwise.
#
Tighten the wheel bolts evenly in a diagonal
patt
ern in the order indicated 1 to 5 with
an initial maximum force of 80 Nm.
#
Tighten the wheel bolts evenly in a diagonal
patt
ern in the order indicated 1 to 5 with
the specied tightening torque of 150 Nm.
Wheels and tyres
481

 Loading...