ATTACHMENTS / CONTROL LINKAGE
Page 7-20 90-855347R1 JANUARY 1999
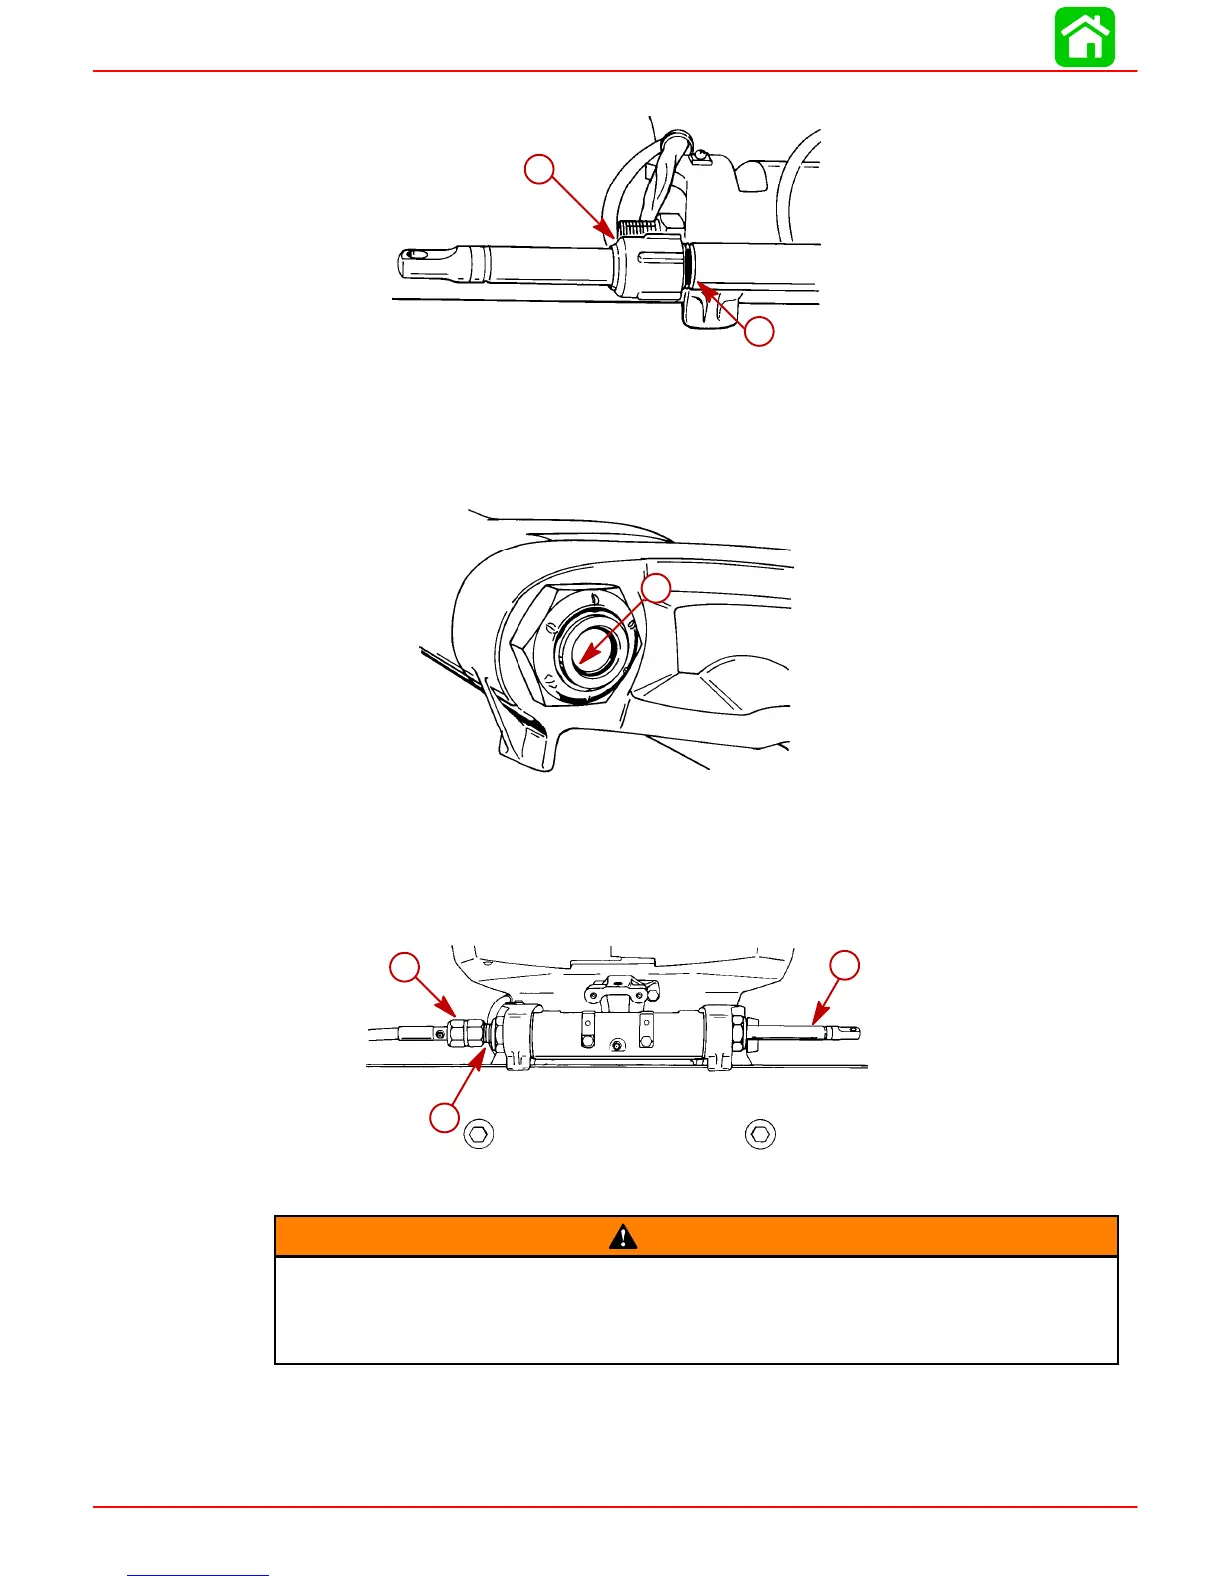
Thread cap (e) onto steering cable mounting tube, up to mark (a).
51888
a
e
STEERING CABLE INSTALLATION - PORT OUTBOARD
IMPORTANT: Lubricate inside of port outboard’s tilt tube and rubber O-ring seal lo-
cated inside tilt tube with 2-4-C w/Teflon, before installing steering cable.
Lubricate inside of port outboard’s tilt tube and rubber O-ring seal (a) with 2-4-C w/Teflon.
51890
a
Insert steering cable end (b) (steering cable routed down starboard side of boat) thru tilt
tube (c) of port outboard and thread steering cable attaching nut (d) onto tilt tube hand
tight.
NOTE: Torque steering cable attaching nut only after final steering adjustments have
been made.
51887
b
c
d
STEERING LINK ROD INSTALLATION
WARNING
Steering link rods MUST BE secured between outboard steering arm and steering
cable end, using special washer head bolt (10-14000) and two nylon insert lock-
nuts (11-34863), as shown. Both special washer head bolt and nylon insert lock-
nuts MUST BE tightened as specified.
Lubricate holes in ends of steering cables, with Quicksilver 2-4-C w/Teflon
(92-825407A12). Assemble steering link rods to steering cable ends of each outboard,
using flat washers and nylon insert locknuts. Tighten locknuts until they seat [DO NOT
exceed 120 lb. in. (13.5 Nm) of torque], then back nut off 1/4 turn.
 Loading...


