Do you have a question about the Meritor Wabco OnLane and is the answer not in the manual?
Critical safety warnings regarding eye protection and vehicle stability during service.
Guides on obtaining manuals and product details from Meritor Wabco.
Contact details for ordering parts and a list of kit components.
Explains the camera-based lane departure warning system and its core technology.
Details environmental and road conditions that can impact system functionality.
Step-by-step guide for installing the camera module and its mounting bracket on the windshield.
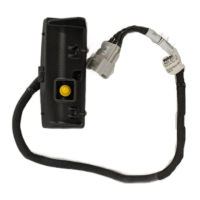
Instructions for fitting the OnLane™ rocker switch into the vehicle dashboard.
Procedure for wiring and connecting the audio switches for system alerts.
Guidance on properly routing and securing the system's wiring harness.
Essential safety step to disconnect the vehicle battery before connecting wiring.
Detailed steps for splicing the harness into vehicle circuits and making connections.
Procedures to confirm the system is installed correctly and functioning as expected.
How to perform a diagnostic test to verify circuit integrity and system response.
Method for reading system faults by counting indicator flashes during test mode.
The Meritor WABCO OnLane™ Lane Departure Warning (LDW) System with SafeTrak technology by Takata is a camera-based warning system designed to enhance driver safety by alerting the operator to unintentional lane departures. This system is specifically designed for Freightliner M2 vehicles and is intended for use by Con-way.
The OnLane™ system utilizes a camera mounted near the top center of the vehicle's windshield. This camera continuously monitors and calculates the vehicle's position within its lane. When the system detects that the vehicle is crossing lane markings without the turn signal being activated, it issues an audible warning through a set of speakers. The system is intelligent enough to differentiate between unintentional lane departures and intentional lane changes by monitoring the turn signals, brake switch, and vehicle speed. This helps to prevent unnecessary warnings during planned maneuvers.
The system's performance can be impacted by several environmental and road conditions. These include a dirty or damaged windshield, which can obstruct the camera's view. Poor lighting conditions, such as those caused by inoperable headlamps or severe road glare, can also hinder the camera's ability to accurately detect lane markings. Adverse weather conditions like snow, ice, heavy fog, or heavy rain can obscure lane markings and reduce system effectiveness. Similarly, poor pavement conditions, including broken road surfaces, ice, snow, sand, dirt, or gravel covering the road surface, can make it difficult for the camera to identify lane markers. Finally, missing, worn, faded, damaged, or covered lane markers will also affect the system's ability to function correctly.
When the system cannot provide assistance due to any of these interfering factors, the vehicle's amber indicator will turn ON. This serves as a visual alert to the driver that the LDW system is temporarily unavailable. The system will automatically resume normal operation, and the amber indicator will turn OFF, once the environmental factors causing the interference are resolved.
The OnLane™ system is designed for straightforward operation and integration into the vehicle's existing systems. Upon turning the vehicle ignition ON, the system performs a self-check. During this startup sequence, a trial warning tone is issued from each speaker (left then right, or both from a single speaker in single-speaker systems), and both the green and amber lights on the OnLane™ switch illuminate. This confirms that the system is powering up correctly.
Once the vehicle reaches approximately 42 mph (67.6 kph) on a well-marked road, the amber LDW Not Available indicator will turn OFF, indicating that the system is actively tracking lane markings and is ready to issue warnings. The system is designed not to issue warnings when the brakes are applied or when either turn signal is activated, recognizing these as intentional driver actions.
Drivers can temporarily silence any alerts for 10-15 minutes (depending on OEM settings) by pressing the OnLane™ switch. Pressing the switch again will clear the mute mode and allow warning alerts to resume. This feature provides flexibility for drivers who may wish to temporarily disable audible warnings in certain situations without fully deactivating the system.
The installation process for the OnLane™ system involves several steps to ensure proper functionality. The camera and bracket must be installed on the windshield when the glass temperature is within the recommended range of 70-100°F (21-37°C) to ensure proper adhesive bonding. The windshield mounting surface must be thoroughly cleaned and dry, free of oil, moisture, and dirt, for correct bracket adhesion. Templates are used to ensure precise alignment of the bracket, as any modification to the template's size will result in an incorrect installation.
The wiring harness installation requires careful routing to prevent pinching or cutting of cables and to ensure it is clear of all screw locations, including headliner and visor areas. Most connections to the vehicle wiring are made on the passenger side A-pillar. The wiring harness connects to the OnLane™ module, the OnLane™ switch, and the audio switches.
For maintenance and troubleshooting, the system includes a Circuit Mode Test. This test is initiated by depressing the OnLane™ rocker switch at least seven times within two seconds after the audible start-up tones are complete. The system confirms entry into test mode with a short tone through the left speaker followed by one through the right speaker (or both from a single speaker). While in test mode, the green LDW Enabled indicator turns OFF, and the amber LDW Not Available indicator flashes. This test mode times out in 10 minutes or upon turning off the vehicle.
If a system fault is present, the amber LDW Not Available indicator will be ON, and the green LDW Enabled indicator will be OFF. The system identifies faults by flashing the green LDW Enabled indicator. For example, a fault code of "2, 3" would be indicated by two flashes, a 3-second pause, and then three more flashes. These fault codes can be re-displayed by pressing and releasing the OnLane™ switch or by connecting with TOOLBOX™ 11 (or later version) software. Detailed fault codes and troubleshooting procedures are available in the OnLane™ Maintenance Manual MM-1291.
The installation also involves connecting to the J1939 network and using ServiceLink to access the Bulk Head Module. Two specific features, "26-01048-001 (turn signal)" and "26-01028-002 (brake lamp)," must be added to the Bulk Head Module. The CAN (Controller Area Network) is then used to verify the installation.
To ensure proper electrical connections, the wiring harness must be connected to a switched ignition power source that is only powered when the vehicle ignition is ON, preventing battery drain. Brake and turn signal inputs must provide a transition from 0V to +12VDC when activated. OEM truck wiring diagrams and service/repair manuals are essential for correctly routing wires and identifying circuits. After wiring is complete, any unused flying leads of the harness must be cut and taped off. The headliner and any trim panels removed during installation must be replaced.
Overall, the OnLane™ system is designed to be a robust and reliable safety feature, with clear indicators for operational status and a built-in test mode for diagnostic purposes, supported by comprehensive documentation for installation and maintenance.
| Category | Automobile Accessories |
|---|---|
| Type | Lane Departure Warning System |
| Manufacturer | Meritor Wabco |
| Compatibility | Commercial vehicles |
| Function | Alerts the driver when the vehicle unintentionally departs from its lane |
| Technology | Camera-based detection |