This document is an instruction manual for the CFN-1013 ceiling fan, providing detailed guidance on its installation, operation, and maintenance.
Function Description:
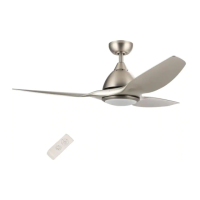
The CFN-1013 is a ceiling fan designed to circulate air and provide illumination. It features a remote control system for convenient operation, allowing users to adjust fan speed, turn the light on/off, set a timer, and reverse blade direction. The fan is suitable for various indoor settings, with options for standard or close-to-ceiling installation depending on ceiling height.
Important Technical Specifications:
- Model: CFN-1013
- Fan Blades: 5 blades
- Power Supply: 120-volt (for household wiring)
- Remote Control: Hand-held remote control system with a receiver.
- RF Emitter Battery: 12V 23A (or UM-44 AAAR03 DC 1.5Vx2 for some emitters)
- Remote Control Distance: 25-30 meters (emitter), 10 meters (emitter: remote control distance within)
- Load Requirements: Bulb ≤ 300W; Fan ≤ 120W
- Mounting:
- Requires a CUL Listed (or UL for Canadian Installation) outlet box marked "ACCEPTABLE FOR FAN SUPPORT".
- Outlet box and support structure must reliably support a minimum of 50 pounds.
- Minimum 7 feet clearance from the trailing edge of the blades to the floor.
- Angled ceiling maximum 22° angle.
- Minimum clearance of 12" between blade tip and ceiling for optimal operation on sloped ceilings.
- Speed Controls: Suitable for use with solid-state speed controls.
- Light Kit: Integrated LED light kit.
Usage Features:
- Remote Control Operation: The fan is primarily operated via a hand-held remote control.
- Speed Control: Buttons for HI, MED, and LOW fan speeds.
- Light Control: "LI" button to turn the lamp ON/OFF.
- Fan Off: "STOP" button to turn off the ceiling fan.
- Timer Function: "Fan timing button" with options for 1H, 2H, and 4H.
- Reverse Direction: "F/R" button to control the fan's forward and reverse direction. This function should only be operated when the fan blades are stopped.
- Learning Code Matching Mode: The remote control and receiver use a learning code matching mode. To pair, turn on the supply power within 30 seconds and press the emitter's "LI" and "Hi" buttons for 3 seconds. A "BEE" sound indicates successful pairing.
- Installation Options:
- Standard Ceiling Installation: Uses a downrod with a ball and socket mounting for higher ceilings.
- Close-to-Ceiling Installation: Recommended for rooms with less than 8-feet ceilings or when additional space is desired from the floor to the fan blades.
- Blade Direction Reversal: Allows for seasonal adjustment of airflow. Forward mode typically pushes air down, creating a cooling effect, while reverse mode pulls air up, recirculating warm air.
- LED Light Kit: Provides illumination, integrated into the fan design.
Maintenance Features:
- Cleaning: Do not use water or detergents when cleaning the fan or fan blades. A dry dust cloth or lightly dampened cloth is suitable for most cleaning.
- Troubleshooting: The manual includes a troubleshooting section to address common issues such as the fan not starting, noisy operation, or wobbling.
- Fan Not Starting: Check circuit fuses/breakers and electrical connections.
- Noisy Fan: Ensure motor housing screws, blade bracket screws, and wire nut connections are snug. Allow a 24-hour "breaking-in" period for new fans. Check light kit screws and bulb security. If using solid-state speed controls, ensure compatibility. Verify the upper canopy does not touch the ceiling.
- Fan Wobble: Check blade and blade arm screw security. Measure blade levels to ensure they are equal (within 1/8"). Use the enclosed Blade Balancing Kit if necessary. Interchanging adjacent blades can help redistribute weight.
- Safety Precautions:
- Always turn off electricity at the circuit breaker or fuse box before installation or maintenance.
- All wiring must comply with the National Electrical Code and local electrical codes, performed by a qualified licensed electrician.
- Use only specified steel screws and lock washers for mounting to the outlet box.
- Mount fan to an outlet box marked "ACCEPTABLE FOR FAN SUPPORT".
- Avoid placing objects in the path of the blades.
- Do not bend blade brackets during assembly or after installation.
- Do not insert objects in the path of the blades.
- Take out batteries from the remote control when not in use for a long time.
- Electrical Connections: Detailed instructions are provided for connecting the receiver to the fan motor and to the supply wires, emphasizing the importance of securing connections with wire nuts and electrical tape. Grounding instructions are also included.
- LED Light Kit Installation: Instructions for installing the LED light kit and glass shade, including wire connections and securing components. Emphasizes "DO NOT OVER TIGHTEN" when securing the glass shade.