GETTING STARTED
1. After unpacking the amplifier, check to make sure all the tubes are firmly seated in their sockets as some may have loosened a
bit during shipping.
2. Connect the A.C. Cord to a grounded (3 pin) A.C. outlet.
3. Unpack the footswitch and connect it using the mono cable provided to the FT. SW. jack on the far left of the Front Panel.
4. If you have purchased a Head Format, connect your speaker enclosure to the proper matching impedance SPEAKER OUTPUT on
the Rear Panel, most typically to the 8 Ohm SPEAKER OUTPUT jack. An 8 Ohm load is preferable for your first experience with an
amp this dynamic and explosive as you will hear the full power potential and best tonal balance. Combo amplifiers use an 8 Ohm
internal speaker and it should already be connected to the proper impedance SPEAKER OUTPUT. If not, move the speaker cable
to the 8 Ohm SPEAKER OUTPUT jack.
5. Flip the POWER Switch to the ON position while leaving the STANDBY Switch in the STANDBY position for at least 30 seconds.
This allows the filaments to warm up in the tubes before being put to use. Following this cold-start procedure every time you power
up will increase the toneful life of your tubes.
6. If you intend to connect processing devices to the EFFECTS LOOP, do so now. Look up EFFECTS LOOP in this manual for proper
connection and operation. We recommend auditioning the Fillmore without processing for the first time, just to hear the pure sounds
and get to know the amp by itself before adding processing. This also helps tell you if your processing might be robbing anything
sonically from your new amplifier. If the Loop is to be used, check the INPUT levels on your processor to make sure they are in the
medium to lower range so you can increase the level slowly once you have lifted STANDBY on the FILLMORE™ and run through
the Channels to view the SEND level coming from the amp.
NOTE: Pedal type Processors don’t always have an Input Level indicator, some have clip lights, and on either of these types you’ll
need to trust your ears regarding levels
7. Follow the Sample Settings examples below and set the Controls at these approximate settings for a tour through your new world
of TONE. Remember these are just a glimpse at the vast possibilities and are meant to give you a taste of one possible way to set
up your Channels. Feel free to fine tune the sound as you go...you can’t hurt a thing and you will be learning by feel...the best way.
8. Flip the STANDBY to the ON position and enjoy the ride!
INSTANT GRATIFICATION
In case you haven’t yet played your new amplifier, below is just one example of the many ways
to set up the Channels. This example demonstrates a pristine Clean sound in Channel 1 and a medium gain solo sound in Channel 2
PAGE 4
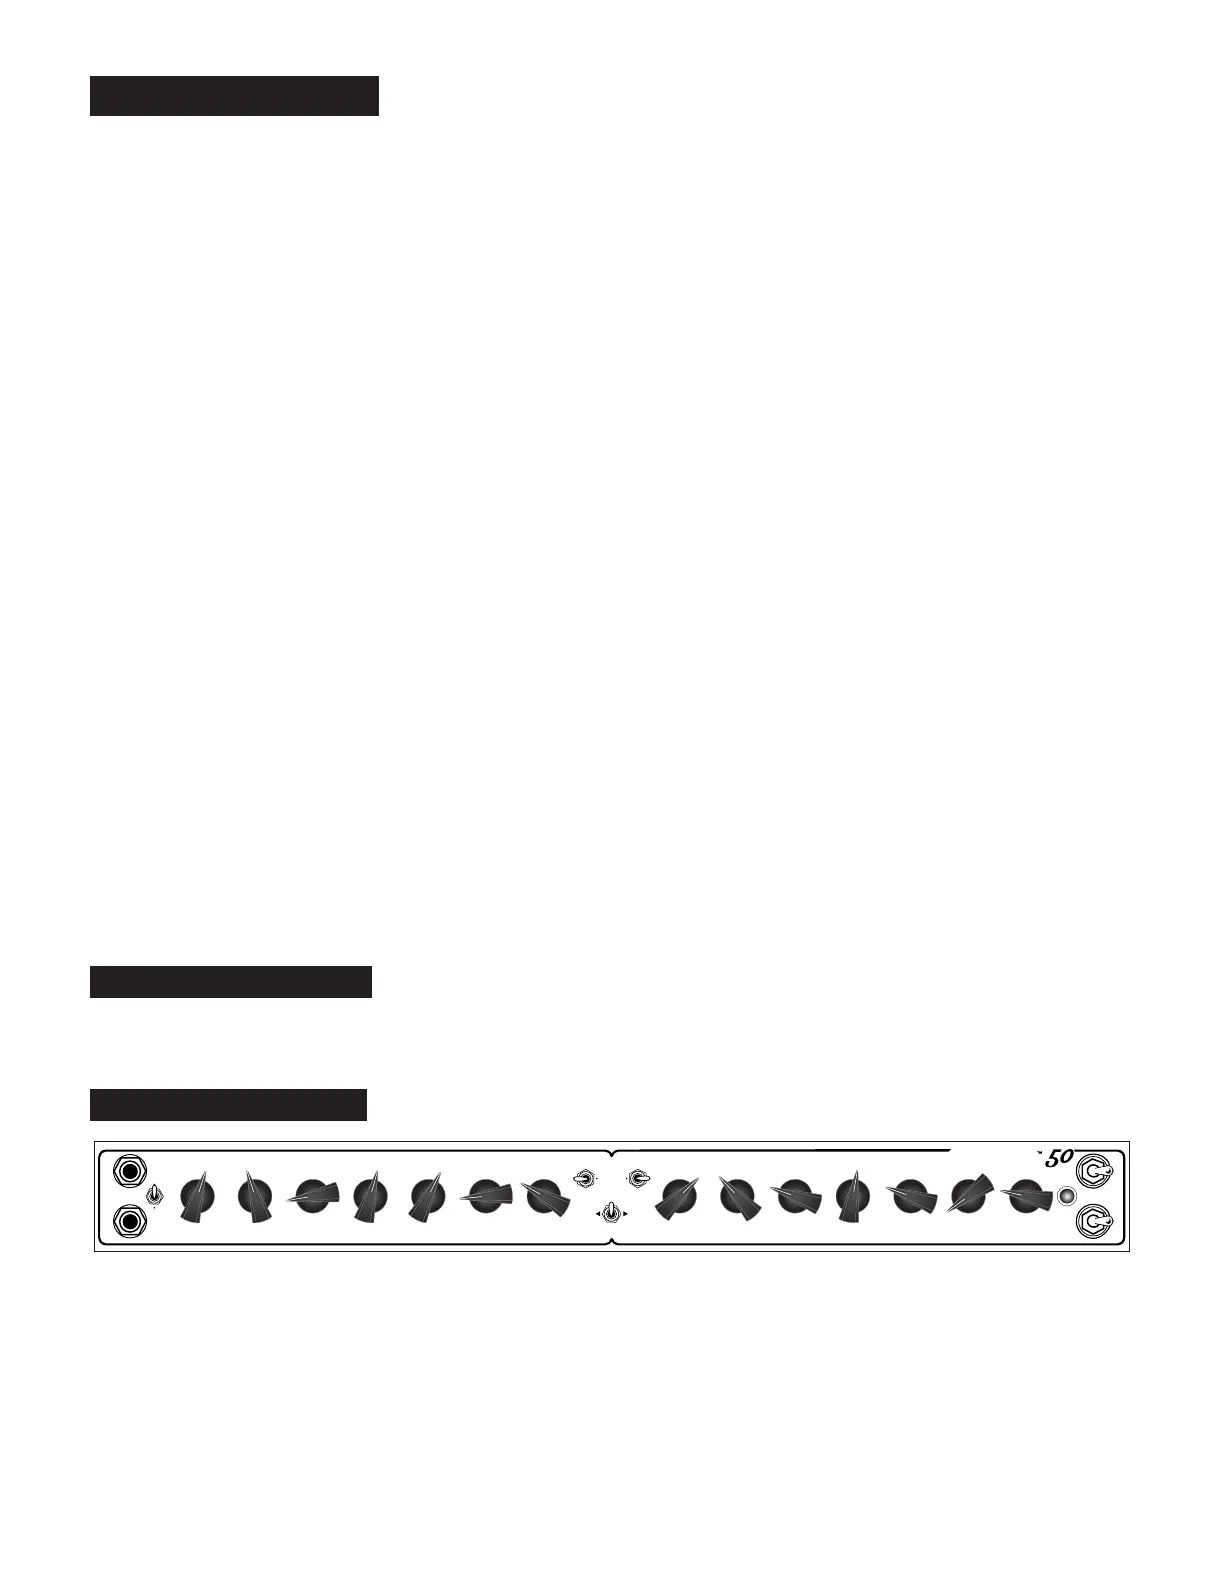
Instant Gratication Settings
TREBLEGAIN MID BASS PRESENCE REVERB
POWER
STANDBY
ON
ON
MASTER
FT. SW.
DRIVE DRIVE
CHANNEL
CLN HI
CLN HI
TREBLEGAIN MID BASS PRESENCE REVERB MASTER
INPUT
FT. SW.
50W
25W
Fillmore