EasyManua.ls Logo

Mestek Space Pak ESP-3642D - User Manual

Default Icon
20 pages
Print Icon
To Next Page IconTo Next Page
Loading...
SECTION 1: INTRODUCTION
Space-Pak System Design.......................................
Code Compliance.....................................................
Air Distribution Requirements...................................
Air Distribution Components.....................................
Warranty Information................................................
Shipment of Unit.......................................................
SECTION 2: SYSTEM INSTALLATION
Step 1: Locating The Unit.........................................
Step 2: Cutting Return Air Opening..........................
Step 3: Attaching Supply Air Plenum Ring...............
Step 4: Setting The Unit............................................
Step 5: Installing The Condensate Trap & Line.........
2
2
2
3
5
5
6
8
9
11
12
Step 6: Wiring The Unit.............................................
Step 7: Installing Air Distribution Components..........
SECTION 3: START UP & OPERATION
Sequence Of Operation.............................................
Prior To Start-Up........................................................
System Start-Up & Adjustements..............................
Charging Cooling Only Systems ..............................
SECTION 4: MAINTENANCE
Before Each Cooling Season....................................
If System Fails To Operate........................................
Parts List...................................................................
12
13
17
17
17
17
18
18
19
IN UNITED STATES: 260 NORTH ELM ST. WESTFIELD, MA 01085 (413) 564-5530/FAX (413) 564-5815
IN CANADA: 5211 CREEKBANK ROAD, MISSISSAUGA, ONTARIO, L4W 1R3 (905) 625-2991/FAX (905) 625-6610
Central Air Conditioning Series
2 to 5 Tons
Fan Coil Unit/Air Supply
Components
MODEL
ESP-D SYSTEM
INSTALLATION,
OPERATION
& MAINTENANCE
MANUAL
ESPD2-301
42-9469
Question and Answer IconNeed help?

Do you have a question about the Mestek Space Pak ESP-3642D and is the answer not in the manual?

Summary

Introduction to Space-Pak Systems

Space-Pak System Design Overview

Explains the hi-velocity system using a specific indoor unit and flexible duct.

Code Compliance Requirements

Outlines installation requirements for fan coil units and electrical wiring.

Air Distribution Component Installation

Details conformity requirements for air distribution component installation.

System Installation Procedures

Locating the Fan Coil Unit

Guidance on selecting an installation location for the fan coil unit, considering clearances.

Cutting the Return Air Opening

Instructions for cutting the correct size opening for the return air box.

Attaching the Supply Air Plenum Ring

Procedures for attaching the supply air plenum flange to the unit.

Setting the Fan Coil Unit Platform

Instructions for constructing and setting the unit on a platform, ensuring proper pitch for the drain.

Connecting Refrigerant Lines

Guidance on connecting refrigerant lines, emphasizing proper sizing and brazing.

Installing the Condensate Trap and Line

Steps for assembling and installing the PVC condensate trap and drain line.

Wiring the Fan Coil Unit

Details on electrical and control wiring, including power supply and thermostat connections.

Installing Air Distribution Components

Procedures for installing plenum duct, tees, elbows, and end caps.

Room Terminator and Tubing Installation

Instructions for installing room terminators and sound attenuating tubing.

Supply Tubing Installation

Guidance on connecting supply tubing to plenum take-offs and ensuring proper bends.

Return Air Box and Duct Installation

Steps for installing the return air box and connecting the return air duct.

Winter Supply Shut-Off Installation

Procedure for installing winter supply shut-offs to prevent moisture collection.

System Start Up and Operation

Sequence of Operation Explained

Describes how the indoor and outdoor units operate based on thermostat settings.

Pre-Start Up Checks

Essential checks including electrical connections, air filters, and shut-offs.

Initial System Start Up Procedure

Comprehensive guide for initial system startup and operation verification.

Charging Cooling Only Systems

Procedures for checking and adjusting refrigerant charge for cooling systems.

Maintenance and Troubleshooting Guide

Before Each Cooling Season Maintenance

Tasks to perform annually before the cooling season begins, including filter cleaning.

Troubleshooting System Failures

Steps to diagnose and resolve issues when the system fails to operate correctly.

Overview

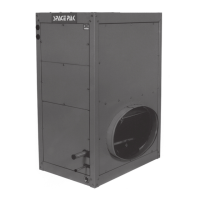
The document provided is an installation, operation, and maintenance manual for the Space-Pak ESP-D System, a central air conditioning series designed for 2 to 5 tons, featuring a fan coil unit/air supply.

Function Description

The Space-Pak ESP-D System is a high-velocity central air conditioning system that pairs a conventional outdoor condensing unit with an indoor Model ESP-D fan coil unit. This system delivers conditioned air through a specially designed, pre-fabricated, pre-insulated flexible duct system. It operates similarly to any conventional air-to-air cooling system, providing efficient cooling for residential and commercial spaces. The system is designed to maintain comfortable indoor temperatures by circulating conditioned air and removing heat and humidity.

Important Technical Specifications

The ESP-D system comes in three models: ESP-2430D (2-2.5 tons), ESP-3642D (3-3.5 tons), and ESP-4860D (4-5 tons).

Electrical Characteristics: All models operate on 1-phase, 60 Hz, 208/230V.

Refrigerant Connections:

  • Suction Line: 7/8" sweat for all models.
  • Liquid Line: 3/8" sweat for all models.

Condensate Drain:

  • NPT: 3/4" for all models.

Return Air Inlet Diameter:

  • ESP-2430D: 15"
  • ESP-3642D: 19"
  • ESP-4860D: 24"

Supply Air Outlet (I.D.):

  • 9" for all models.

Recommended Condensing Unit:

  • Capacity (MBH): 24 to 30 (ESP-2430D), 36 to 42 (ESP-3642D), 48 to 60 (ESP-4860D).
  • Minimum SEER: 12+ for all models.

Blower Specifications:

  • Standard CFM @ 1.5" W.C.: 550 (ESP-2430D), 850 (ESP-3642D), 1150 (ESP-4860D).
  • Wheel Diameter and Width: 9" x 5" (ESP-2430D, ESP-3642D), 9" x 6-3/8" (ESP-4860D).
  • Motor HP: 1/3 (ESP-2430D), 1/2 (ESP-3642D), 3/4 (ESP-4860D).
  • Motor Type: PSC for all models.
  • F.L. Amps: 1.8 (ESP-2430D), 2.8 (ESP-3642D), 3.6 (ESP-4860D).
  • Number of Rows Deep: 6 for all models.

Coil Specifications:

  • Refrigerant Charge (R-22): 0 for all models (indicating field charging).
  • Flow Control Type: Expansion Valve for all models.

Shipment Weight (lbs):

  • ESP-2430D: 117
  • ESP-3642D: 139
  • ESP-4860D: 166

Dimensions (Horizontal Air Flow Unit):

  • A (Length): 24-1/8" (ESP-2430D), 33-1/8" (ESP-3642D), 43-1/8" (ESP-4860D).
  • B (Width): 12" (ESP-2430D), 16-1/2" (ESP-3642D), 21-1/2" (ESP-4860D).
  • C (Height): 16-7/8" (ESP-2430D), 24-1/4" (ESP-3642D), 34-1/8" (ESP-4860D).
  • D (Depth): 15-3/8" (ESP-2430D), 16-1/2" (ESP-3642D), 21-1/2" (ESP-4860D).

Clearances:

  • Minimum 8" clearance for return plenum.
  • Minimum 12" clearance for supply.
  • Minimum 38" clearance for refrigerant line connections.

Air Distribution System Components:

  • Plenum Duct (SPC-13-8): Rigid, 9" I.D., 11" O.D. fiberglass with aluminum vapor barrier, 6 feet long sections.
  • Supply Tubing (SPC-25-100): Flexible, insulated, 2" I.D. and 3 1/4" O.D., 100 feet long sections.
  • Return Air Box (SPC-1D, 2D, 3D): Includes filter grill (14" x 25" x 1" or 14" x 36" x 1") and clamp bands.
  • Return Air Duct (SPC-4, 5, 6): Flexible, 6 feet long, round shape (15", 19", or 24" dia.).
  • Installation Kit (SPC-50-2A & 5A): Contains sound attenuating tubing, kwik-connects, plenum take-offs, terminator plates, and balancing orifices.
  • Plenum Hole Cutter (SPC-71-10): For cutting 2" holes in plenum.
  • Pliers (SPC-72): For securing plenum take-off clips.

Usage Features

Installation Flexibility: The fan coil unit can be installed in unconditioned spaces (attic, garage, crawlspace) or conditioned spaces (basement, closet, utility room), provided it's protected from weather. It can be field-converted from a horizontal to a vertical air flow arrangement.

Plenum Duct Layout: The plenum duct can be routed in various accessible locations, typically in the attic or basement, to shorten supply runs. The small size of the plenum allows for easy boxing in when necessary. For two-story or split-level homes, the plenum duct can run between floors or along the ceiling.

Air Distribution: The system uses small-diameter, pre-insulated flexible supply tubing (2" I.D.) that can be routed through standard stud spaces, making it suitable for both new construction and retrofits. Room terminators should be located in the ceiling or floor for vertical discharge, or in soffit areas or closet tops for horizontal discharge, avoiding direct airflow on occupants or placement above furniture.

Condensate Management: A condensate trap assembly is provided and must be cemented together with PVC pipe cement. The condensate line should be pitched 1/4" per foot to a suitable drain. For attic installations, a secondary drain pan or optional float switch is recommended.

Refrigerant Line Connection: Refrigerant lines from the outdoor condensing unit are connected to the fan coil unit according to the manufacturer's sizing recommendations. Proper line sizing and brazing procedures (with dry nitrogen trickle flow) are critical. Installation of a sight glass on the liquid line is recommended for accurate system charging.

System Start-Up: Initial start-up involves checking electrical connections, air filter installation, and removal of winter supply shut-offs. The thermostat fan switch is placed in the ON position (cooling indicator OFF) to start the indoor blower, allowing for checks on blower operation and distribution system leakage. For cooling, the thermostat is set to COOL, and the system runs for at least 30 minutes to stabilize.

Safety Features:

  • Anti-Frost Control: Automatically stops the outdoor unit if ice accumulates on the indoor evaporator coil, restarting once the ice melts.
  • Float Switch (Optional): Shuts down the condensing unit if the drain pan is full, preventing overflow.

Maintenance Features

Before Each Cooling Season:

  • Air Filter: Check and clean the permanent-type air filter thoroughly with soap solution and water.
  • Fan Coil Unit Inspection: Turn off power, remove service access panels, and inspect the evaporator coil and blower wheel for dust and dirt buildup. Clean as necessary with solvent and/or water.
  • Condensate Drain: Ensure the unit condensate drain is clear, free-running, and the plug is in the cleanout.
  • Outdoor Condensing Unit: Follow the manufacturer's maintenance instructions for the outdoor unit.
  • System Start-Up & Adjustments: Follow the procedures outlined in Section 3 of the manual.

If System Fails to Operate:

  • Thermostat Check: Verify the thermostat switch is set to the proper mode of operation and below room temperature.
  • Outdoor Unit Check: Confirm the outdoor unit is operating.
  • Electrical Checks: Inspect for tripped circuit breakers or blown fuses at the main fuse box or unit disconnect box. Replace blown fuses with the same size and type.

Refrigerant Charge Maintenance:

  • Superheat Check: Verify the refrigerant charge by checking the superheat leaving the evaporator coil against the corresponding suction pressure. The recommended superheat value is between 9°F and 12°F.
  • Sight Glass: If installed, check for the presence of flashing in the liquid line.
  • Adjustments: If superheat is too high, add refrigerant gas slowly to the suction line service port. If superheat is too low, slowly bleed refrigerant from the suction line service port into an appropriate recovery device.

Winter Supply Shut-Off:

  • Snap winter supply shut-offs into room terminator openings to prevent moisture collection in ductwork during winter. The return air filter should be wrapped in a plastic bag and reinstalled to block the return air opening. All supply shut-offs and the plastic bag must be removed before operating the system.

General Maintenance:

  • The system is designed for years of trouble-free performance with normal installations.
  • Regular examination by the homeowner at the beginning and mid-season, and by a qualified service professional at least once a year, is recommended.
  • All internal cabinet surfaces should be covered with insulation to prevent condensation. Add insulation if required.

Mestek Space Pak ESP-3642D Specifications

General IconGeneral
BrandMestek
ModelSpace Pak ESP-3642D
CategoryAir Conditioner
LanguageEnglish

Related product manuals