Care and maintenance | EN
25
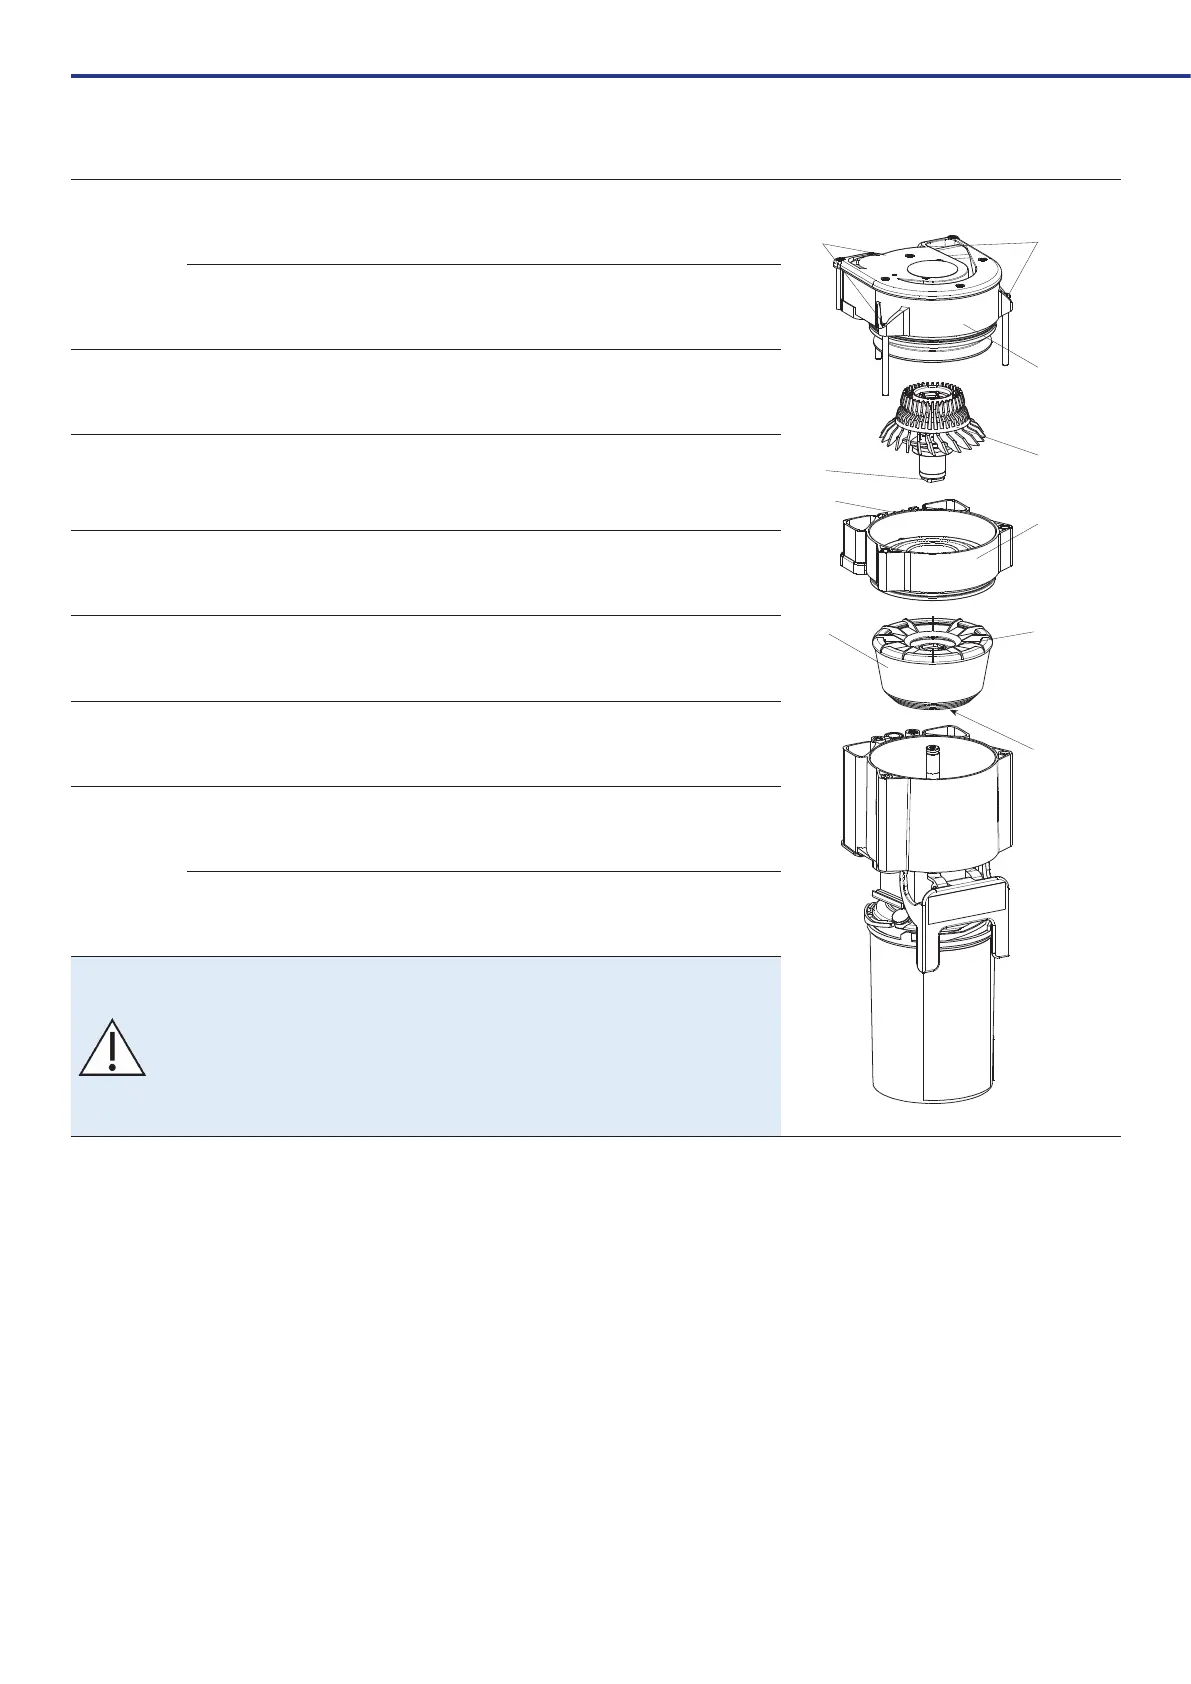
7.2.5.1. Visual check of the centrifuge
1
Remove separator from wall bracket
1
1
2
3
5
8
4
6
9
7
Remove the four screws on the top of the unit using a suitable tool (Torx 20).
2
Remove the lid of the separation (use the screwdriver support on the back).
Do not remove the separation inlet seal!
3
Remove the separation rotor by removing the plug in the center of the rotor using
needle-nose pliers, loosen the hexagon socket screw and pull the rotor out upwards.
Attention: Left-hand thread!
4 Pull off pump hose on the back of the separator at the upper connection
5 Remove centrifuge inlet part upwards (using needle-nosed pliers)
6
Pull out the centrifuge chambers upwards
7
Visually check the centrifuge chambers for contamination; centrifuge chambers that show
heavy deposits or accumulations of solids must be replaced!
Then reassemble in reverse order.
ACHTUNG!
It is important that all screws used are screwed in as far as they will go!
When assembling, make sure that the four pins (7) on the underside of the centrifuge
chamber are inserted into the holes provided! Furthermore, the square of the separation
rotor (8) must engage in the centrifuge top (9)!