This document provides instructions and safety warnings for the Meterk Impact Drill, model Z1J-GW20-13.
Function Description
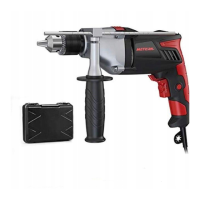
The Meterk Impact Drill is a versatile power tool designed for various drilling and screwdriving tasks. Its primary function is impact drilling in hard materials such as brick, concrete, and stone. Additionally, it can be used for drilling in wood, metal, and plastic. With electronic control and the ability to rotate both clockwise and counter-clockwise, it is also suitable for screwdriving and thread-cutting applications. The tool is equipped with an additional handle to enhance stability and control during operation, particularly for impact drilling.
Important Technical Specifications
- Model: Z1J-GW20-13
- Mains Voltage: 120 V ~/60 Hz
- Power Input: 7.5 A
- Idling Speed: 0-2800 RPM
- Drilling Capacity:
- Concrete: 13 mm
- Steel: 10 mm
- Wood: 25 mm
- Protection Class: II/
- Weight: 2 kg
- Vibration Emission Values (EN 60745):
- Hammer drilling in concrete (handle): aₕ = 15.4 m/s², K uncertainty = 1.5 m/s²
- Hammer drilling in concrete (additional handle): aₕ = 9.6 m/s², K uncertainty = 1.5 m/s²
- Drilling in metal (handle): aₕ = 4.6 m/s², K uncertainty = 1.5 m/s²
- Drilling in metal (additional handle): aₕ = 2.5 m/s², K uncertainty = 1.5 m/s²
Usage Features
The impact drill incorporates several features to facilitate its use and ensure user safety:
- Keyless Chuck (1): Allows for quick and easy insertion and removal of drill bits without the need for a chuck key. To fit a drill bit, the chuck (1) is opened, the bit is pushed in as far as possible, and then the chuck is closed securely.
- Drill Depth Stop (2): This feature helps control drilling depth. It is held in place by the additional handle (8) and can be adjusted by turning the handle. The depth stop is set to the desired drilling depth, and drilling continues until it touches the workpiece.
- Drill/Hammer Drill Selector Switch (3): This switch allows users to select between two modes:
- Drill Position (A): For drilling in wood, metal, and plastic, and for screwdriving.
- Hammer Drill Position (B): For impact drilling in concrete, rock, and masonry.
- Important: The switch position should only be changed when the drill is at a standstill.
- ON/OFF Switch (5) and Speed Controller (6): The ON/OFF switch (5) activates the tool. The speed can be infinitely varied by applying greater or lesser pressure to this switch. The speed controller (6) is a setting ring that allows preselection of the maximum speed, ensuring the ON/OFF switch (5) can only be pressed up to the defined maximum speed. This feature is useful for starting holes at low speed and gradually increasing it.
- Locking Button (4): For continuous operation, the ON/OFF switch (5) can be secured using the locking button (4).
- Clockwise/Counter-clockwise Switch (7): This switch controls the direction of rotation, enabling both forward (clockwise) for drilling and reverse (counter-clockwise) for screwdriving or removing jammed bits. This switch should also only be changed when the drill is at a standstill.
- Additional Handle (8): This handle provides enhanced stability and control, especially during hammer drilling. It is secured by a clamp that tightens clockwise and loosens anti-clockwise. The handle can be adjusted to the most comfortable working position for both left-handed and right-handed users. The manual emphasizes that the tool should not be used without the additional handle.
Tips for Working with the Hammer Drill:
- Concrete and Masonry: Use carbide drill bits and a high-speed setting in hammer drill mode (Position B).
- Steel: Use HSS drill bits and a low-speed setting in drill mode (Position A). Lubricating the hole with cutting fluid is recommended to prevent drill bit wear.
- Screws: Use drill mode (Position A) and a low-speed setting.
- Starting Holes: For deep holes in hard materials, it's recommended to start with a smaller drill bit.
- Drilling Tiles: Start in drill mode (Position A) until the bit passes through the tiles, then switch to hammer drill mode (Position B).
Maintenance Features
Proper cleaning and maintenance are crucial for the longevity and safe operation of the impact drill.
- General Cleaning:
- Always disconnect the power plug before cleaning.
- Keep safety devices, air vents, and the motor housing free of dirt and dust.
- Wipe the equipment with a clean cloth or blow it with compressed air at low pressure after each use.
- Clean regularly with a moist cloth and soft soap. Avoid cleaning agents or solvents that could damage plastic parts. Ensure no water seeps into the device.
- Carbon Brushes: In case of excessive sparking, the carbon brushes should be checked by a qualified electrician. Replacement of carbon brushes should only be performed by a qualified electrician.
- Internal Maintenance: There are no user-serviceable parts inside the equipment that require additional maintenance.
- Repairs: Only use accessories and spare parts recommended by the manufacturer. If the equipment fails, it should be repaired by an authorized electrician. If the supply cord is damaged, it must be replaced by the manufacturer, its agent, or a qualified electrician to prevent safety hazards.
Safety Warnings:
The manual stresses the importance of reading all safety warnings and instructions to prevent electric shock, fire, or serious injury. Key safety points include:
- Work Area Safety: Keep the work area clean, well-lit, and free of flammable materials. Keep children and bystanders away.
- Electrical Safety: Ensure power tool plugs match outlets, avoid modifying plugs, and do not use adapter plugs with earthed power tools. Avoid body contact with earthed surfaces. Do not expose power tools to rain or wet conditions. Do not abuse the cord. Use an outdoor-suitable extension cord when operating outdoors.
- Personal Safety: Stay alert, use common sense, and do not operate the tool while tired or under the influence. Always wear personal protective equipment, including eye and ear protection, dust masks, and gloves. Prevent unintentional starting. Remove adjusting keys or wrenches before turning on the tool. Maintain proper footing and balance. Dress properly, keeping loose clothing, jewelry, and hair away from moving parts. Use dust extraction and collection facilities if provided.
- Power Tool Use and Care: Do not force the power tool; use the correct tool for the application. Do not use a power tool if the switch does not turn it on and off. Disconnect the plug before making adjustments or changing accessories. Store idle power tools out of reach of children. Maintain power tools, checking for misalignment, binding, or breakage. Keep cutting tools sharp and clean. Use the power tool, accessories, and tool bits according to instructions and working conditions.
- Special Safety Instructions: Wear ear protectors during impact drilling. Use auxiliary handles if supplied. Hold the power tool by insulated gripping surfaces when cutting accessories may contact hidden wiring. Use appropriate detectors to determine if utility lines are hidden. Switch off the power tool immediately if the tool insert jams. Hold the machine firmly with both hands and ensure a secure stance. Secure the workpiece. Wait until the machine comes to a complete stop before placing it down. Never use or touch a damaged cable; pull the mains plug if the cable is damaged during work.
Environmental Protection:
End-of-life electrical equipment must not be disposed of with household waste. Users are encouraged to return the machine to a designated return point for recycling to protect resources and the environment.