GENERAL INFORMATION
CAUTION: Always disconnect battery before beginning
installation.
Check contents against the parts list to determine all are
correct and included, and also to familiarize yourself with
them.
Locknuts are furnished. DO NOT tighten bolts and nuts
until installation is complete (unless otherwise specified),
then be sure to tighten all attaching parts per specified torque
chart.
When ordering parts, furnish Part No., Name and
Description.
Meyer Products assumes no responsibility for installations not made in accordance with these instructions.
INSTALLATION INSTRUCTIONS
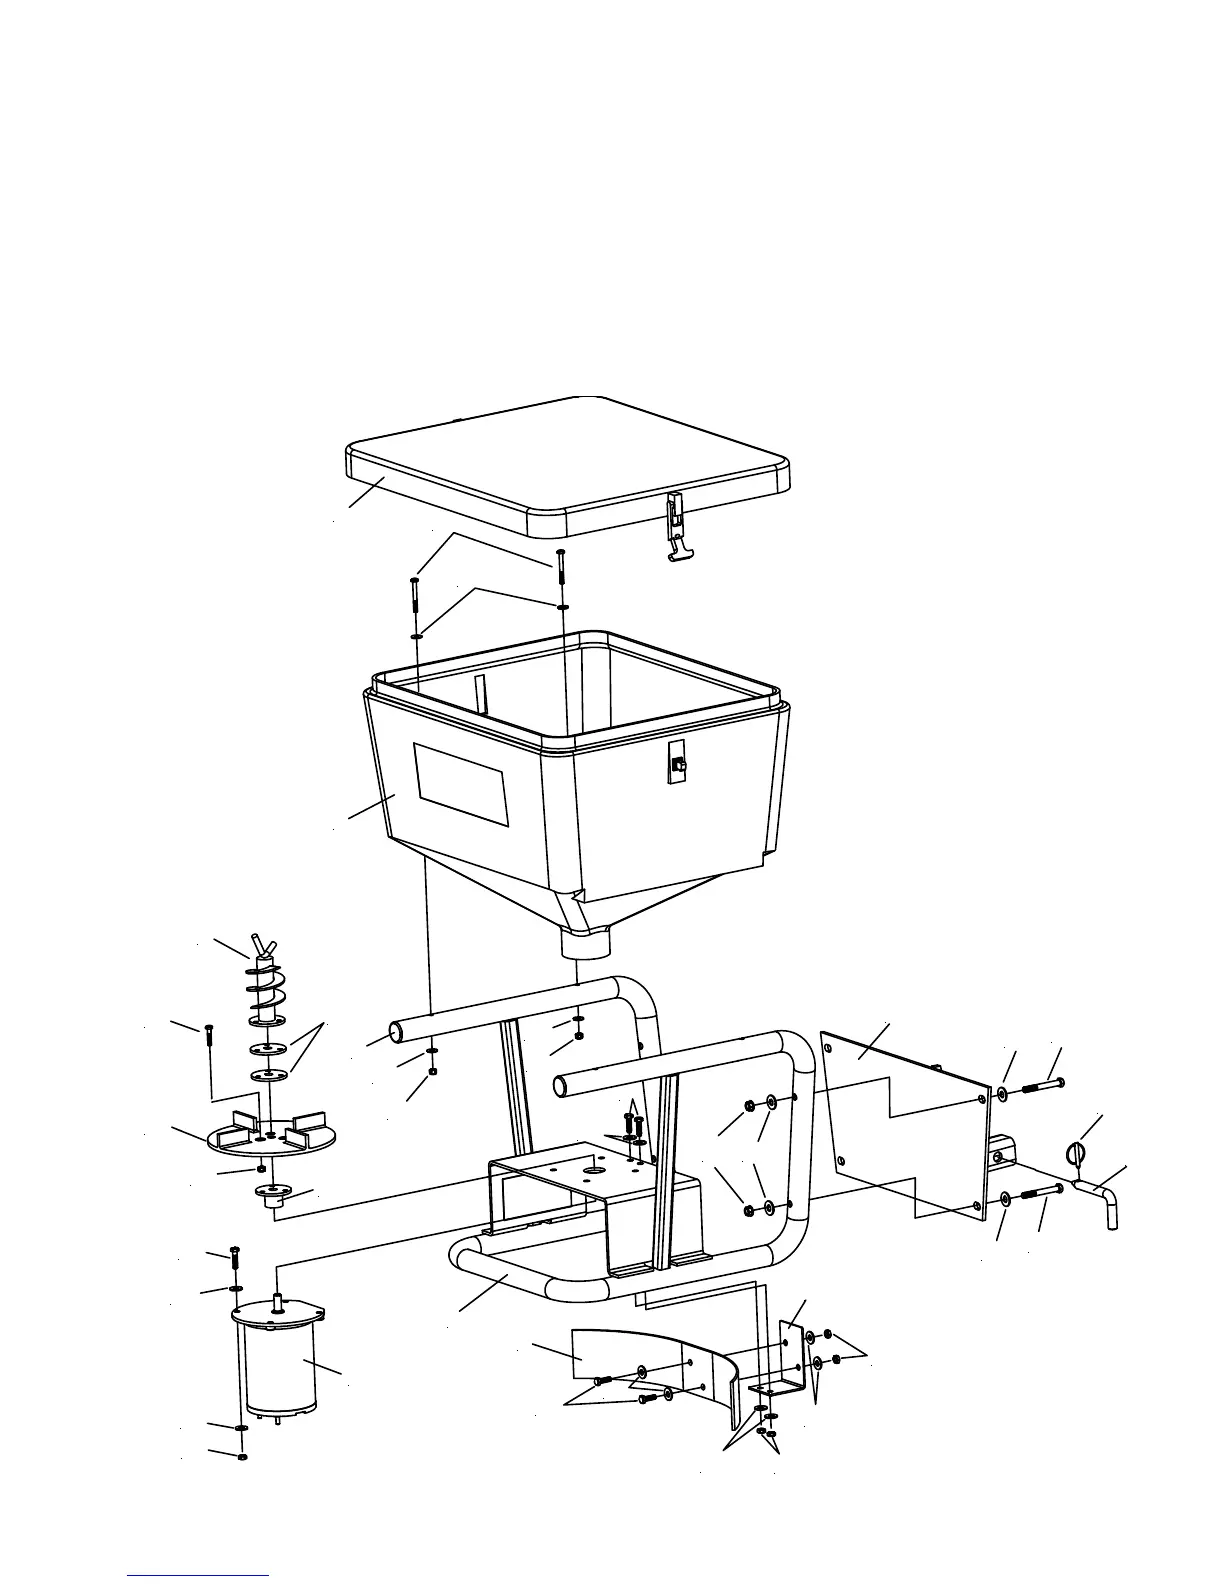
A. Assemble Hitch Assembly (12) to Spreader Frame (3)
using 3/8-16 x 3" Bolt (23), 3/8 Flatwasher (25) and
3/8 Locknut (24).
B. Slide Spreader Assembly into receiver hitch on vehicle
and insert Hinge Pin (22) through corresponding hole
on receiver and Hitch Assembly (12). Secure Hinge
Pin with Linch Pin (26).
C. Tighten all bolts to their required torque using the chart
below.
D. ELECTRICAL INSTALLATION. Refer to Figure 1.
Figure 2
1
2
3
4
5
6
7
8
9
10
11
12
14
15
16
17
18
19
20
21
22
23
24
25
26
21
20
18
20
18
21
21
21
21
19
19
16
23
25
25