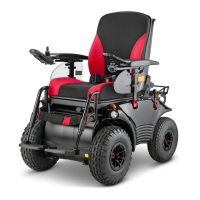
Do you have a question about the Meyra Optimus 2 and is the answer not in the manual?
Procedure to ensure the wheelchair is safely immobilized to prevent accidental movement.
Mandatory checks to perform before each journey to ensure safety and functionality.
Guidance on controlling the wheelchair's speed and direction using the joystick.
Explains how the electric motors function as the primary service brake.
Instructions on how to safely apply the brakes by returning the joystick to its neutral position.
Steps to engage the drum brake by moving the brake lever backward.
Steps to disengage the drum brake by moving the brake lever forward.
Procedure to enable manual pushing of the wheelchair by disengaging the motor.
Procedure to re-engage the motor for powered operation.
Ensuring the selection lever is set to drive mode for powered operation.
Procedure to disengage the drum brake, allowing the wheelchair to move freely.
Verifying the operating module is positioned for safe and comfortable steering.
Modifying the operating module's proximity to the arm supports for comfort.
Instructions for adjusting the vertical position of the operating module.
Steps to power on the operating module using its ON/OFF button.
Verifying the charge status of the wheelchair's drive batteries.
Confirming the desired maximum speed setting is correctly configured.
Securing the wheelchair before commencing the battery charging process.
Connecting the battery charger plug to the designated charging port on the operating module.
Initiating the battery charging sequence by powering the charger.
Properly disconnecting the battery charger upon completion of the charging cycle.
Details on the functions and symbols associated with the operating module.
Modifying the operating module's proximity to the arm supports for comfort.
Procedure for safely detaching the operating module from its mount.
Procedure for attaching the operating module to its mount.
How to swivel the operating module for closer table access or easier removal.
Steps to adjust the vertical position of the operating module.
Description of the calf belt's purpose and its attachment/removal.
Procedure to detach the calf belt from its attachment points.
Procedure to secure the calf belt to its attachment points.
How to adjust the length of the calf belt for a proper fit.
Information on the folding capabilities of the wheelchair's footplates.
Instructions for folding the footboard up before removing the upper leg support.
Procedure for lifting the footboard into its upper position.
Procedure for lowering the footboard onto its bracket.
How to swivel leg supports outward or inward to reduce overall width.
Procedure for inward swiveling of leg supports until the lock engages audibly.
Procedure to remove leg supports for easier transfer or transport.
Procedure to re-attach leg supports to the wheelchair frame.
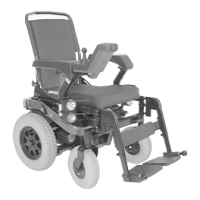
Procedure for raising or lowering the leg support to the desired height.
How to adjust the height of electrically adjustable leg supports using the operating module.
Steps to detach the electrically height adjustable leg support from the wheelchair.
Procedure for re-attaching the electrically height adjustable leg support.
Procedure to detach an arm support from its mounting.
Steps required to detach the operating module, potentially for arm support removal.
How to swivel arm supports upwards for easier user transfer.
Method for adjusting the angle of the arm support.
Procedure to swivel the seat unit upwards for access or maintenance.
How to adjust the seat's angle using the electric control system.
How to adjust and secure the angle of the back support on the Ergostar seat.
Procedure for adjusting the lordosis support on the Ergostar seat.
Procedure to fold the back support onto the seat for storage or transport.
Procedure to raise and lock the back support into its upright position.
How to adjust and secure the back support angle on the Ergo Seat.
Procedure to fold down the electrically adjustable back support.
Procedure to raise and secure the electrically adjustable back support.
Instructions for adjusting and detaching the head support on the ERGO Seat.
Instructions for adjusting the head support height on the RECARO seat.
Procedure to detach the rear-view mirror from the wheelchair.
Procedure to install the rear-view mirror onto the wheelchair.
How to adjust the angle and position of the rear-view mirror for optimal visibility.
Methods for loading the wheelchair using ramps or lifting platforms.
Criteria for using the wheelchair as a seat within a motor vehicle.
How to properly secure the wheelchair using designated anchor points and symbols.
Overview of essential maintenance tasks and their importance for product liability.
Routine checks to perform before operating the wheelchair.
Specific checks for lighting and reflectors before driving in low-light conditions.
Regular checks of tyre pressure every two weeks.
Checks of adjustment screws and wheel attachments every 6-8 weeks.
Checks of tyre profile every two months.
Checks of general condition and cleanness every six months.
Annual maintenance tasks recommended by the manufacturer for the vehicle and charger.
Procedure for replacing fuses, emphasizing correct type and safety precautions.
Details on the main/battery fuse location and its technical specifications.
How to perform vertical alignment adjustments for the headlights.
Troubleshooting steps for a non-illuminated operating module display.
Diagnosis and solutions for the wheelchair failing to move forward.
Interpreting error codes shown on the operating module for diagnostics.
Troubleshooting steps for inactive lighting components on the wheelchair.
Factors influencing the wheelchair's range and performance under various conditions.
Guidelines and safety considerations for gradients the wheelchair can ascend.
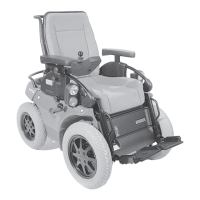
Detailed technical specifications specific to the Optimus 2 / 2S Model 2.322.
Specifications related to the wheelchair's electrical components and power systems.
Physical dimensions for the wheelchair configured with the Ergoseat.
Dimensions for the Ergoseat configuration when prepared for transport.
Fields for capturing essential identification details of the wheelchair.
Section for documenting the first annual safety inspection results.
Section for documenting the second annual safety inspection results.
Section for documenting the third annual safety inspection results.
Section for documenting the fourth annual safety inspection results.
Section for documenting the fifth annual safety inspection results.
Fields for capturing essential vehicle identification details for transfer purposes.
| Type | Electric Wheelchair |
|---|---|
| Category | Outdoor |
| Maximum Speed | 6 km/h |
| Weight Capacity | 150 kg |
| Obstacle Height | 10 cm |
| Max User Weight | 150 kg |
| Armrest Height | Adjustable |
| Footrest | Swing-away |
| Frame Material | Steel |
| Foldable | No |
| Battery | 2 x 12V |
| Drive Wheels | 14 inches |
| Seat Depth Options | 40 cm, 45 cm |
| Wheel Size | 14 inches |