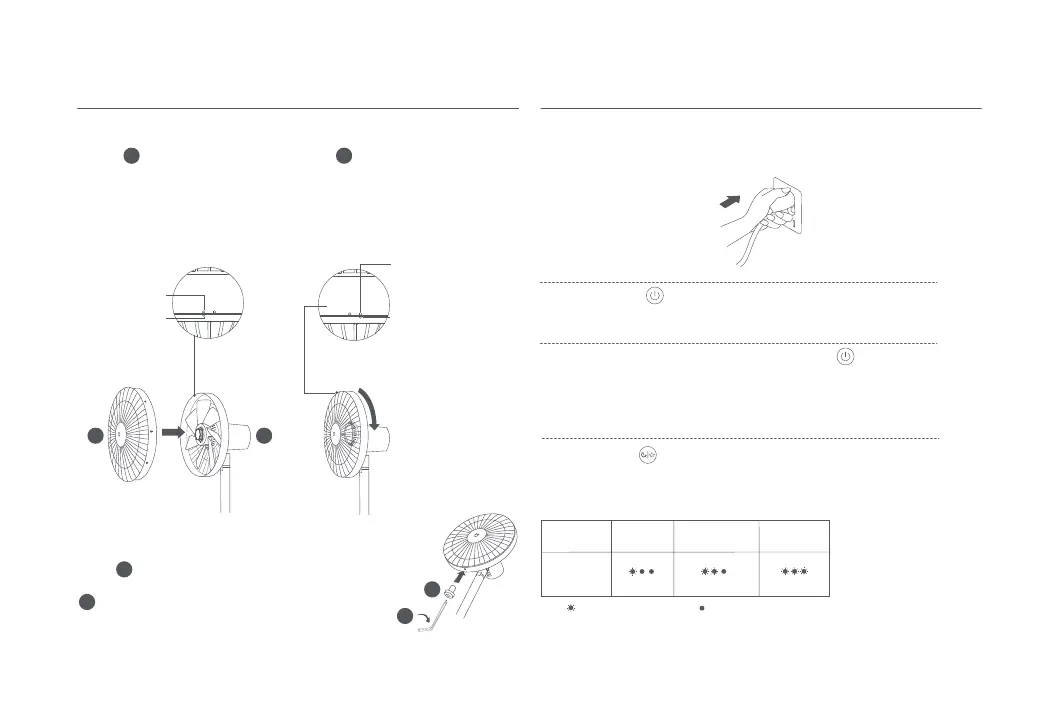
1. Align Front Grille Alignment Mark with Rear Grille Le Alignment
Mark, and make sure the front grille is properly embedded into the rear
grille.
2. Turn the front grille clockwise until the Front Grille Alignment Mark aligns
the Rear Grille Right Alignment Mark. Make sure the grilles are securely
fastened.
Step 6: Fasten the front grille
Installation Instructions
Step 5: Install the front grille
Plug the power cord into a power outlet. Once you hear a beep, the fan is
connected successfully.
Connect to a power outlet
How to Use
Top View before
Fastening
the Front & Rear Grille
Front Grille
Alignment Mark
Front Grille
Alignment Mark
Rear Grille Right
Alignment Mark
Rear Grille Le
Alignment Mark
Top View aer Fastening
the Front & Rear Grille
Press the buon to start the fan. When turned on for the
first time, the default speed is slow (1).
When the fan is working, press and hold the buon to stop it.
Turn on/off
Turn on
Turn off
Press the buon to adjust the speed. With each press, the corresponding
status indicator will be on (see the table below). The fan will remember and
apply the last used speed mode when turned on again.
Note: means the indicator is on; means the indicator is off.
Switching Speed/Mode
Switching speed
Indicator
Status
Fan Speed
Slow (1) Medium (2)
Fast (3)
Insert fan grille screw into the hole at the boom of the
fan grille. Turn the screw clockwise by using the included
6
13
13
11
11
9
7
9
7
Allen key to tighten it.