13
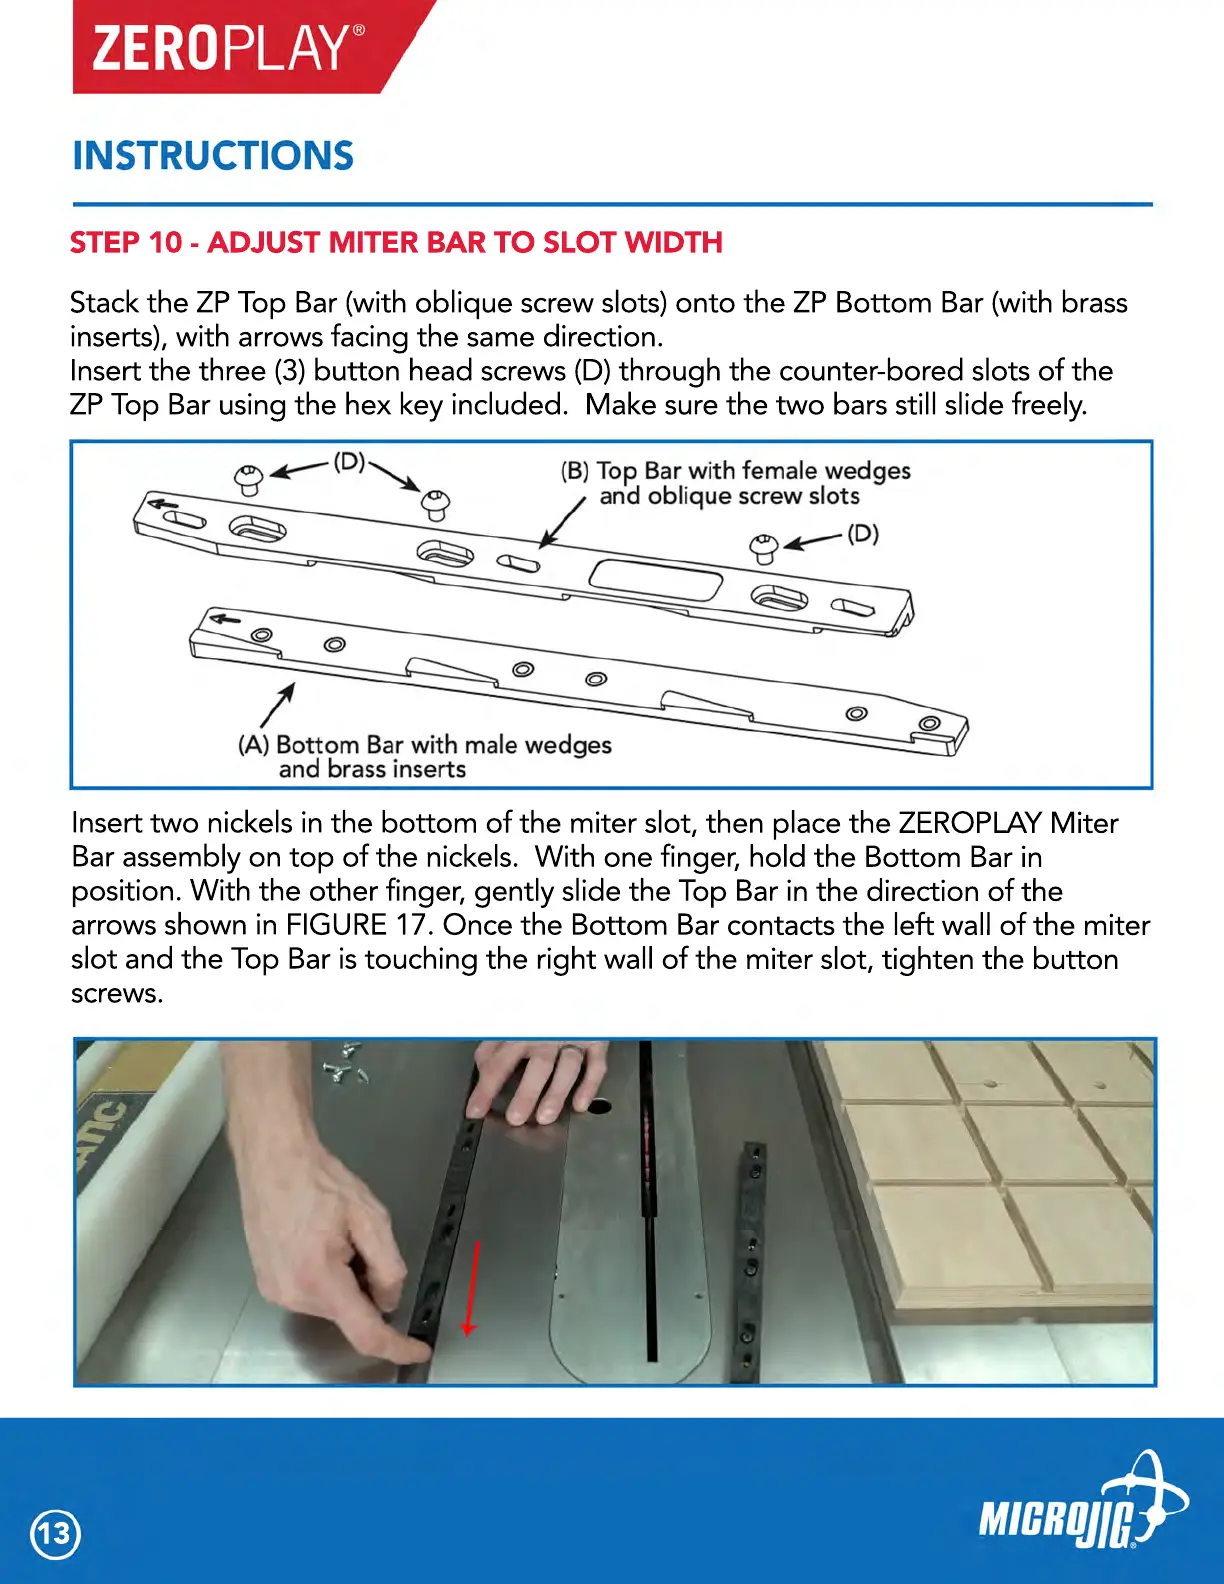
Stack the ZP Top Bar (with oblique screw slots) onto the ZP Bottom Bar (with brass
inserts), with arrows facing the same direction.
Insert the three (3) button head screws (D) through the counter-bored slots of the
ZP Top Bar using the hex key included. Make sure the two bars still slide freely.
Insert two nickels in the bottom of the miter slot, then place the ZEROPLAY Miter
Bar assembly on top of the nickels. With one finger, hold the Bottom Bar in
position. With the other finger, gently slide the Top Bar in the direction of the
arrows shown in FIGURE 17. Once the Bottom Bar contacts the left wall of the miter
slot and the Top Bar is touching the right wall of the miter slot, tighten the button
screws.
STEP 10 - ADJUST MITER BAR TO SLOT WIDTH