2
UK
3
UK
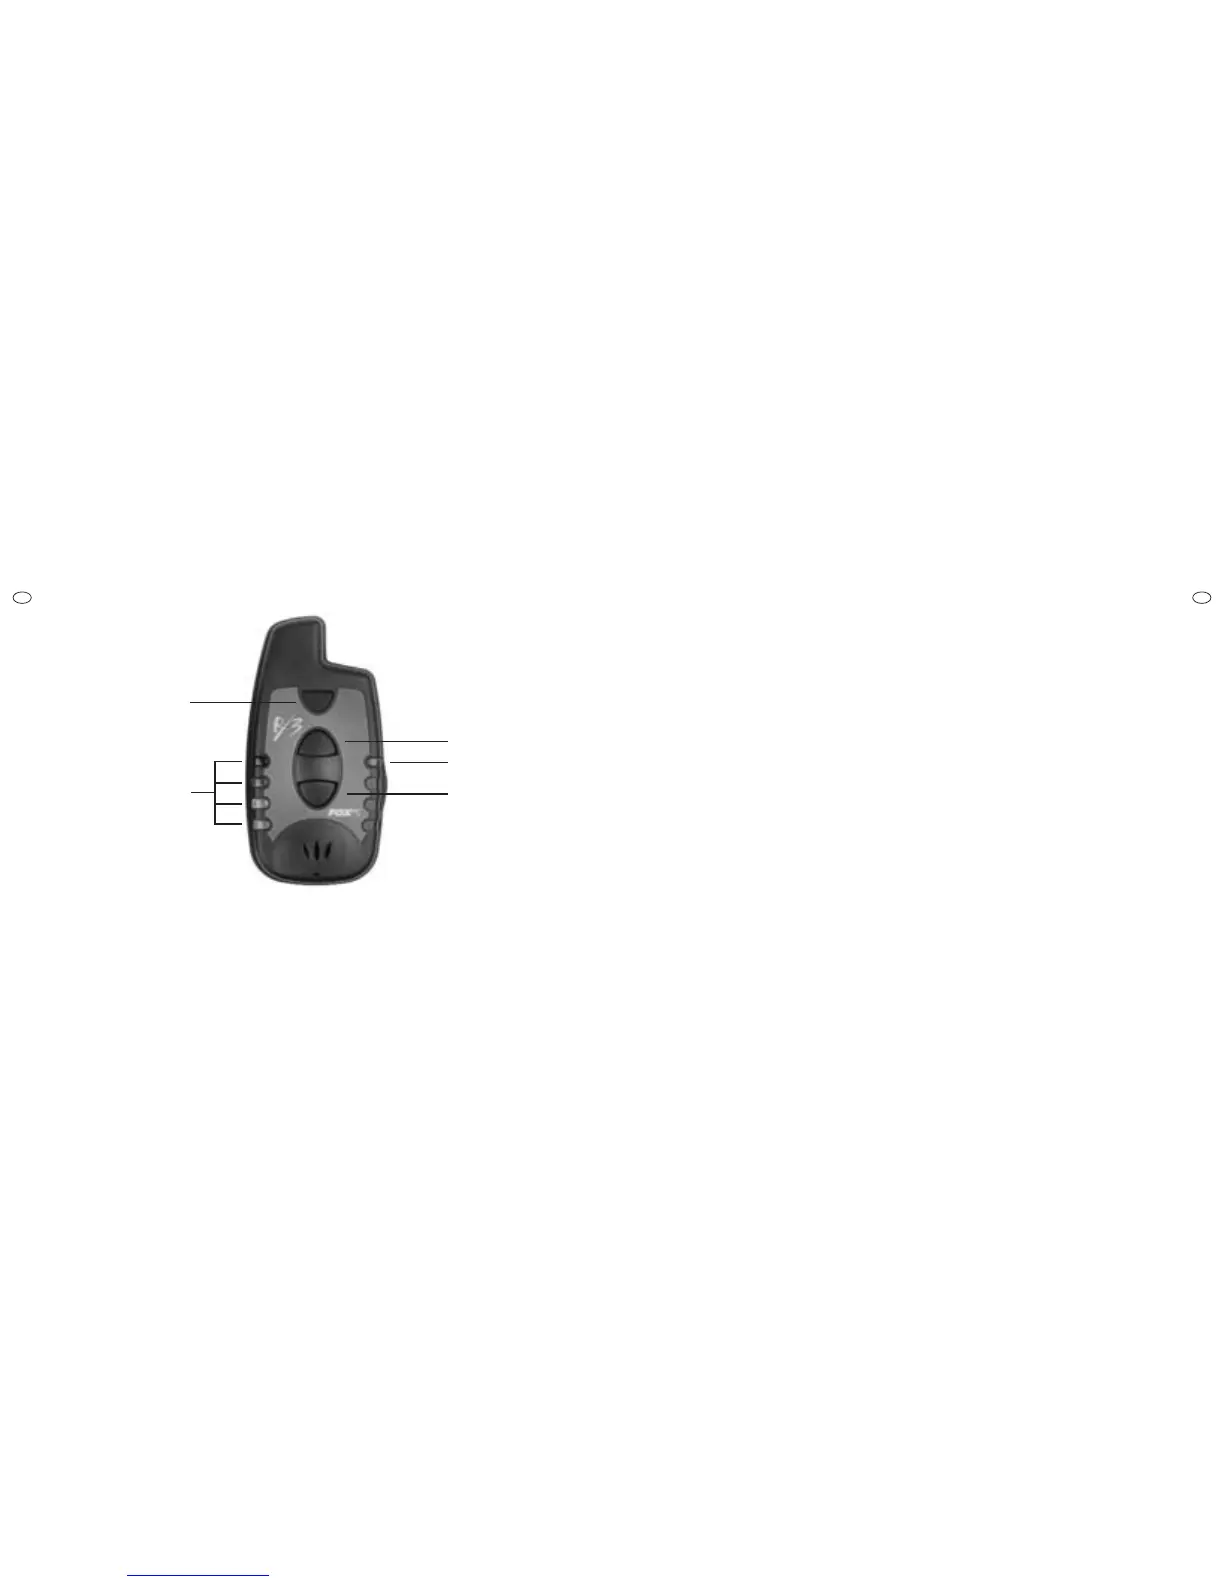
ON/OFF BUTTON
VOLUME UP
BUTTON
VOLUME DOWN
BUTTON
CHARGING LED
INTERCHANGEABLE
INDICATION
LED LIGHTS
MICRON RX3
RECEIVER
TO SWITCH ON
Press and release [ON/OFF] button. Unit will sound a
three note sequence and the four LEDs will illuminate.
TO SWITCH OFF
Press and release [ON/OFF] button. Unit will sound a
single low note.
TO ADJUST VOLUME AND SELECT
VIBRATING ALERT
Use [VOLUME +] and [VOLUME -] buttons.
The unit will give a two-tone ascending or descending
beep, at the new volume setting
There are 8 different volume settings available.
Vibrating alert is selected by pressing [VOLUME -]
again, when the unit is already at its lowest volume
setting.
“REGISTRATION” MODE
When the receiver is used for the first time, it is nec-
essary to “register” the bite alarms that it will be used
with, so that the receiver can “learn” their unique iden-
tification codes. Note that any new generation Micron
radio-equipped product, with any LED colour, can be
assigned to any LED on the receiver. Before starting
this procedure, ensure all your bite alarms are
switched OFF, then proceed as follows -
1. With the unit already switched on, press and hold
down the [ON/OFF] button. After about two seconds,
the top LED will start to flicker rapidly. Release the
[ON/OFF] button.
2. Switch on the bite alarm that is to be assigned to
the first LED. The bite alarm will emit a “tick-tock”
sound, after its normal start-up tones and the RX3 will
emit a single beep. The LED will stop flickering and illu-
minate constantly for a brief period.
3. The second LED will then start flickering. Repeat
step (2) above for the remaining bite alarms.
4. When all bite alarms have been assigned, switch
the RX3 off.
5. Note that if an error has been made, registration
mode can be cancelled at any time, by switching the
receiver off.
6. If only one particular LED is to be assigned, leaving
all others as they are, this can be achieved by using
the volume
+/- buttons. Enter registration mode as
described above and then use the volume
+/- buttons
to select which LED to assign. If the same alarm is
registered to more than one LED, only the first LED it
was assigned to will illuminate in normal operation.
7. Note that registration data for any given LED is not
overwritten, until a bite alarm is switched on. If, there-
fore, registration mode is entered accidentally, then
simply switching the receiver off will prevent any cor-
ruption of the registration data.
8. Registration data is held in non-volatile memory and
so is held indefinitely when batteries are removed.
Equally, it can be overwritten as many times as
desired, for instance when new alarms are purchased,